
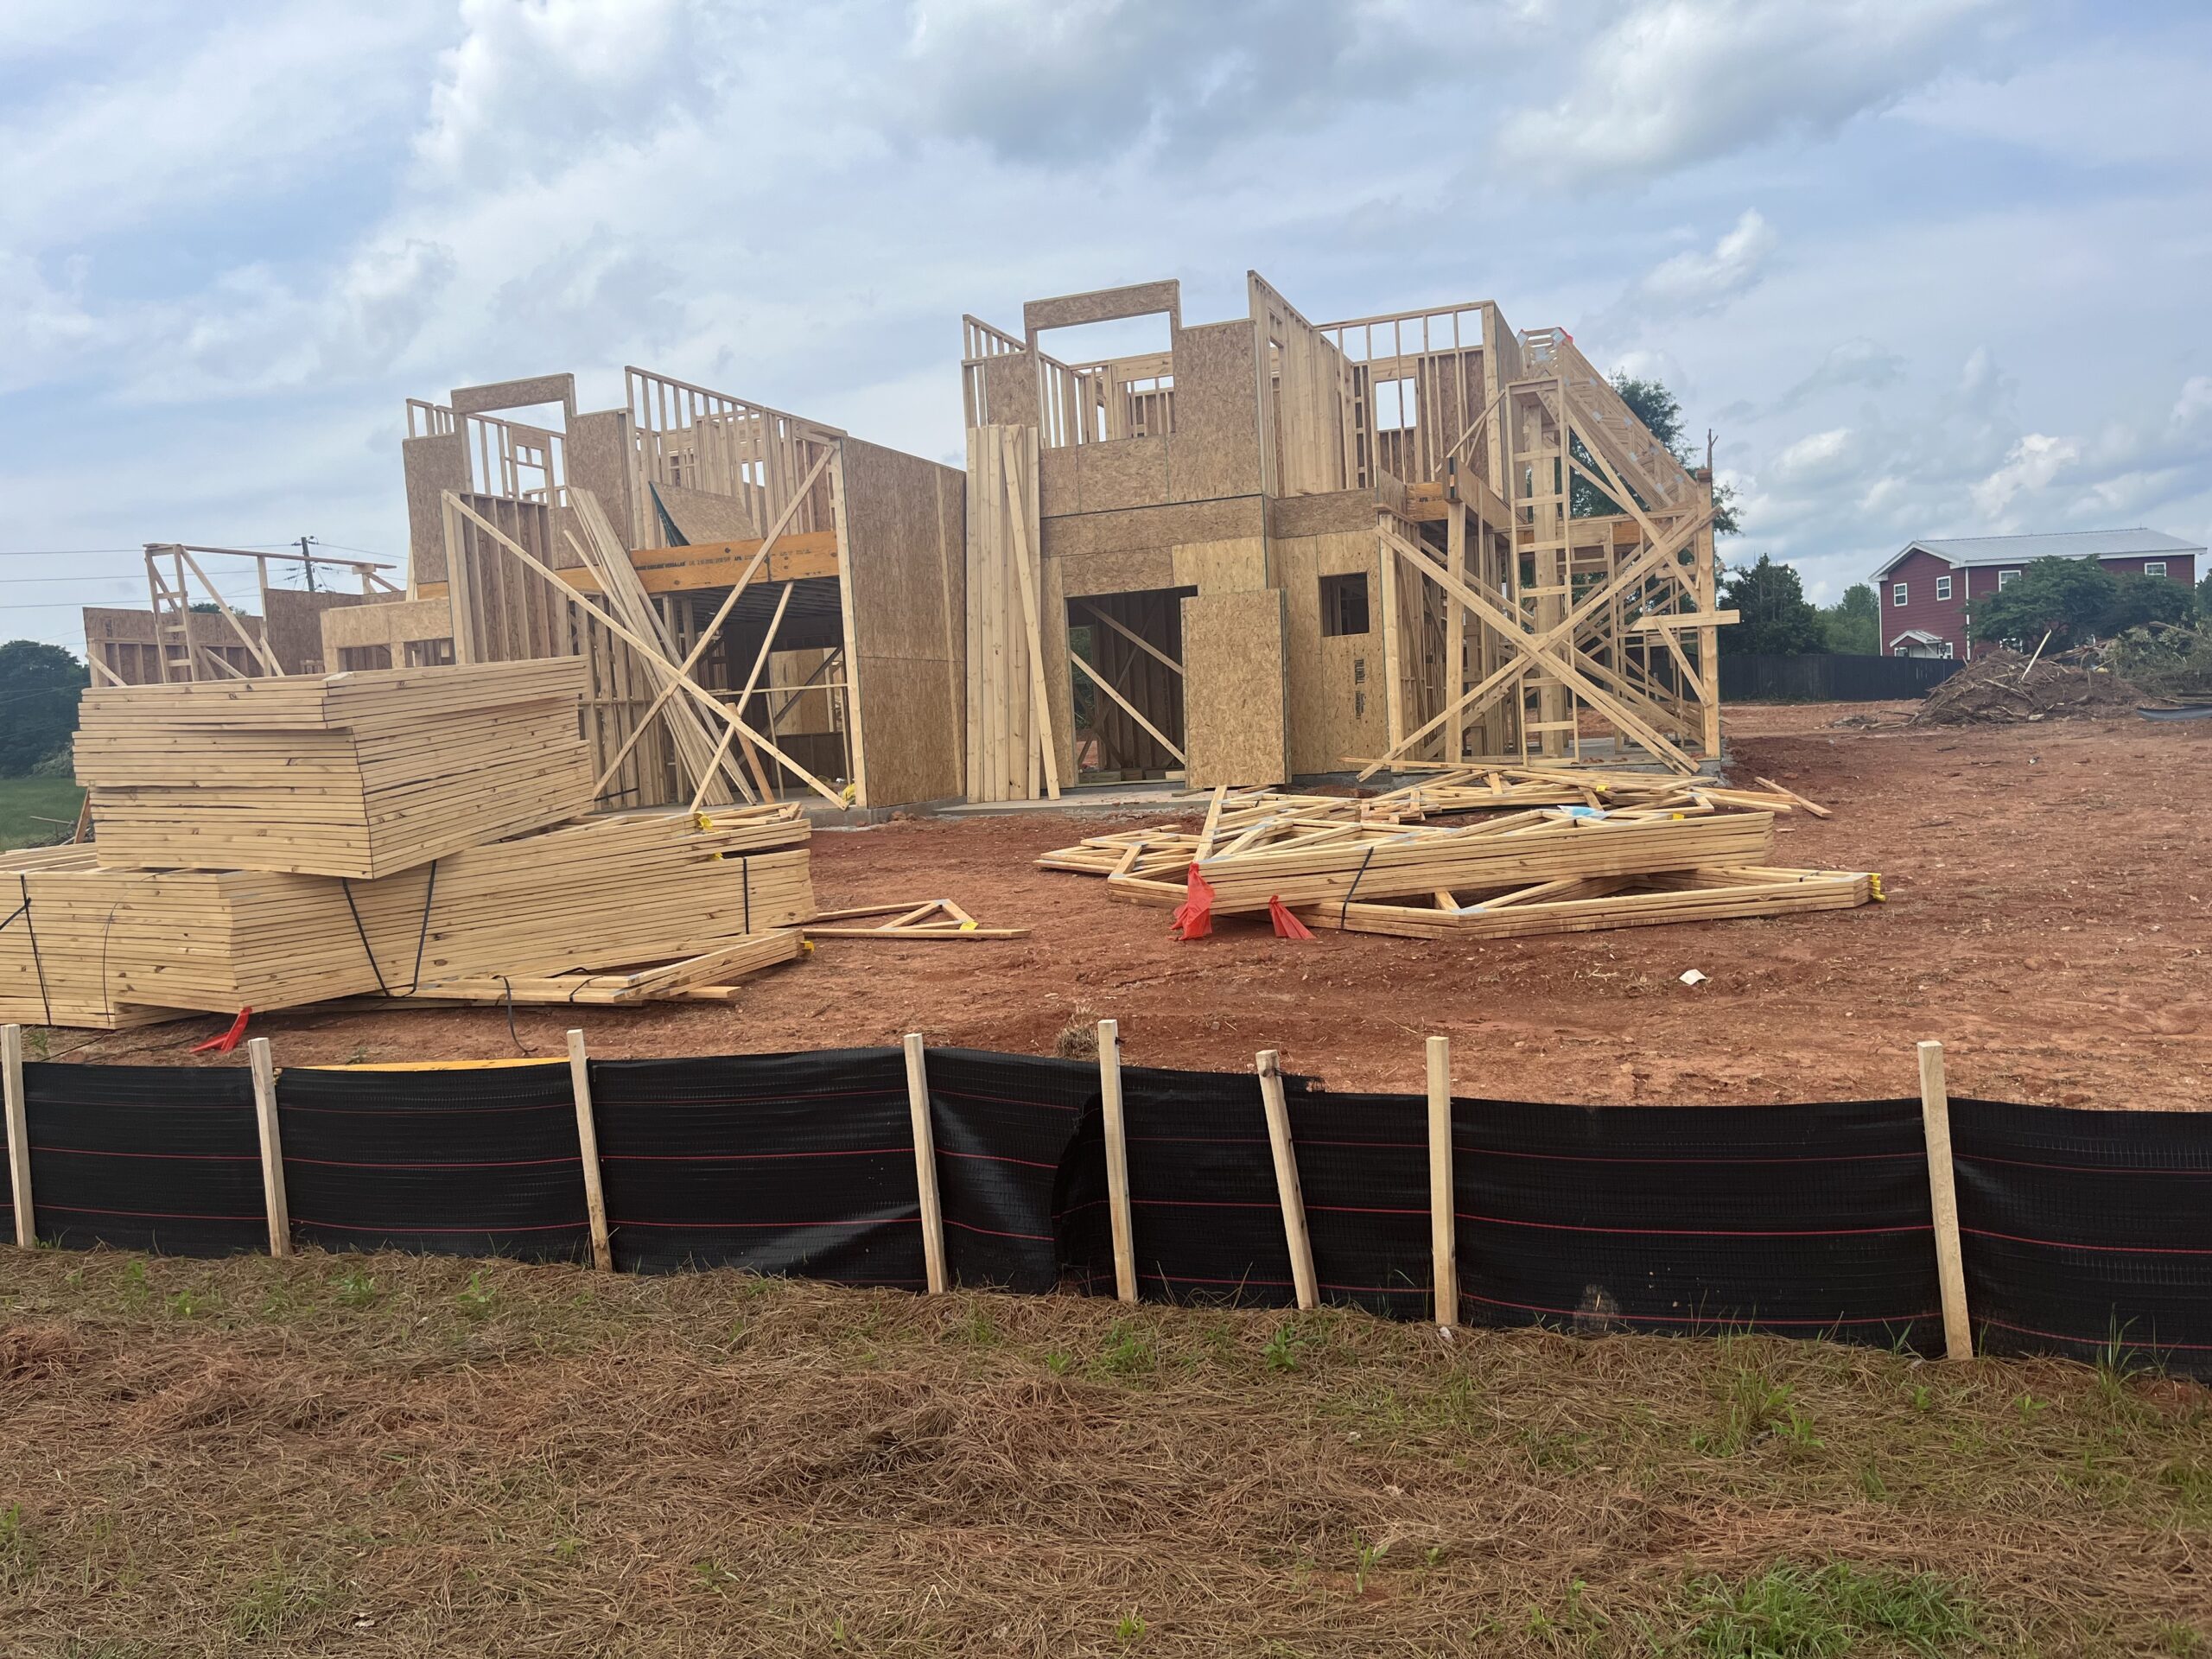
Here is an example of a 8,680 square foot custom contract house with an 8/12, 12/12, 16/12 multi pitch, multi styled roof system. At this stage of construction the framing crew, using the Roof Framing Solutions method, as shown in the following pictures, was able to continue progress on the house while having the Roof System material delivered and then cut and build the entire Roof System in 6 days
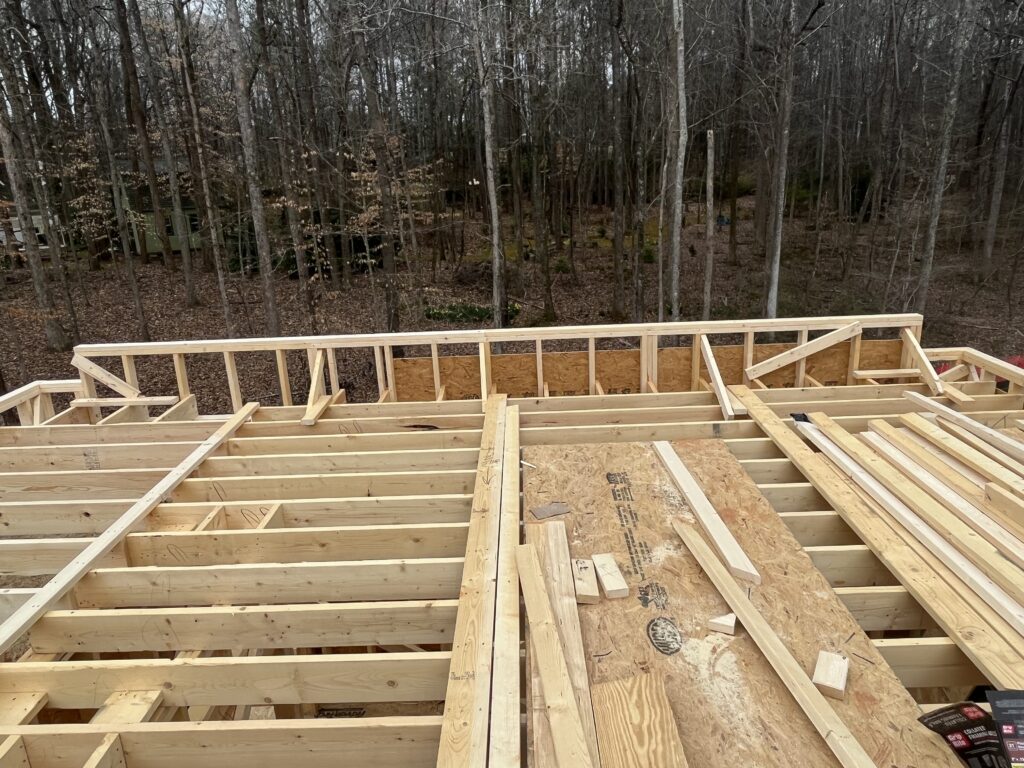
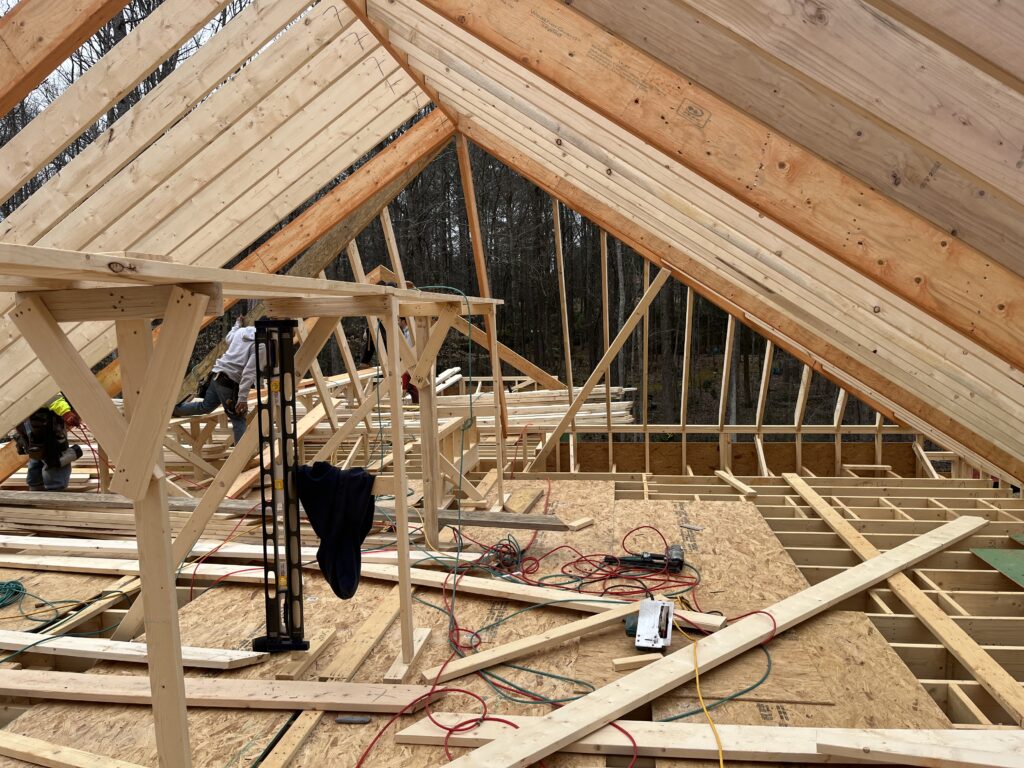
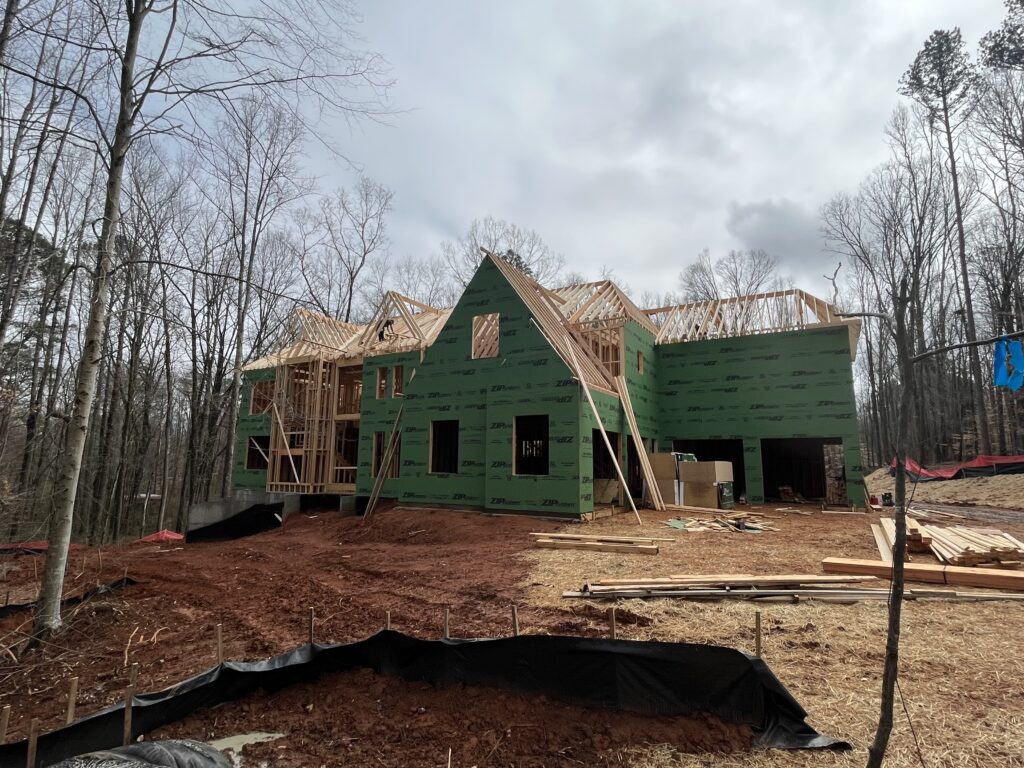
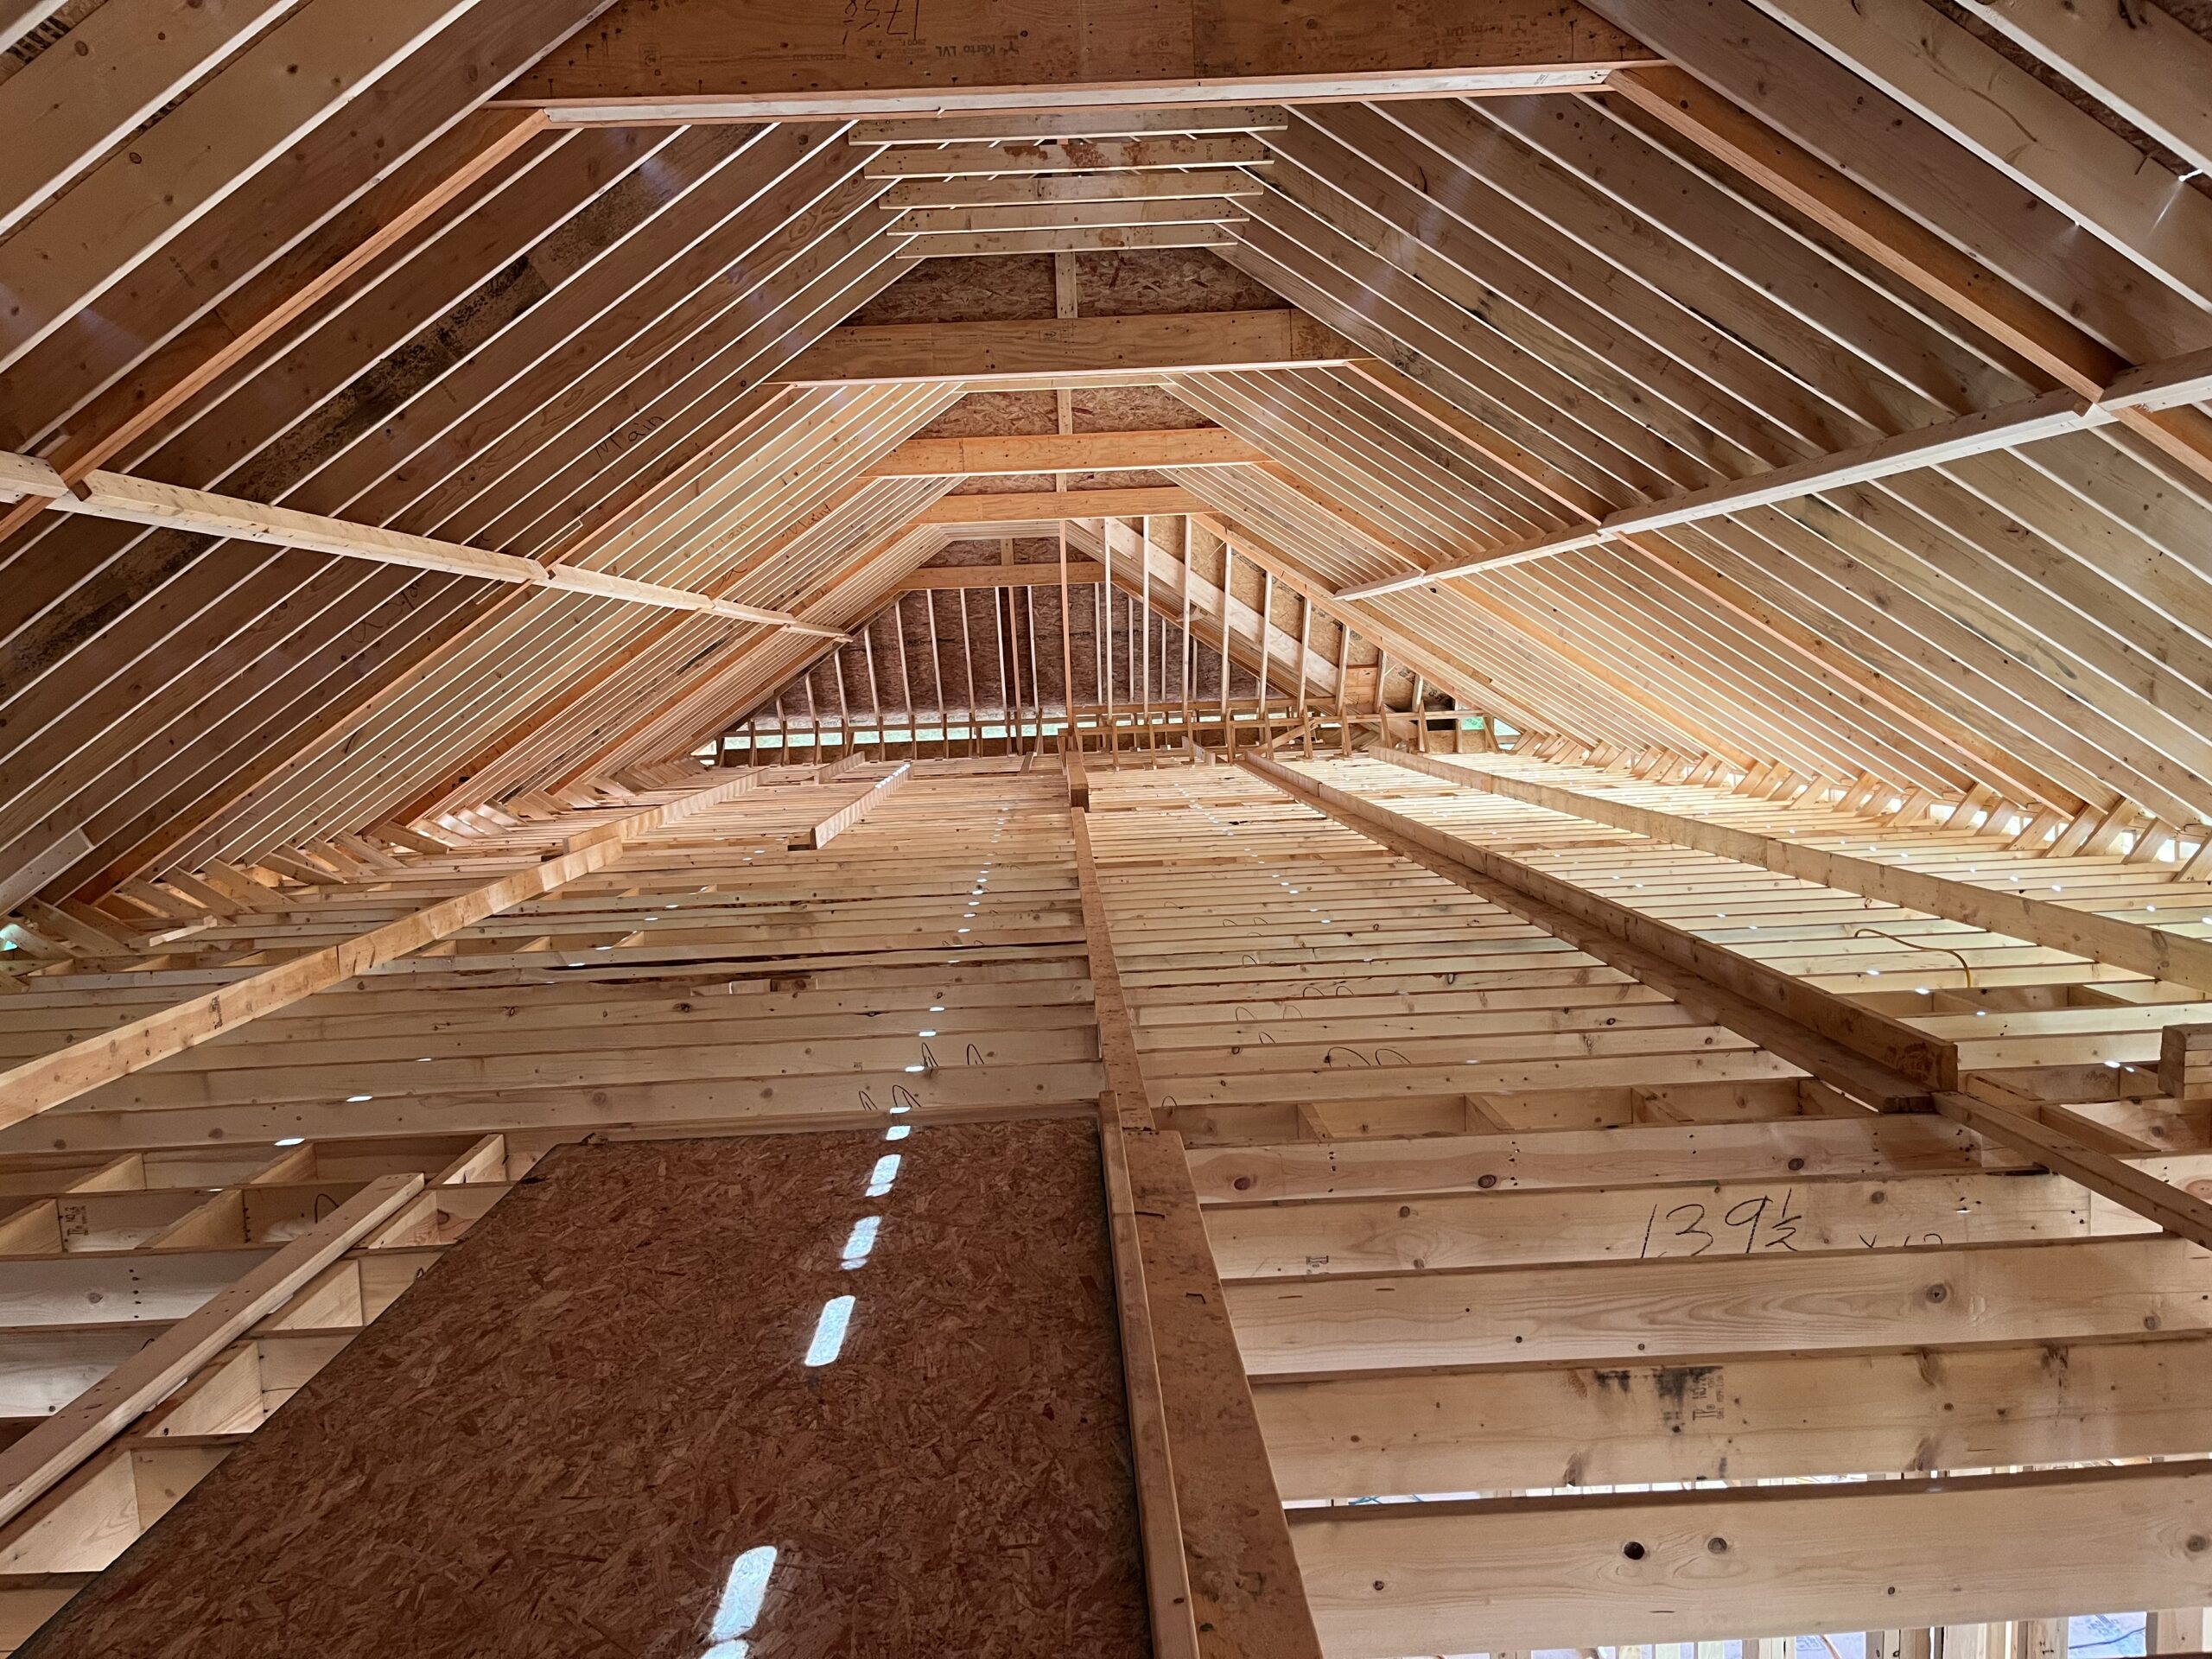
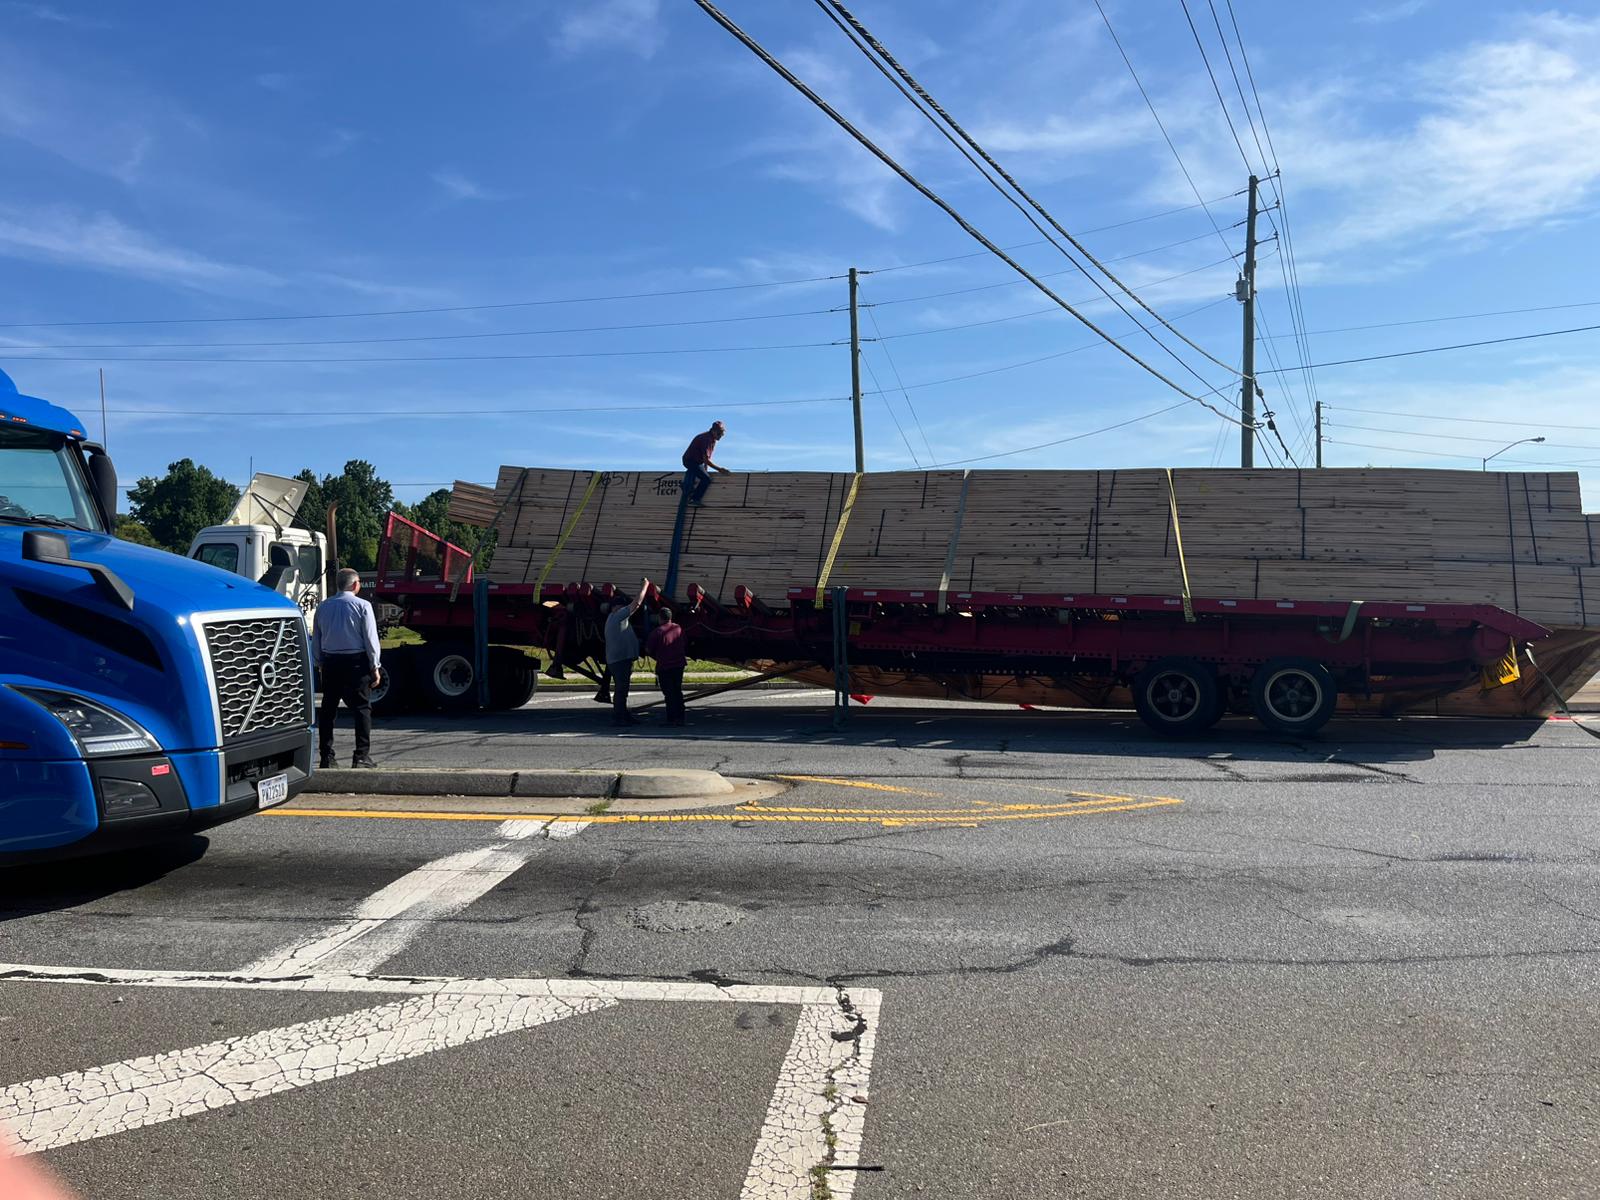
Front and rear elevations on the day the Roof package was delivered. Notice the continuous 16” on center stacked layout. The Roof System designed by Roof Framing Solutions uses the same layout so each rafter will stack over the studs below.
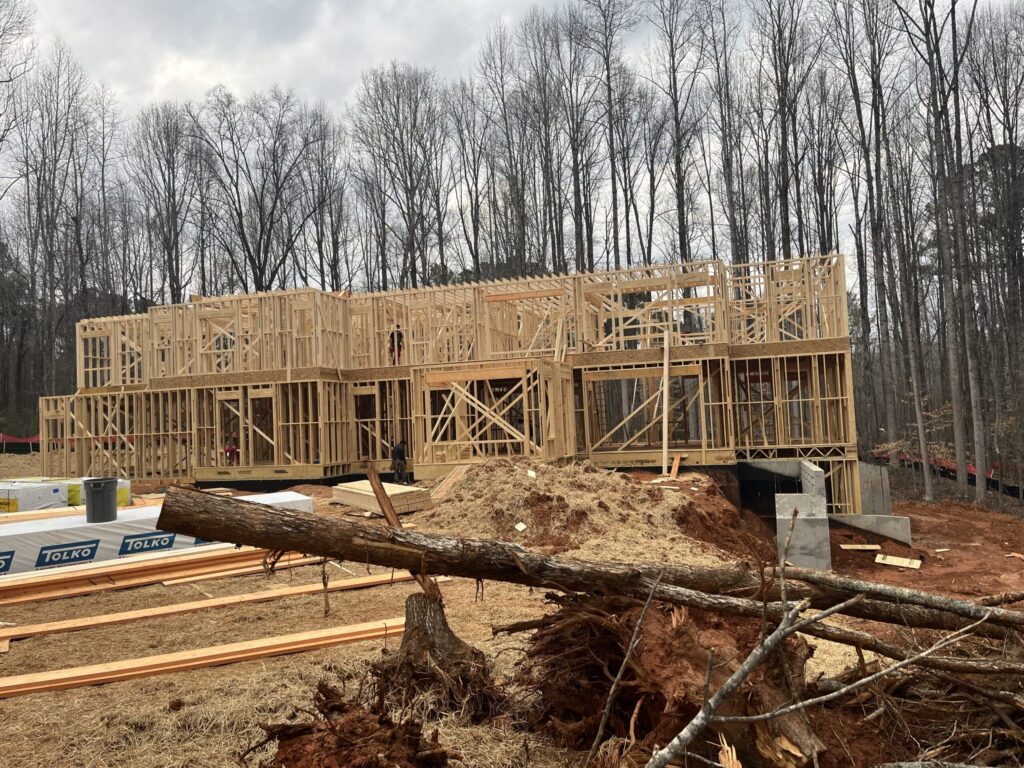
The roof package followed a consistent 16-inch on-center stacked layout across both front and rear elevations. This design allows each rafter to align precisely with the studs below, providing structural continuity and ease of installation.

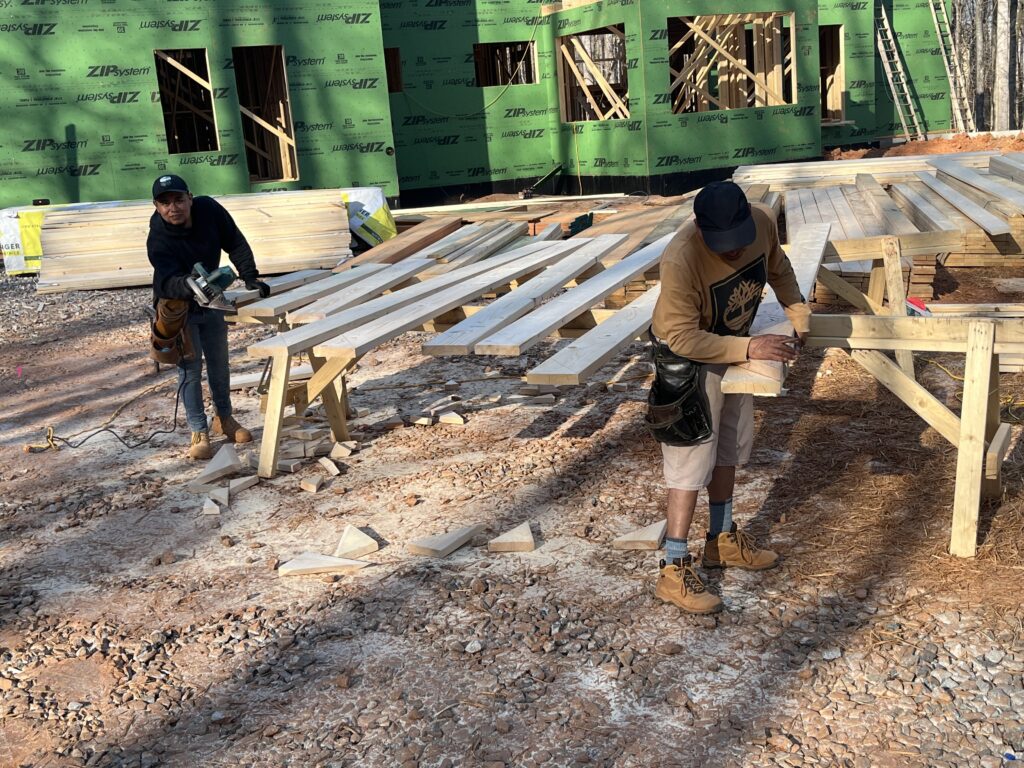
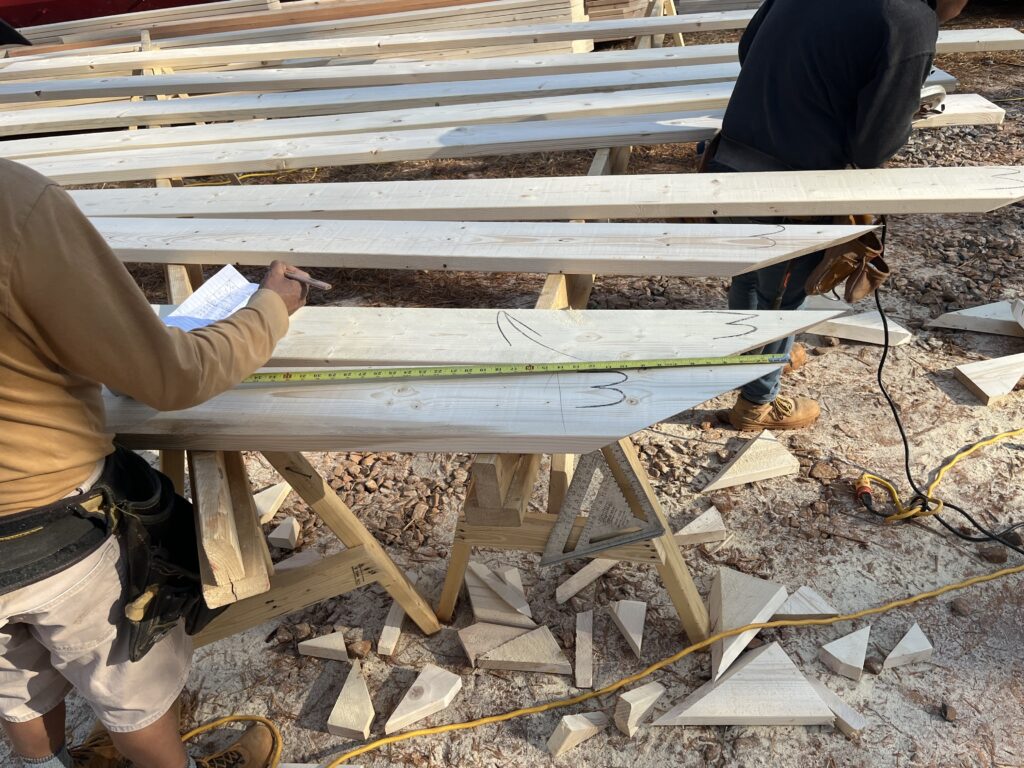
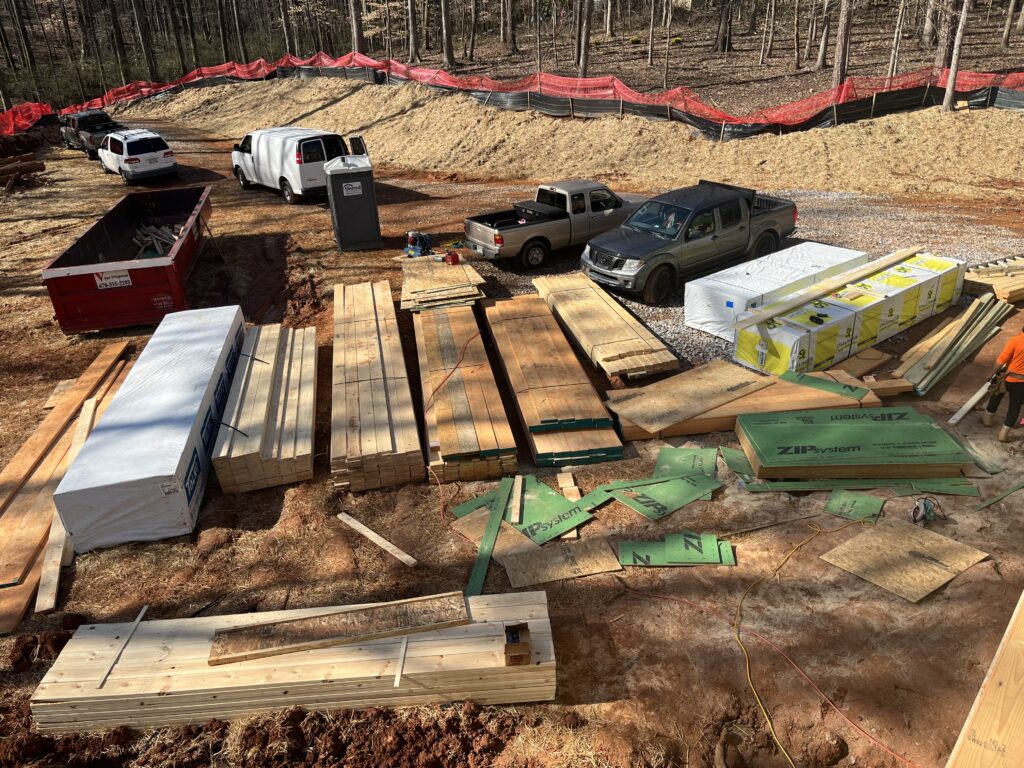
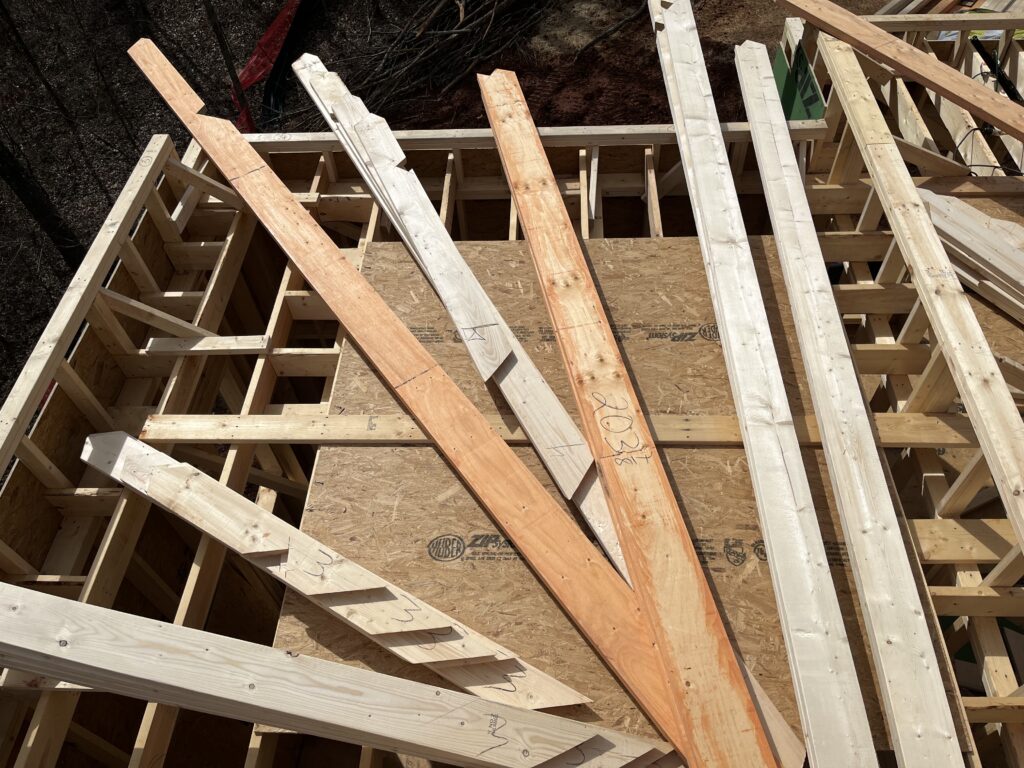
Following the Roof System Rafter Cut List each Roof component is cut, numbered and marked following the Roof System Rafter Layout Plan. After each Roof Section has been numbered and marked it is then moved to a staging area, organized and stacked.
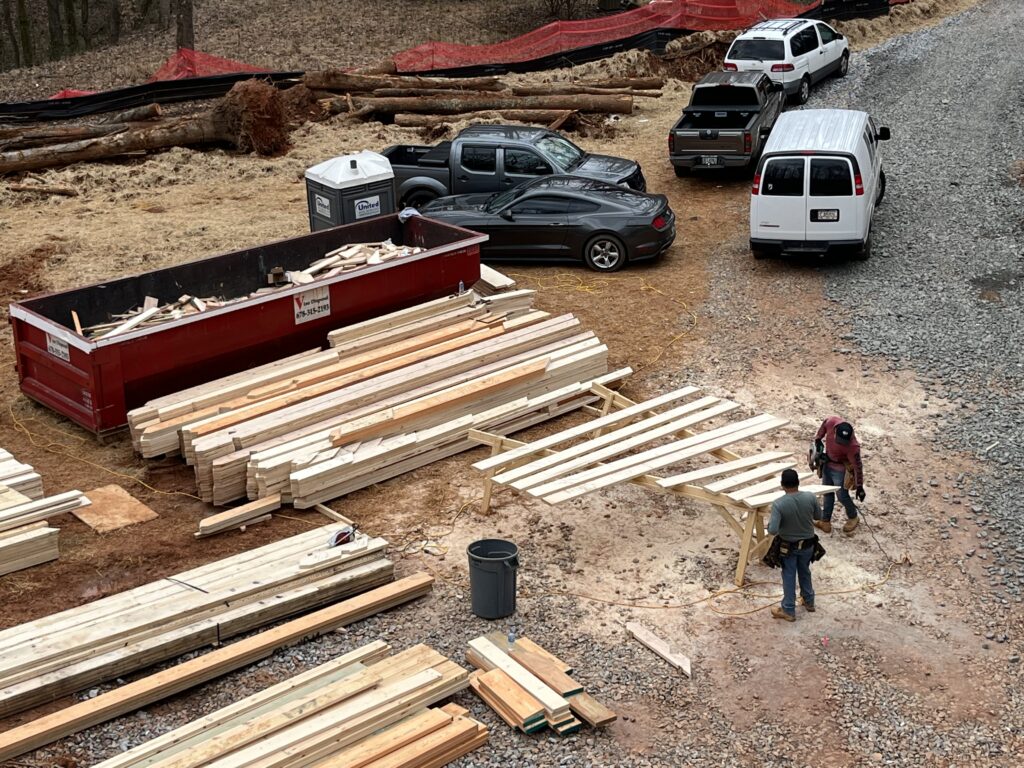
Using a detailed Rafter Cut List written in the framers’ language, the cut team began accurately laying out and cutting the roof components. Meanwhile, the rest of the crew focused on framing tasks and prepping the site, enabling a parallel workflow.
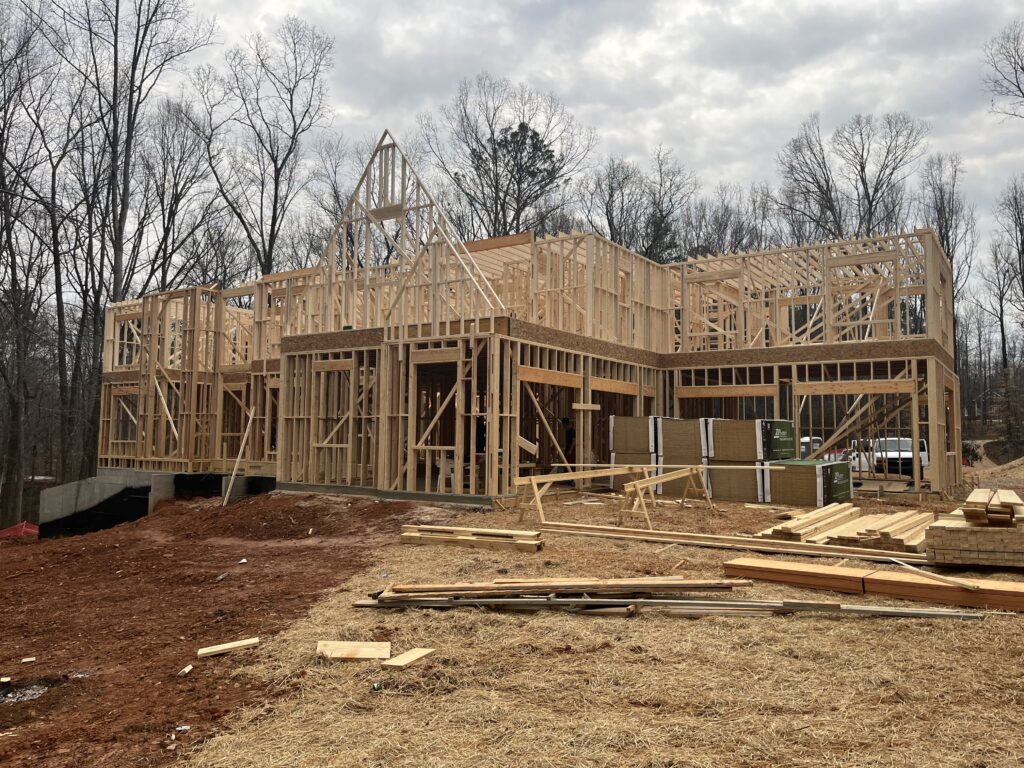
As the rafters were being cut, the remaining crew completed exterior wall sheathing and began framing the kneewalls based on the Roof System Rafter Layout Plan. These kneewalls, designed for an 8/12 and 16/12 pitch.
Once the kneewalls were framed and properly braced, the exterior wall sheathing was finished to structurally link the upper and lower levels. The differences in kneewall height and span had been pre-set to accommodate the specific roof.
Efficient roof framing starts with careful planning and documentation. Roof Framing Solutions ensures every measurement, angle, and cut is accounted for before the first rafter is laid, minimizing errors on site.

By leveraging a clear and detailed Rafter Cut List, framing crews avoid guesswork and repetitive measurements. This organized approach speeds up cutting while maintaining high precision in every component.
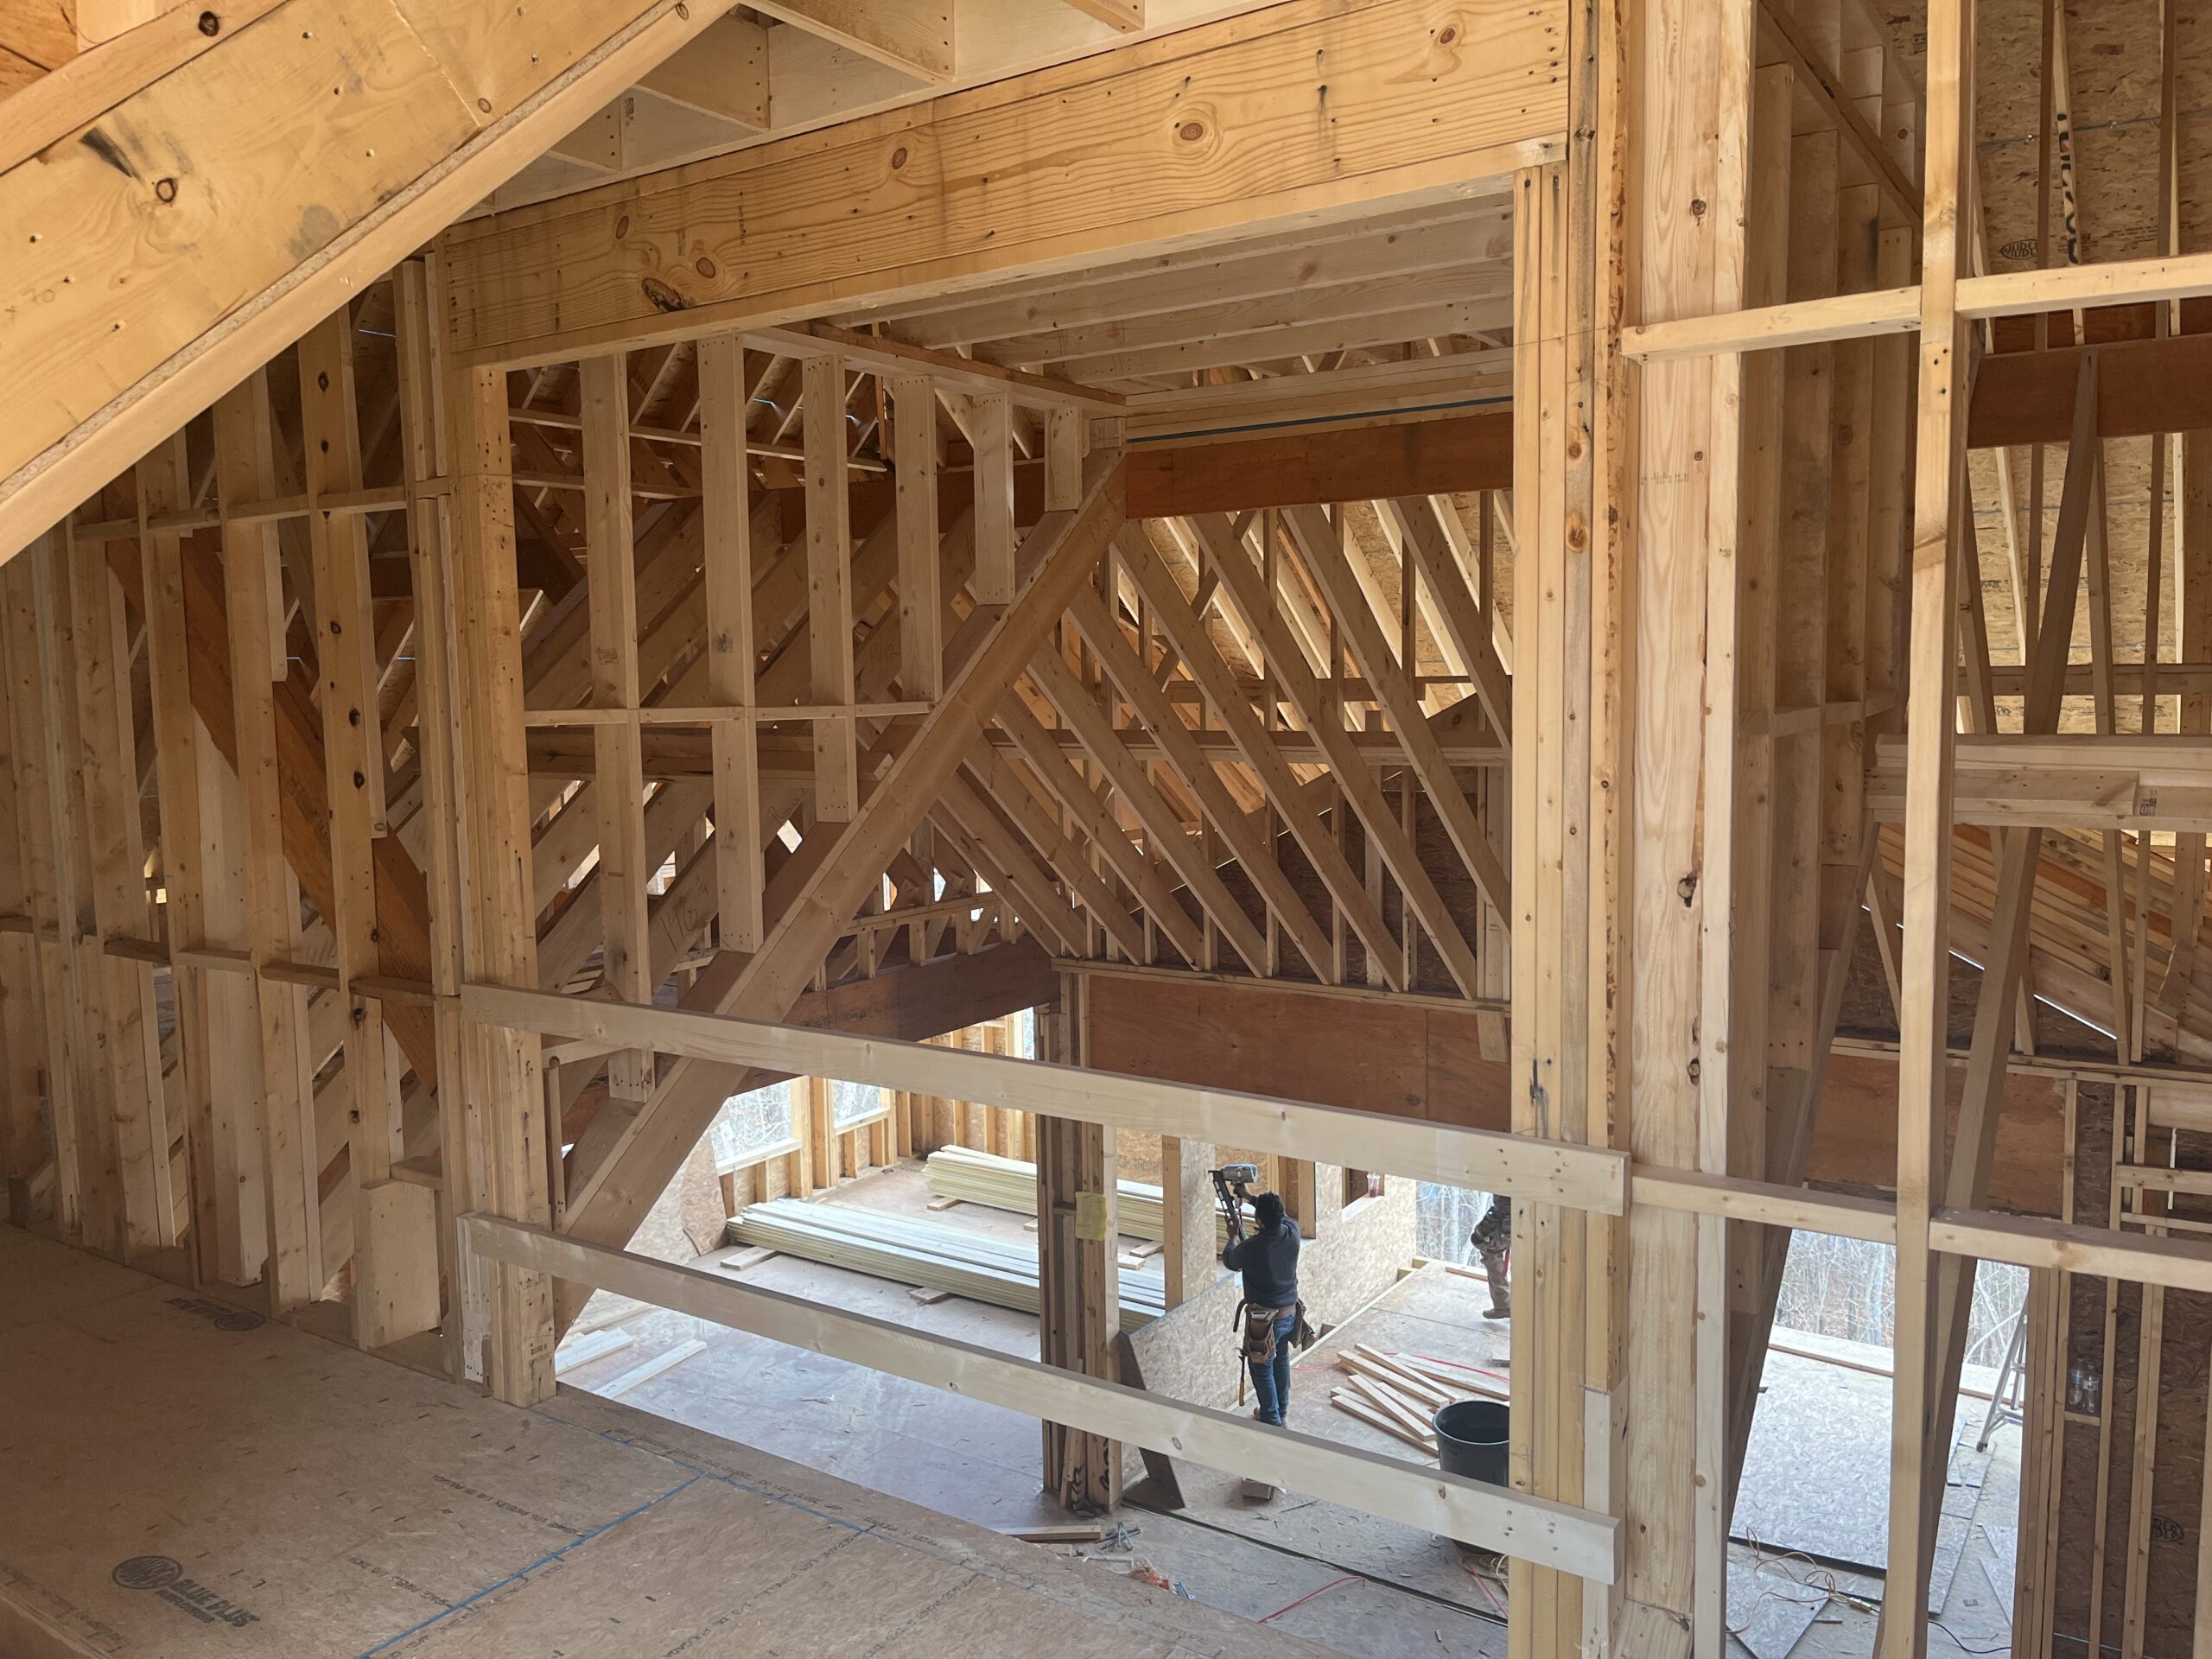
With the Roof kneewalls framed and braced the exterior wall sheathing was safely finished structurally connecting the Roof kneewalls with the lower-level walls creating a stronger structure. Note the kneewall height and span differences pre -set for the 8/12, 16/12 Hip roof with a brick overhang
Using the provided scaffold heights and locations the scaffolding was built over a temporary layer of roof sheathing creating a safe productive work area while moving rafters into place
With a clear safe productive work area and following the Roof System Rafter Layout Plan the entire Pre-cut Roof System was moved and stacked in the correct location ready for assembly. Pre-cut extended Tail of the Hip to align the 8/12, 16/12.

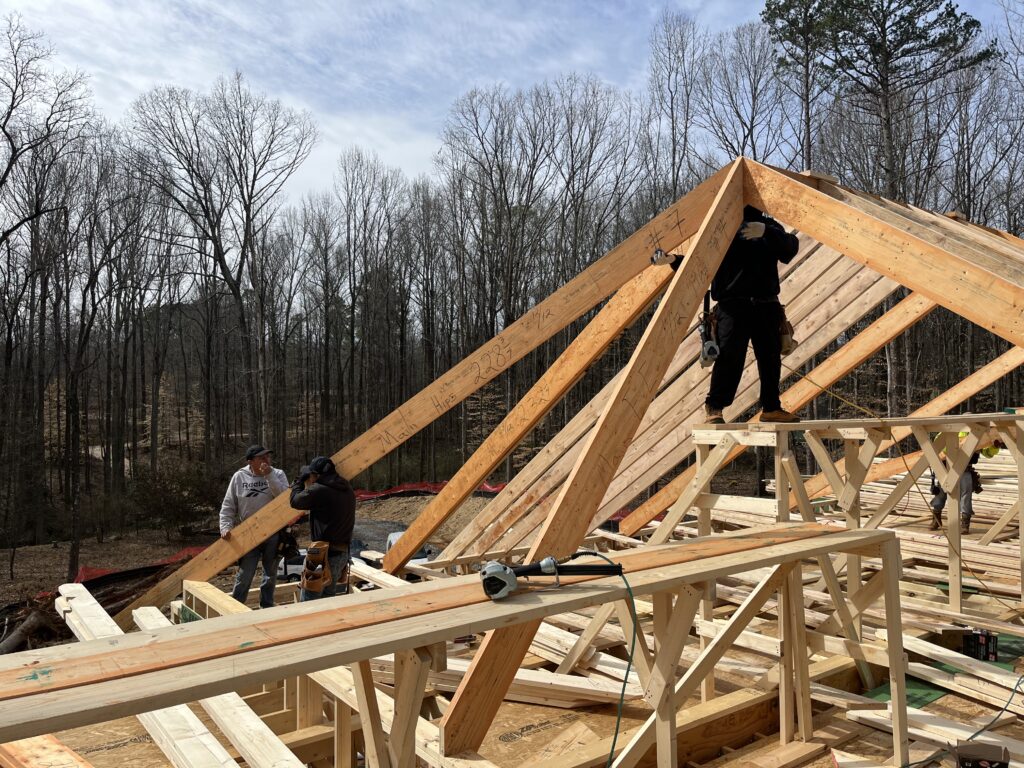
Assembling the Pre-cut 8/12, 16/12 End Common Girder Rafters. Note the Pre-cut 8/12, 16/12 Hips and Jack Rafters stacked and ready to be installed
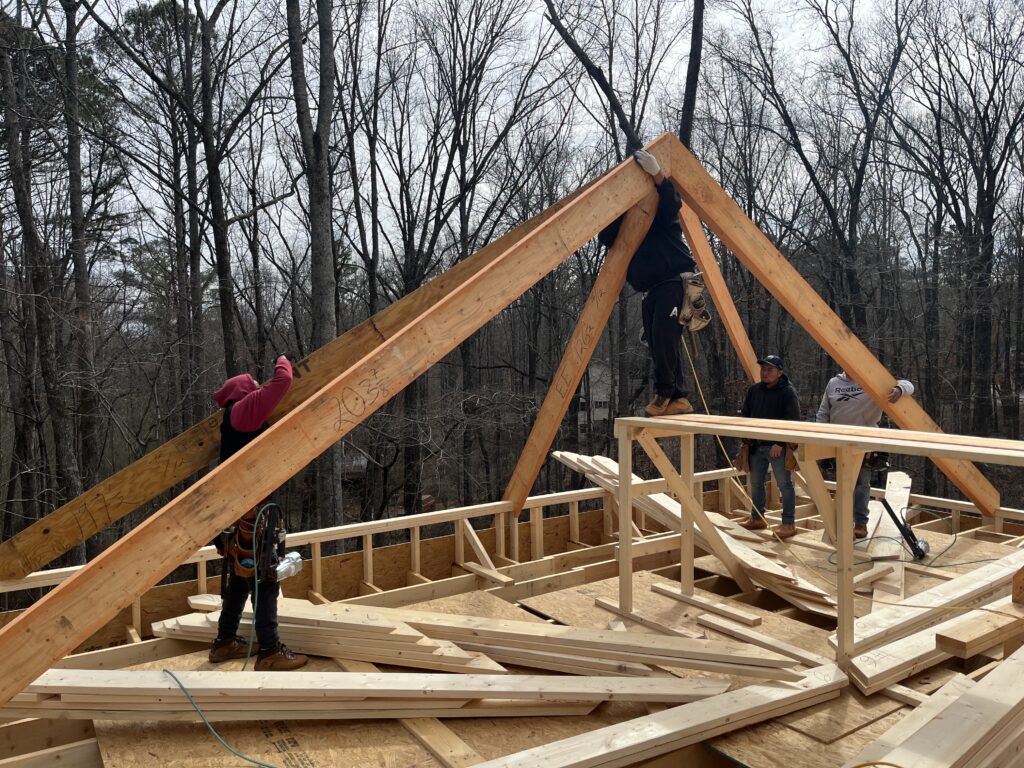
Installing the Pre-cut 8/12, 16/12 Switch Pitch Hips
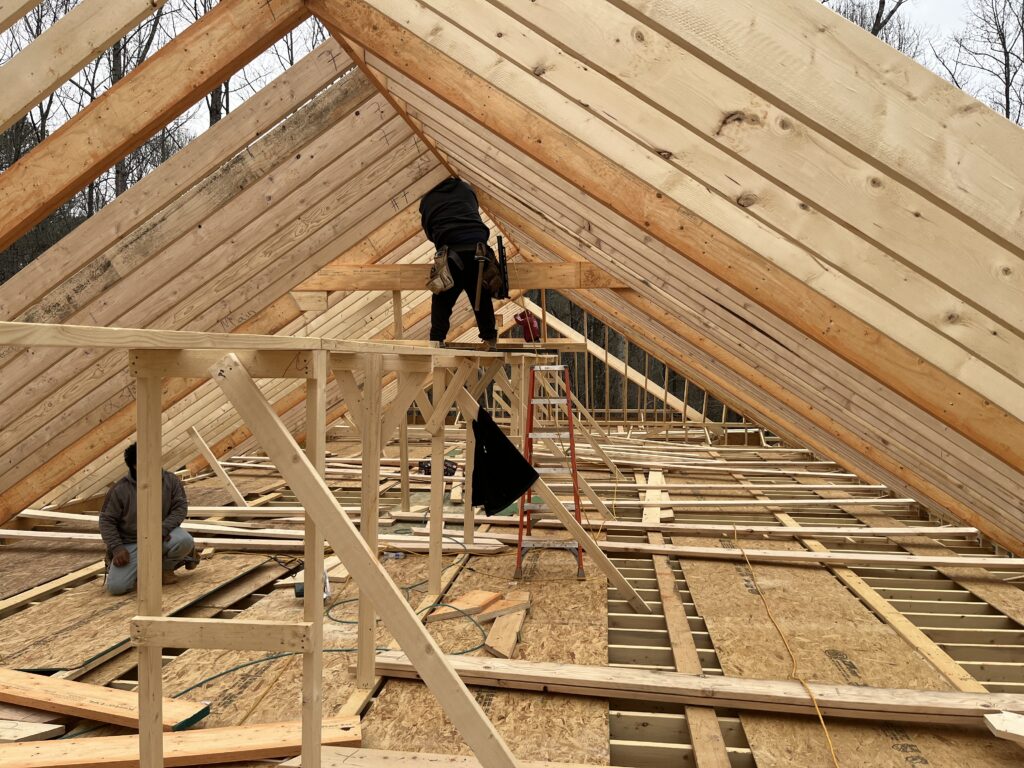
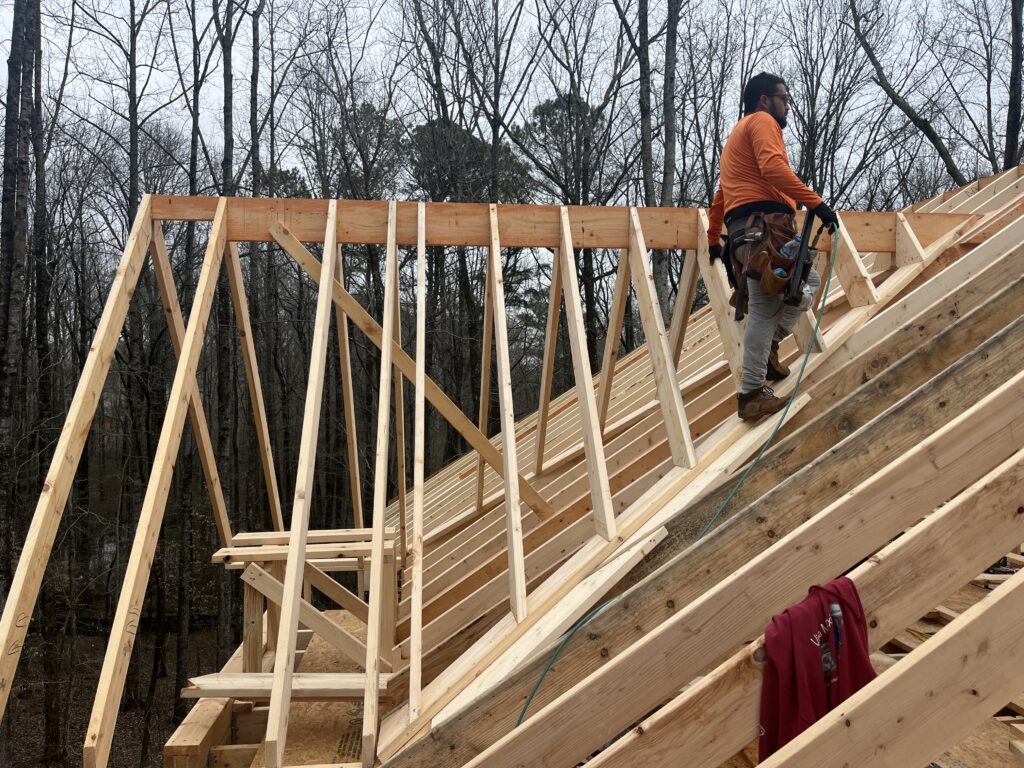
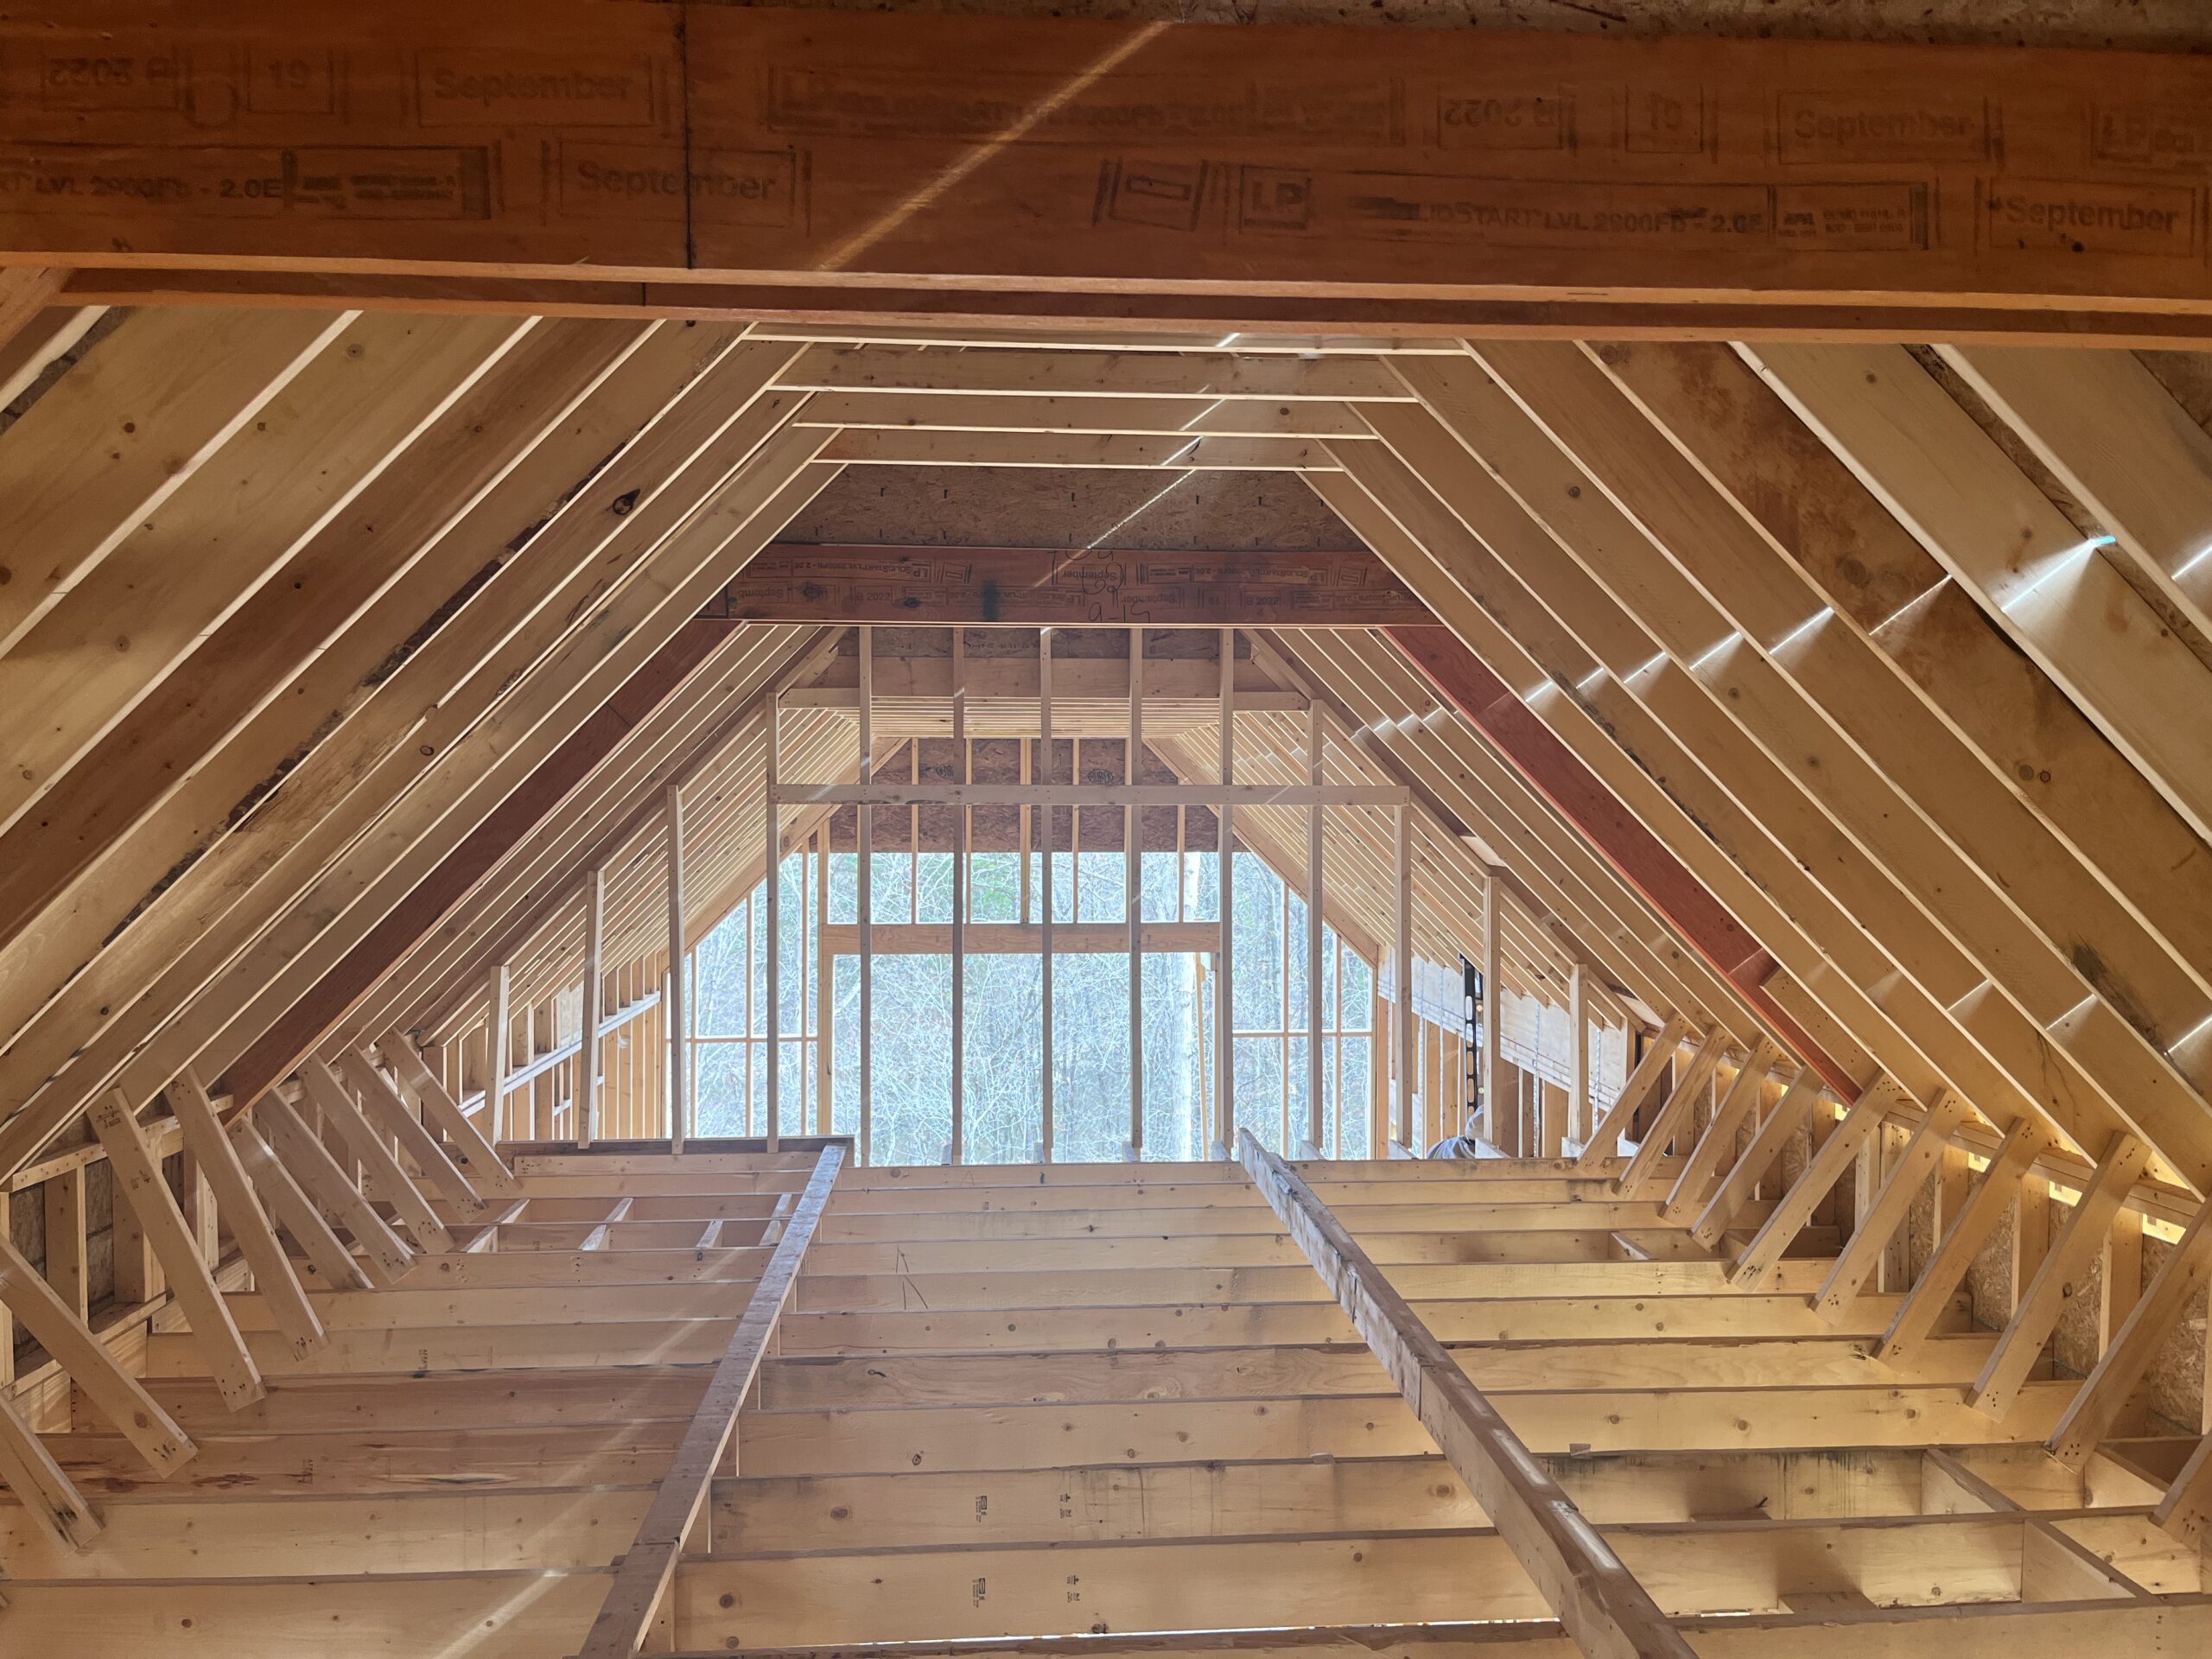
Setting the ridge and all the common 8/12 Rafters. Note all the scaffolds and kneewalls are completed and the Rafters are stacked and ready for assembly.
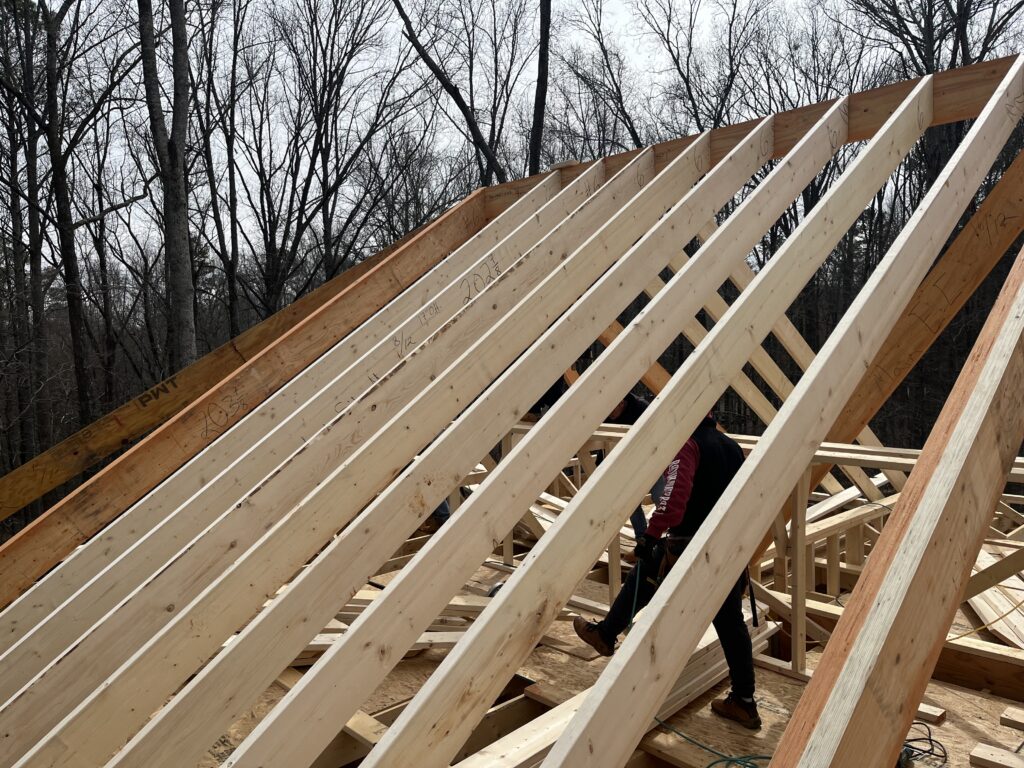
All the Pre-cut 8/12 Common Rafters installed.
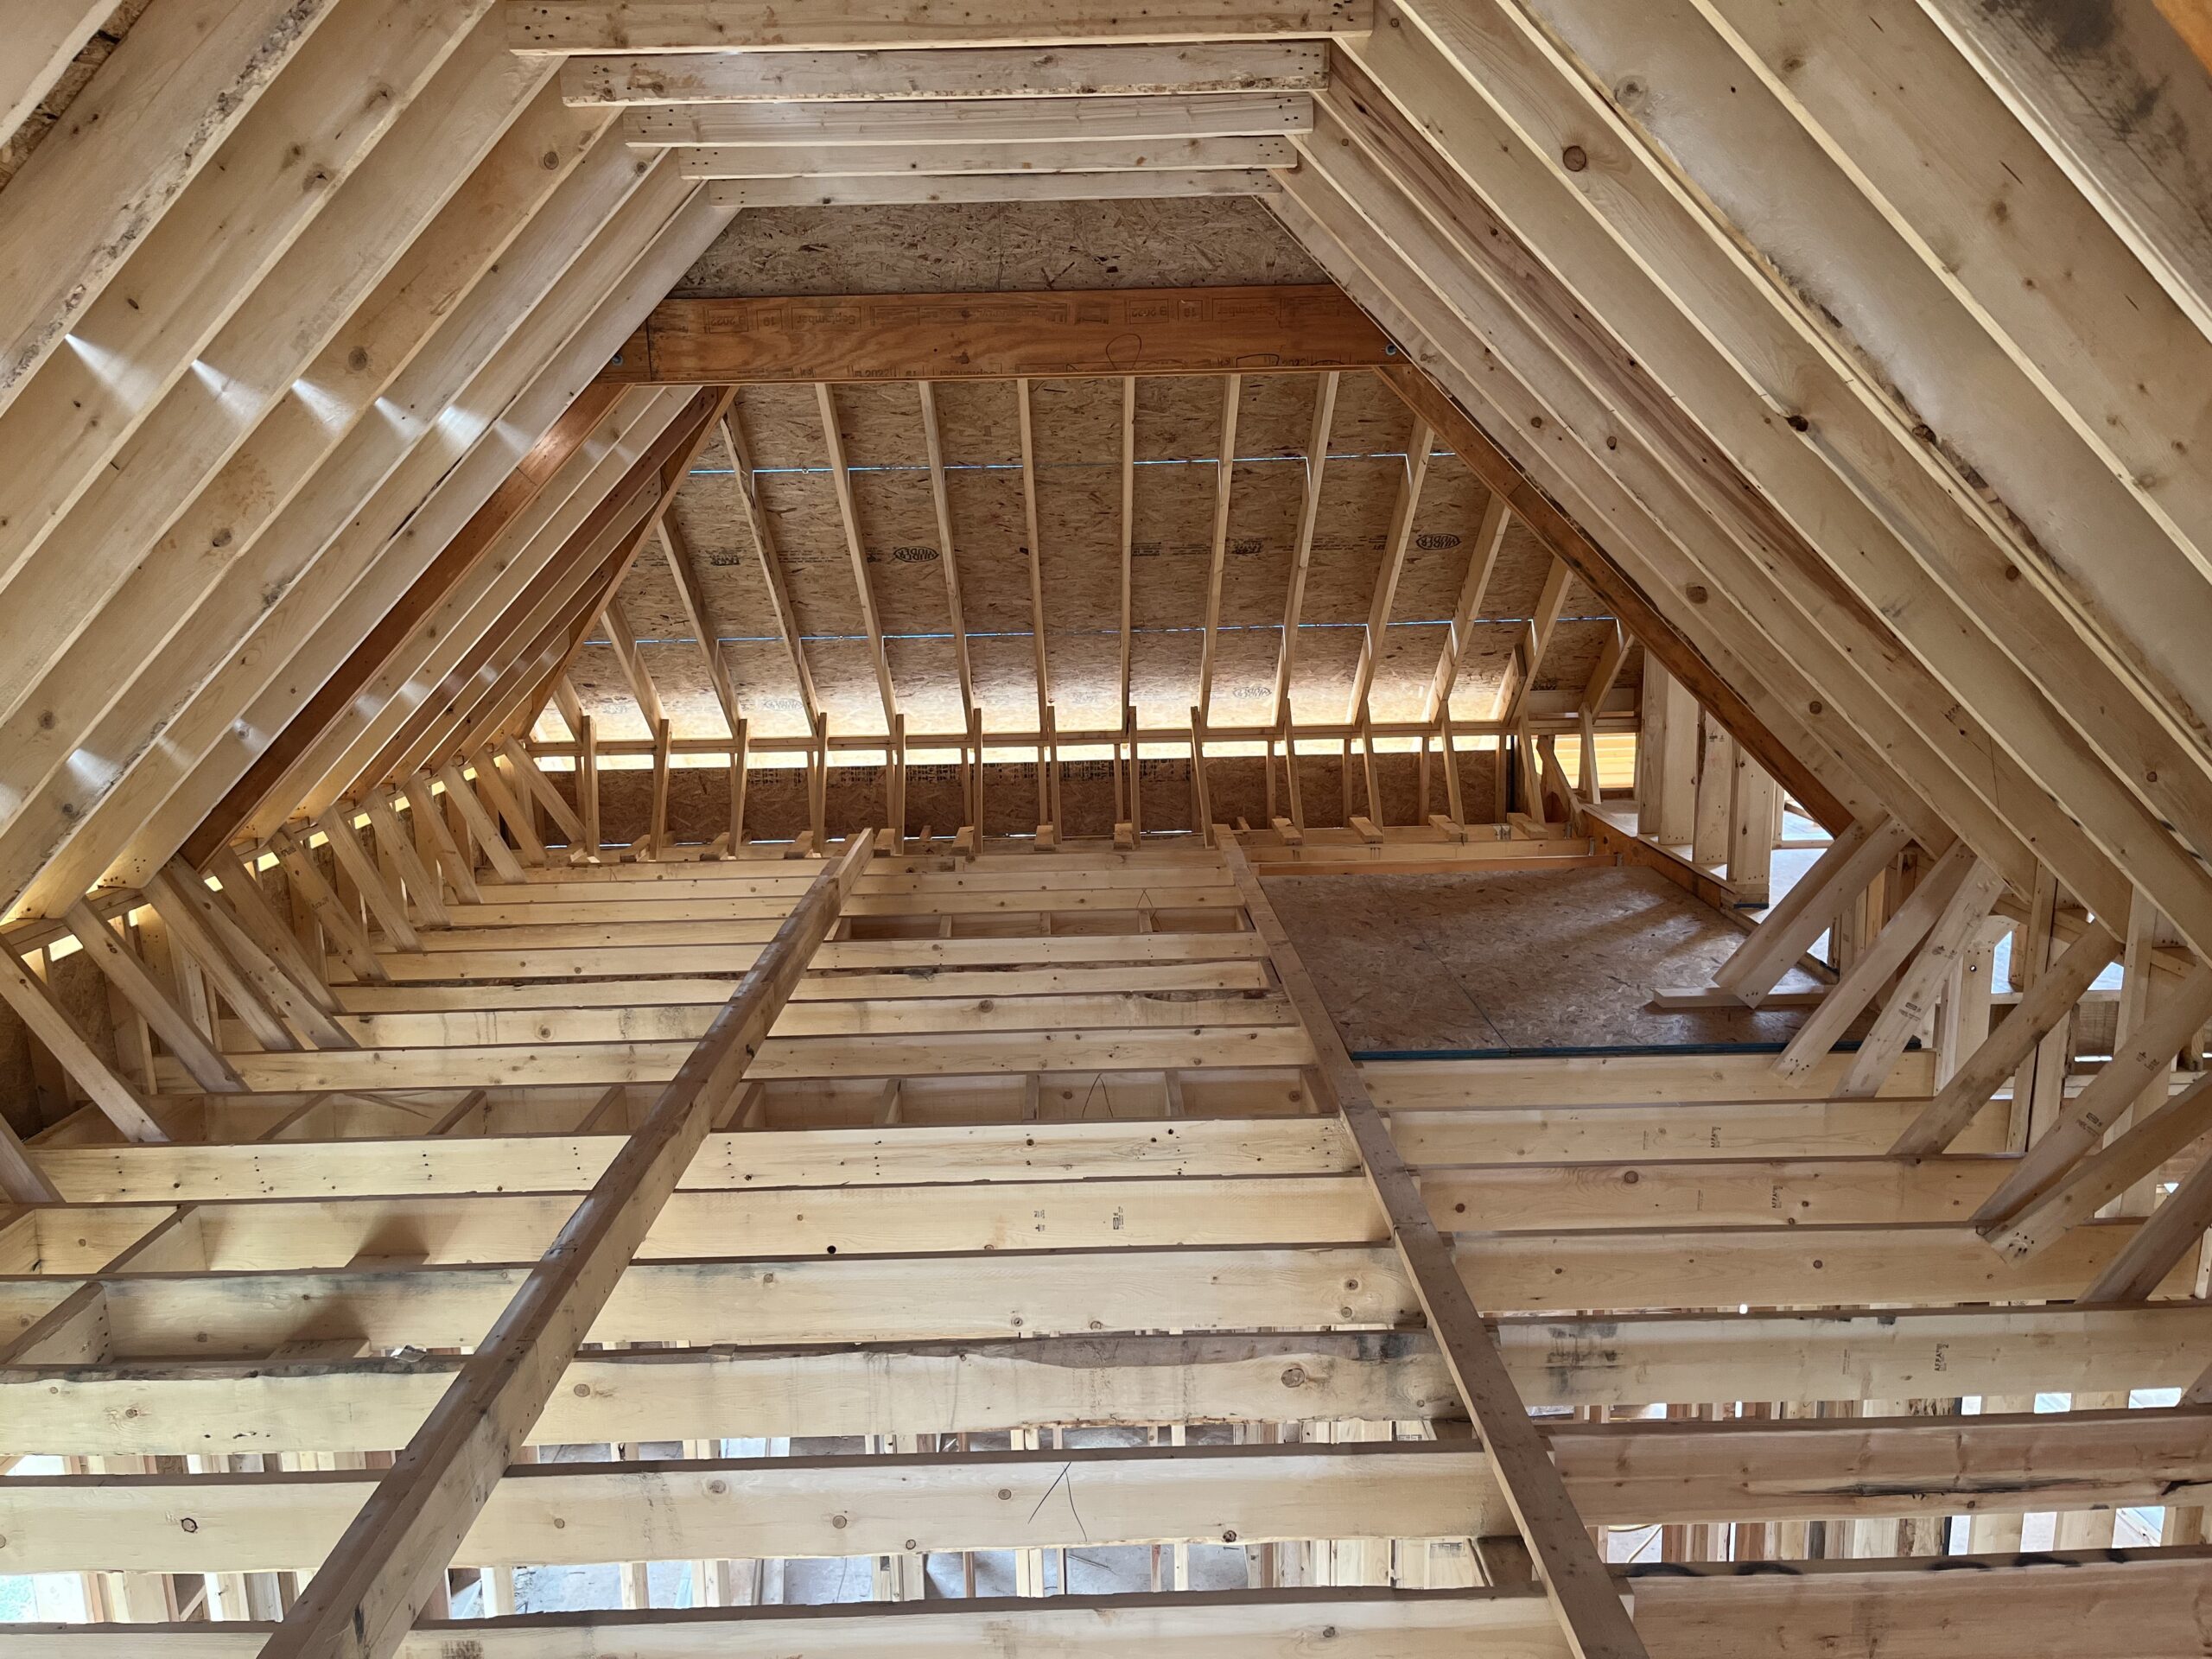
All the Pre-cut 8/12, 16/12 Hips, Common and Jack Rafters installed
Completed 8/12, 16/12 Switch Pitch Hip Roof with the scaffold removed, reused and the Roof is ready for sheathing
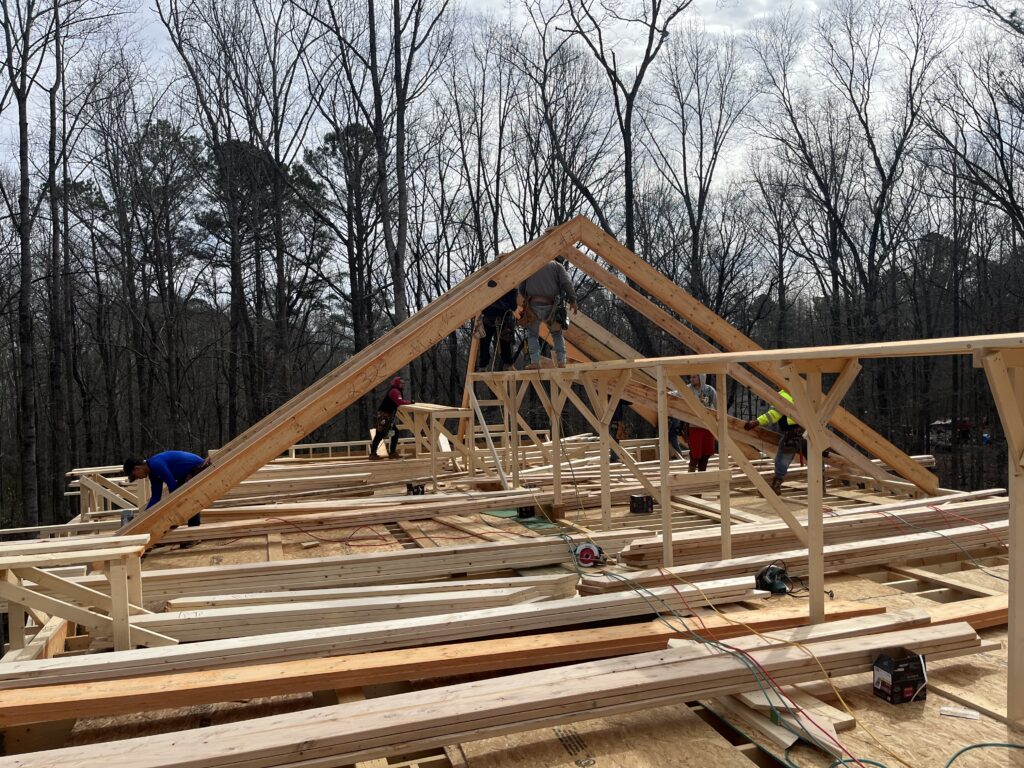
With a completed section of Roof and the Pre-cut Rafters already in place, the crew started the next section of Roof. Here they are installing the Pre-cut 8/12, 12/12 Hip with Jack Rafters ready to be installed
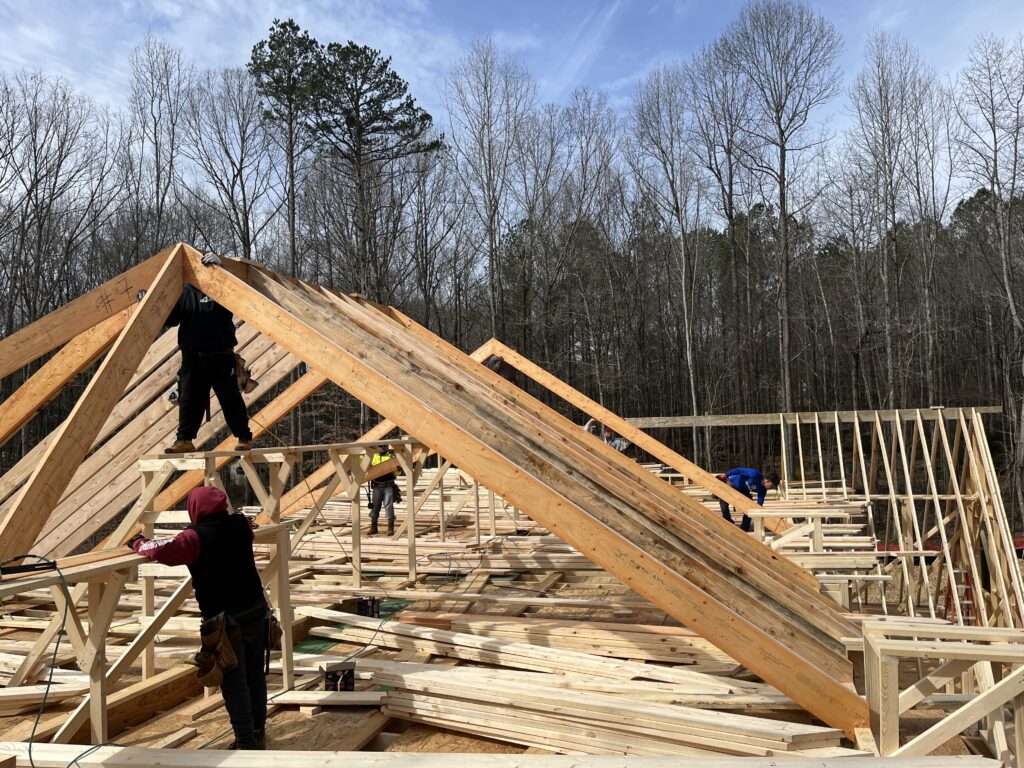
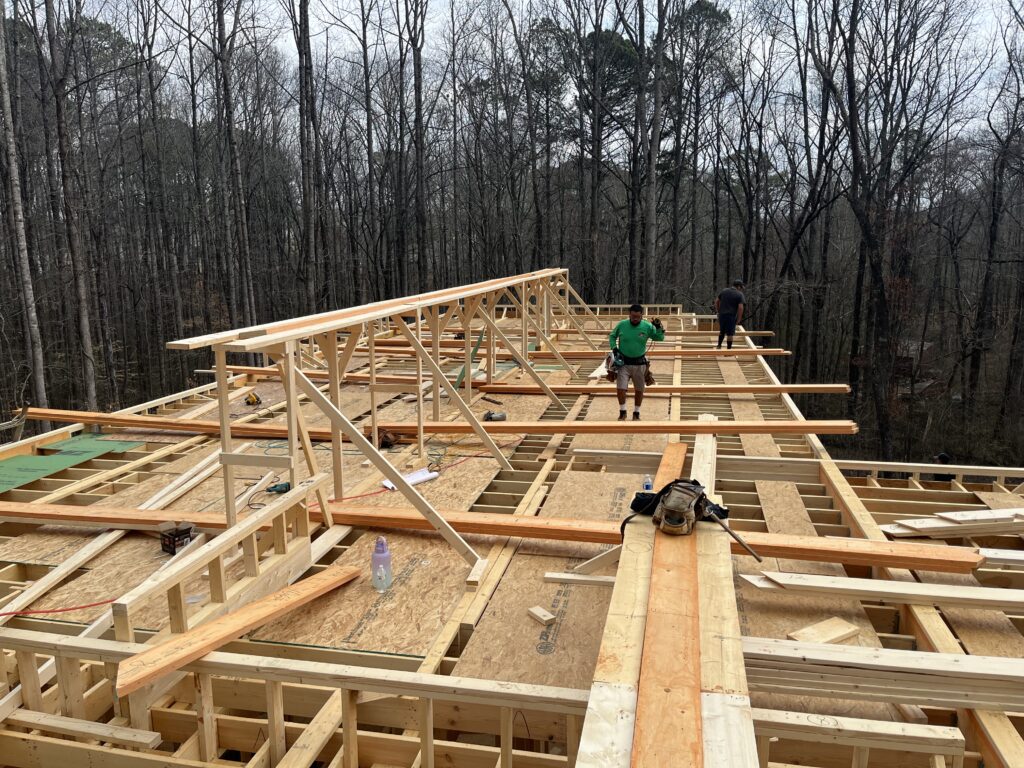
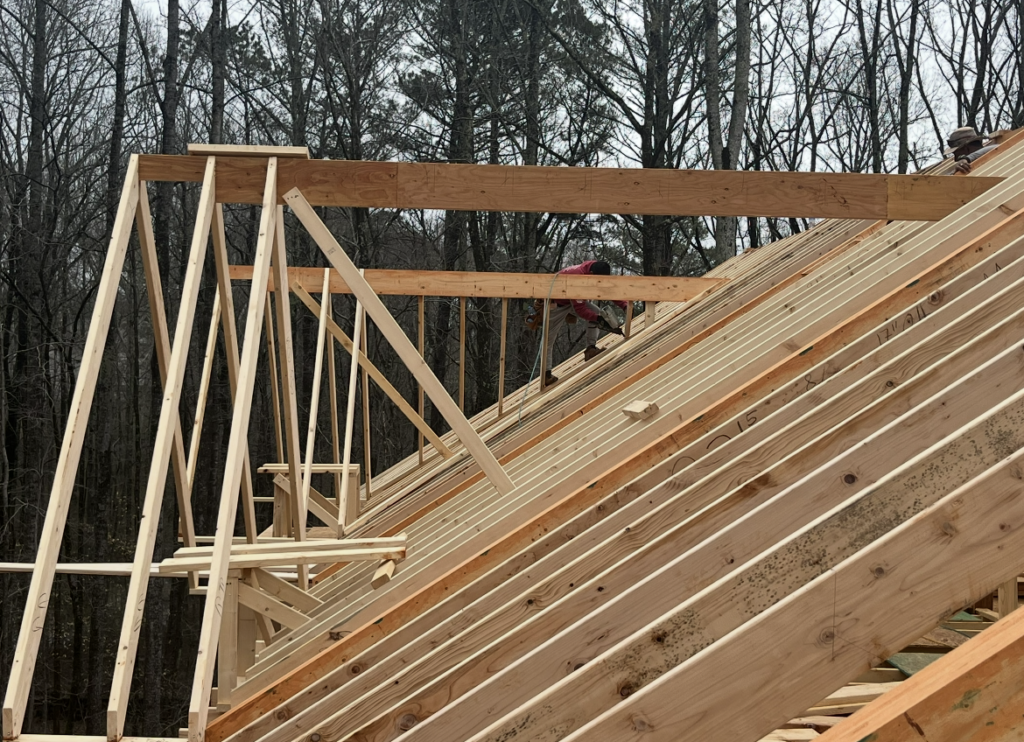
While the Pre-cut Hips and Jack Rafters are being installed the 8/12 Common Rafters are filled in and another Roof Section is being started. Note the stacks of Rafters organized and in place for the entire Roof System
Having all the Pre-cut Rafters in place eliminates any loss of production when setting up the Roof. Here all the 8/12 Common Rafters and the 8/12, 12/12 Jack Rafters have been installed. Note the previous Roof in the background
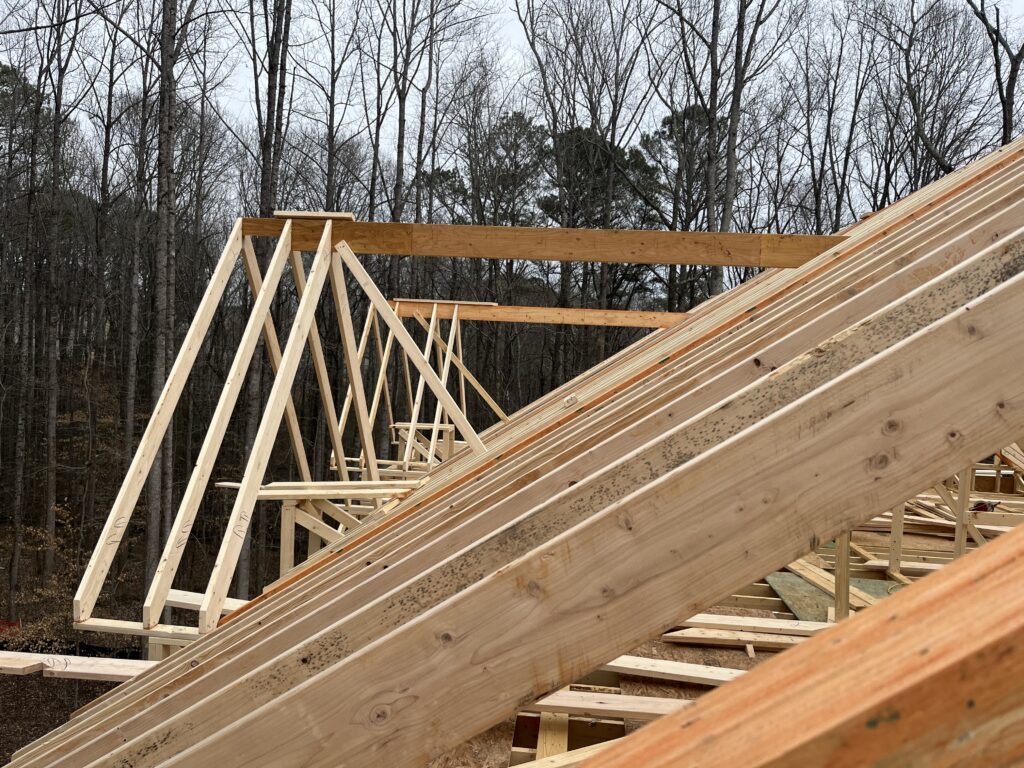
On the opposite end of the same Roof the 8/12, 16/12 Hips and Jack Rafters have been installed completing 90% of an 8/12, 12/12, 16/12 Triple Switch Pitch Hip Roof. Note (2) things: All Pre-cut Rafters are stacking above the common 16” layout and the next Roof being set up in the background
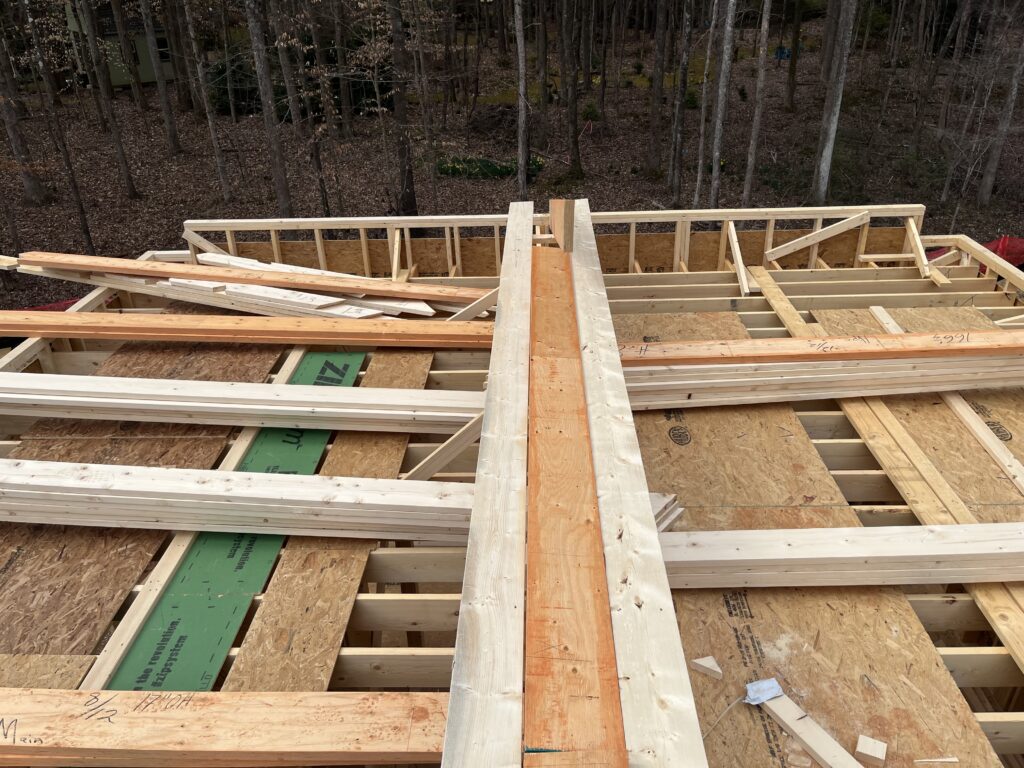
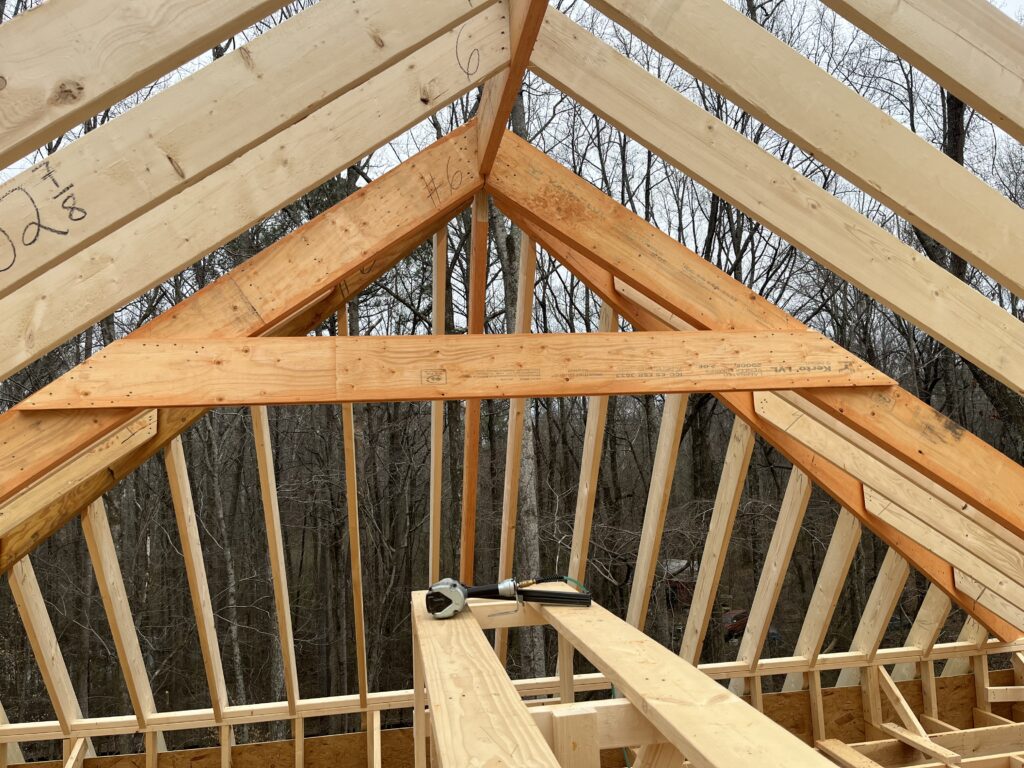
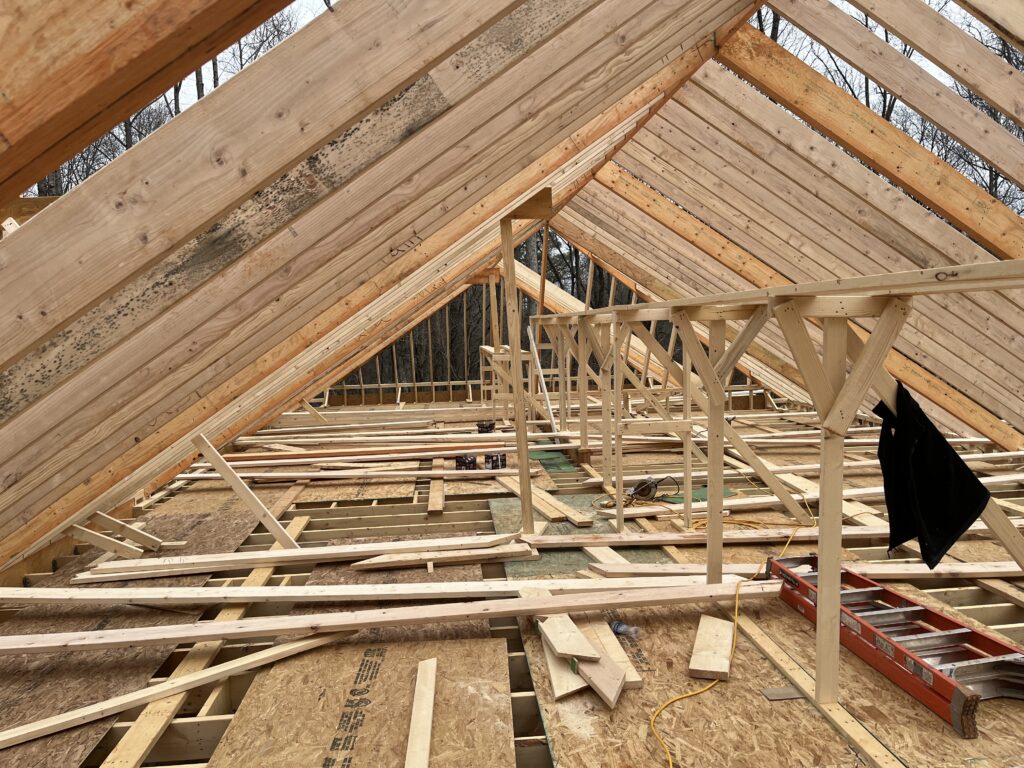
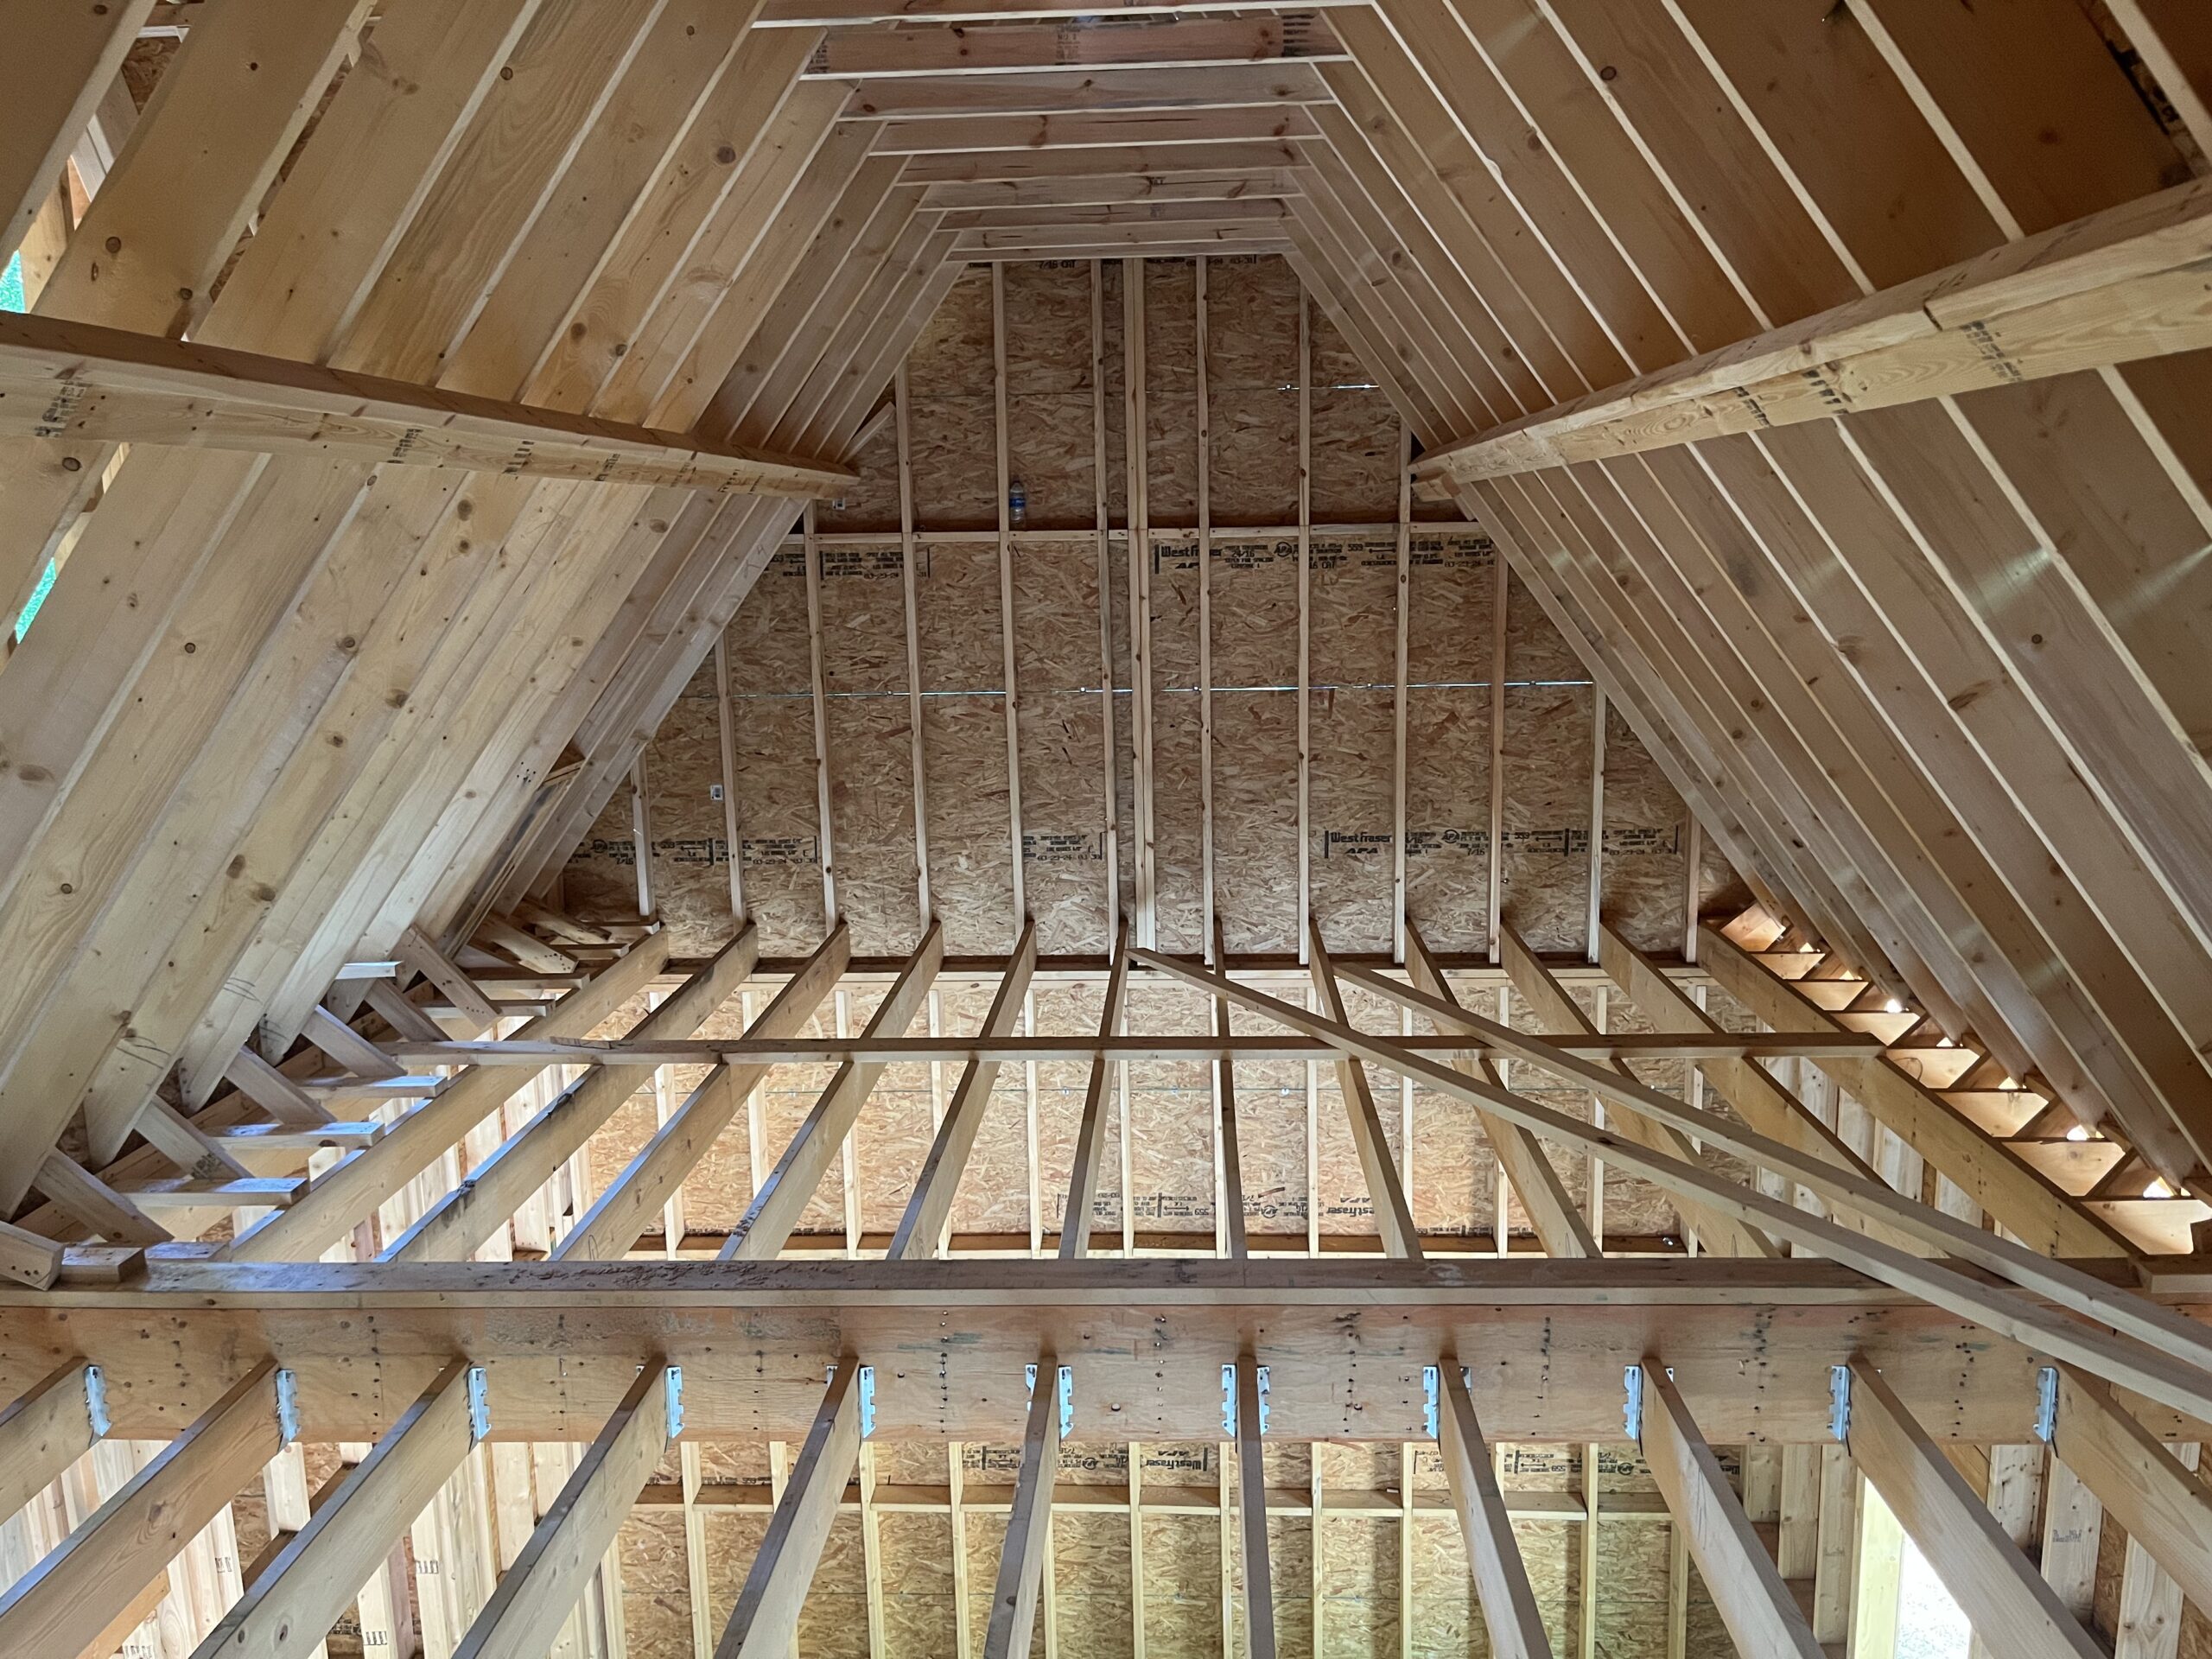
With the Roof in the background being filled in and the Main body being completed, the Coller Ties are also being installed so the scaffolds can be removed to stock for the Roof sheathing
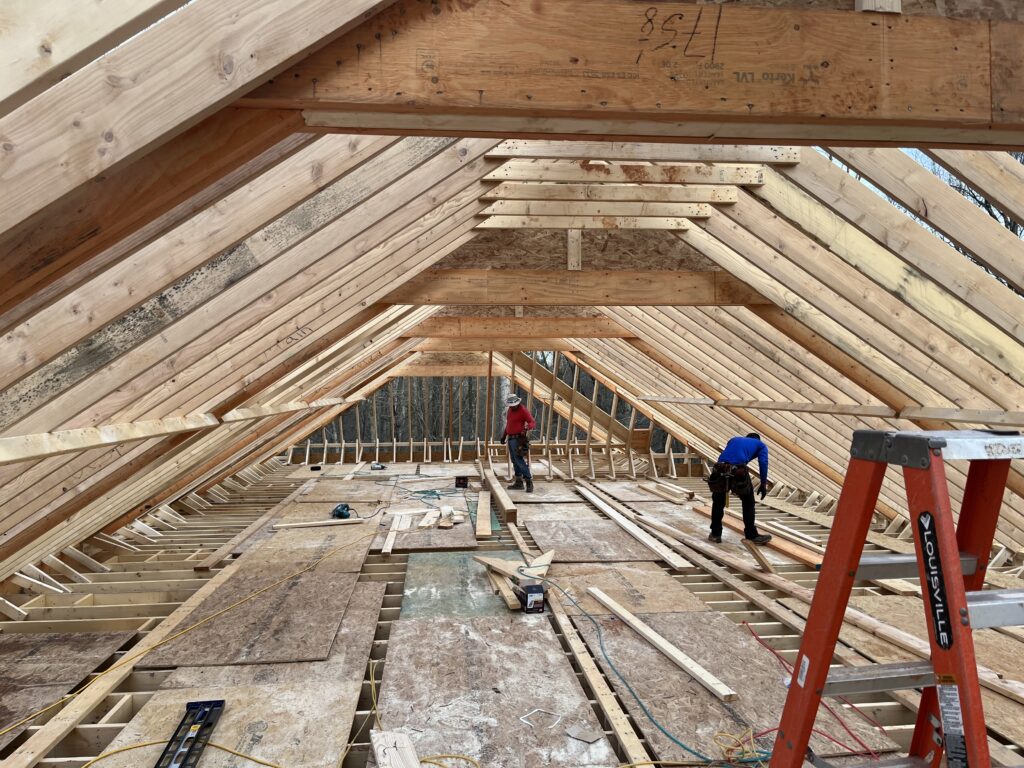
With the Coller Ties installed and the scaffold removed the Rafters have been straightened with catwalks and are being prepped for Roof sheathing
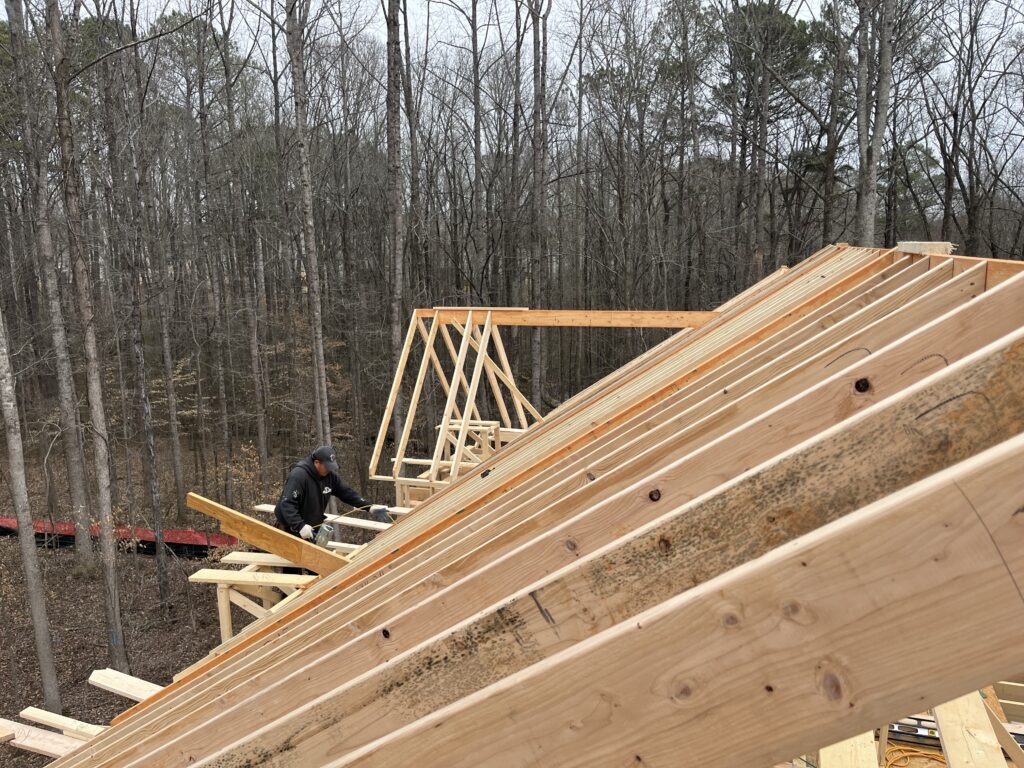
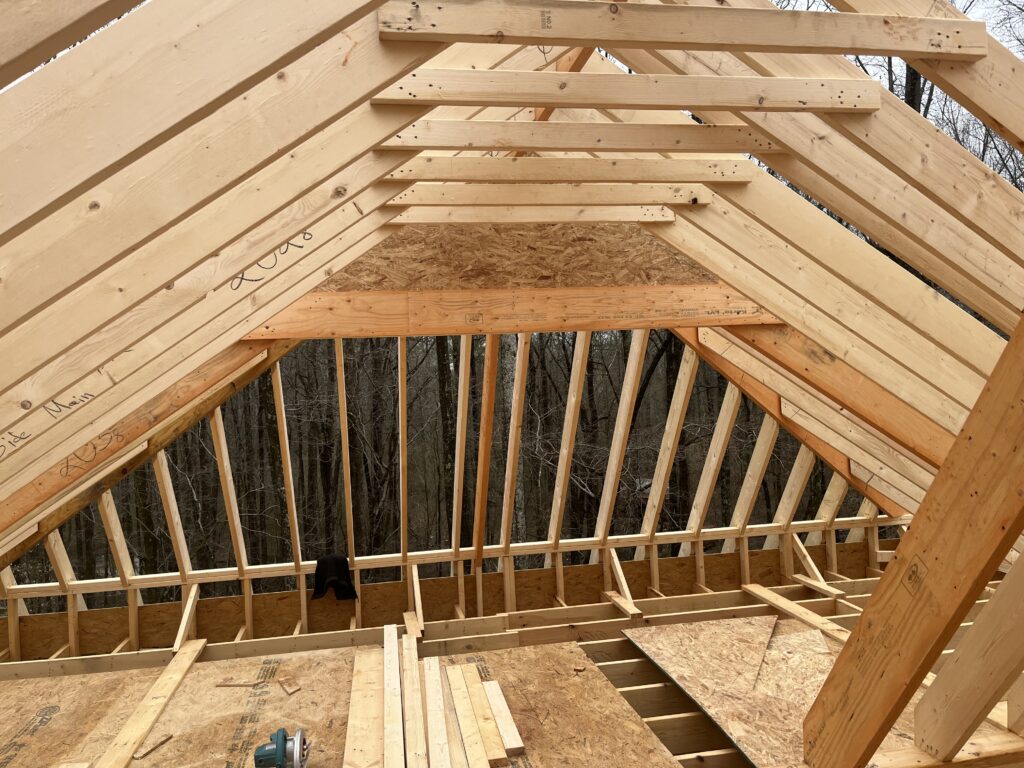
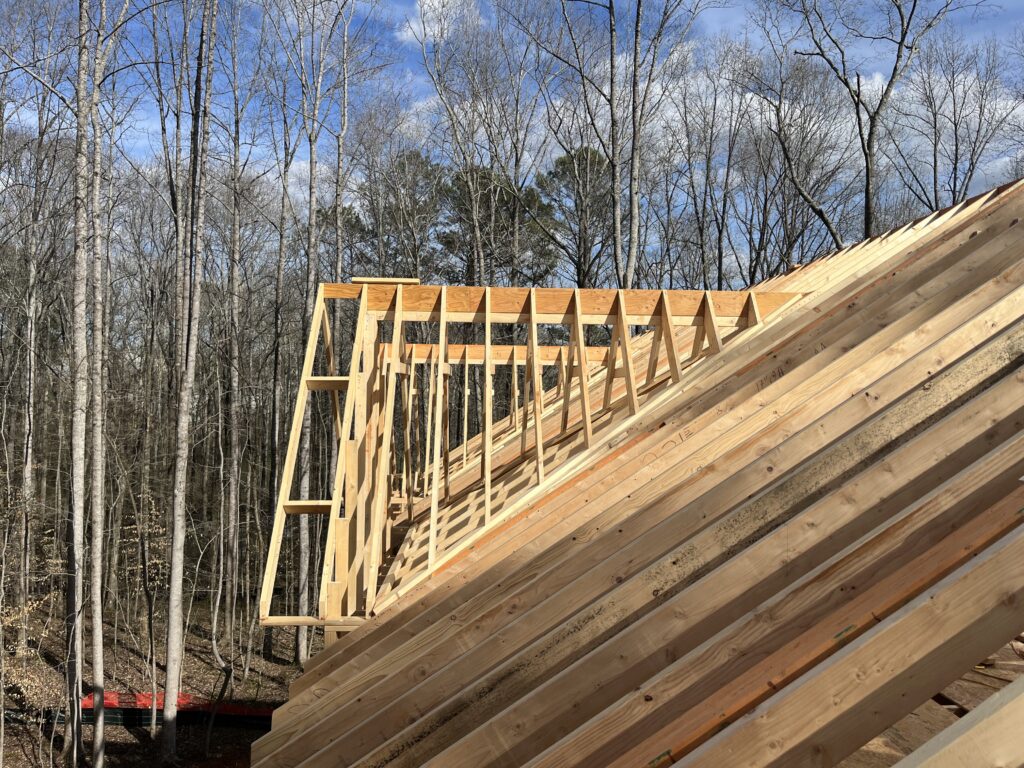
Now with the Main body of the Roof completed the (2) Front Secondary Roofs are being set up. Note the “No Tails “on the Rafters as they are Radius Tails
Both 16/12 Gables have been set, plumbed and ready to be filled in. Note the end Rafter on the inside set to stud up a wall to insulate with the Main body of the House
The first set of Pre-cut 8/12, 16/12 Switch Pitch Valley Jack Rafters being installed on a Pre-cut 8/12, 16/12 Valley Pad
First completed Secondary 8/12, 16/12 Roof connection. Note the continuous 16” layout with the Pre-cut Common and Jack Rafters. Also note the Valley blocking in the Lower Roof for solid Roof sheathing nailing
Two completed 16/12 Secondary Gable Roofs on an 8/12 Main Roof ready for sheathing
Front elevation at the end of the first day of roof assembly with 90% set and filled in. Note the upper middle secondary 16/12 Gable being filled in as shown in previous pictures

Rear elevation at end of the first day of Roof assembly with 90% filled in. Notice the area used for cutting and staging the Roof is now being used by another contractor
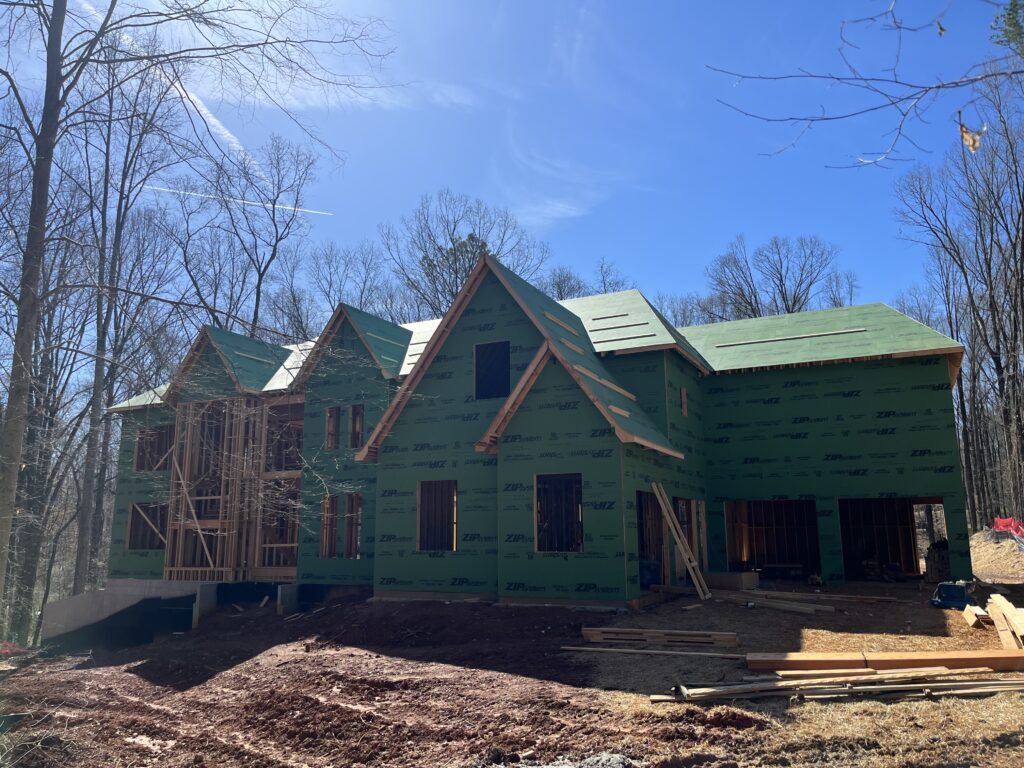
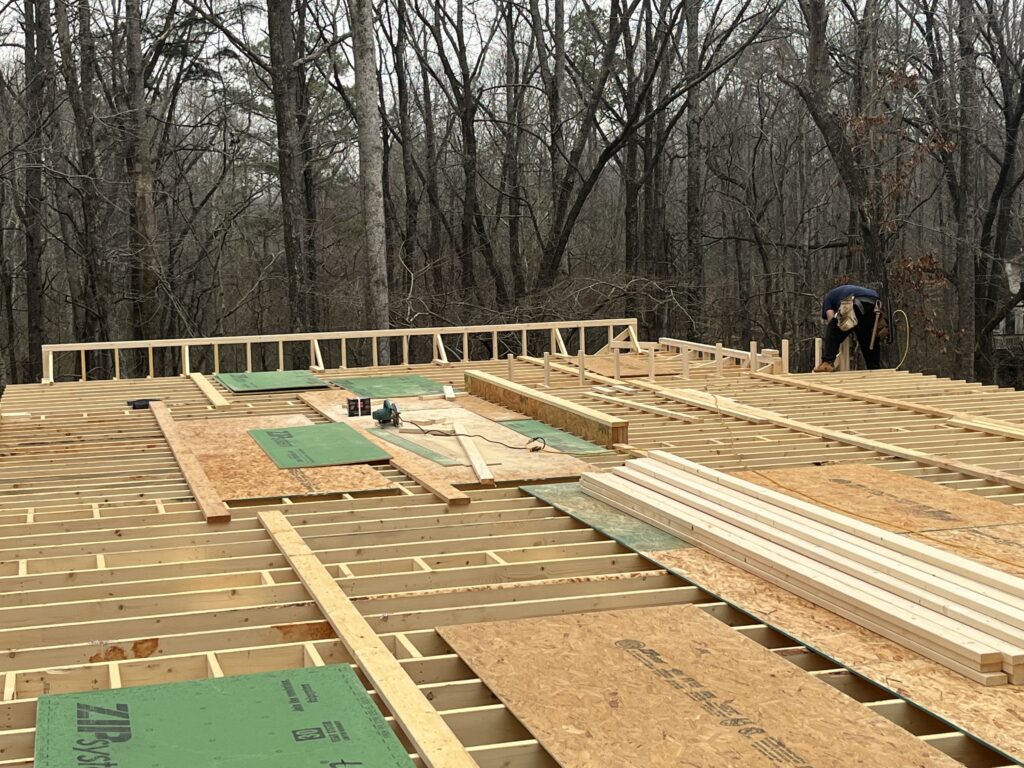
The end of the third day of Roof assembly. Fully decked and ready to be “Dried In’ by the Roofing crew. Note the Pre-cut Radius Tails on the Front Gables and the Upper Gable Radius Tail alignment with the Straight Tails of the Main Roof
Using the Roof Framing Solutions method the Builder received a complete, accurate Roof Framing Material List to have an apples to apples estimate from numerous lumber suppliers and was able to lock down a firm cost for the Homeowners. The lumber supplier was the able to order anything needed ahead of time, fill the entire order and have ready for a scheduled delivery. With the delivery the Framer received the Roof Framing Material Layout Plan, Roof System Rafter Cut list and the Roof System Rafter Layout Plan with all the information needed, written in The Framers Language, to prep, organize, cut, set up and build the roof system as effectively as possible in a clean, safe productive jobsite. With the material savings and having a brace free open attic the Homeowners were able to re-direct the savings back into the house and gain:
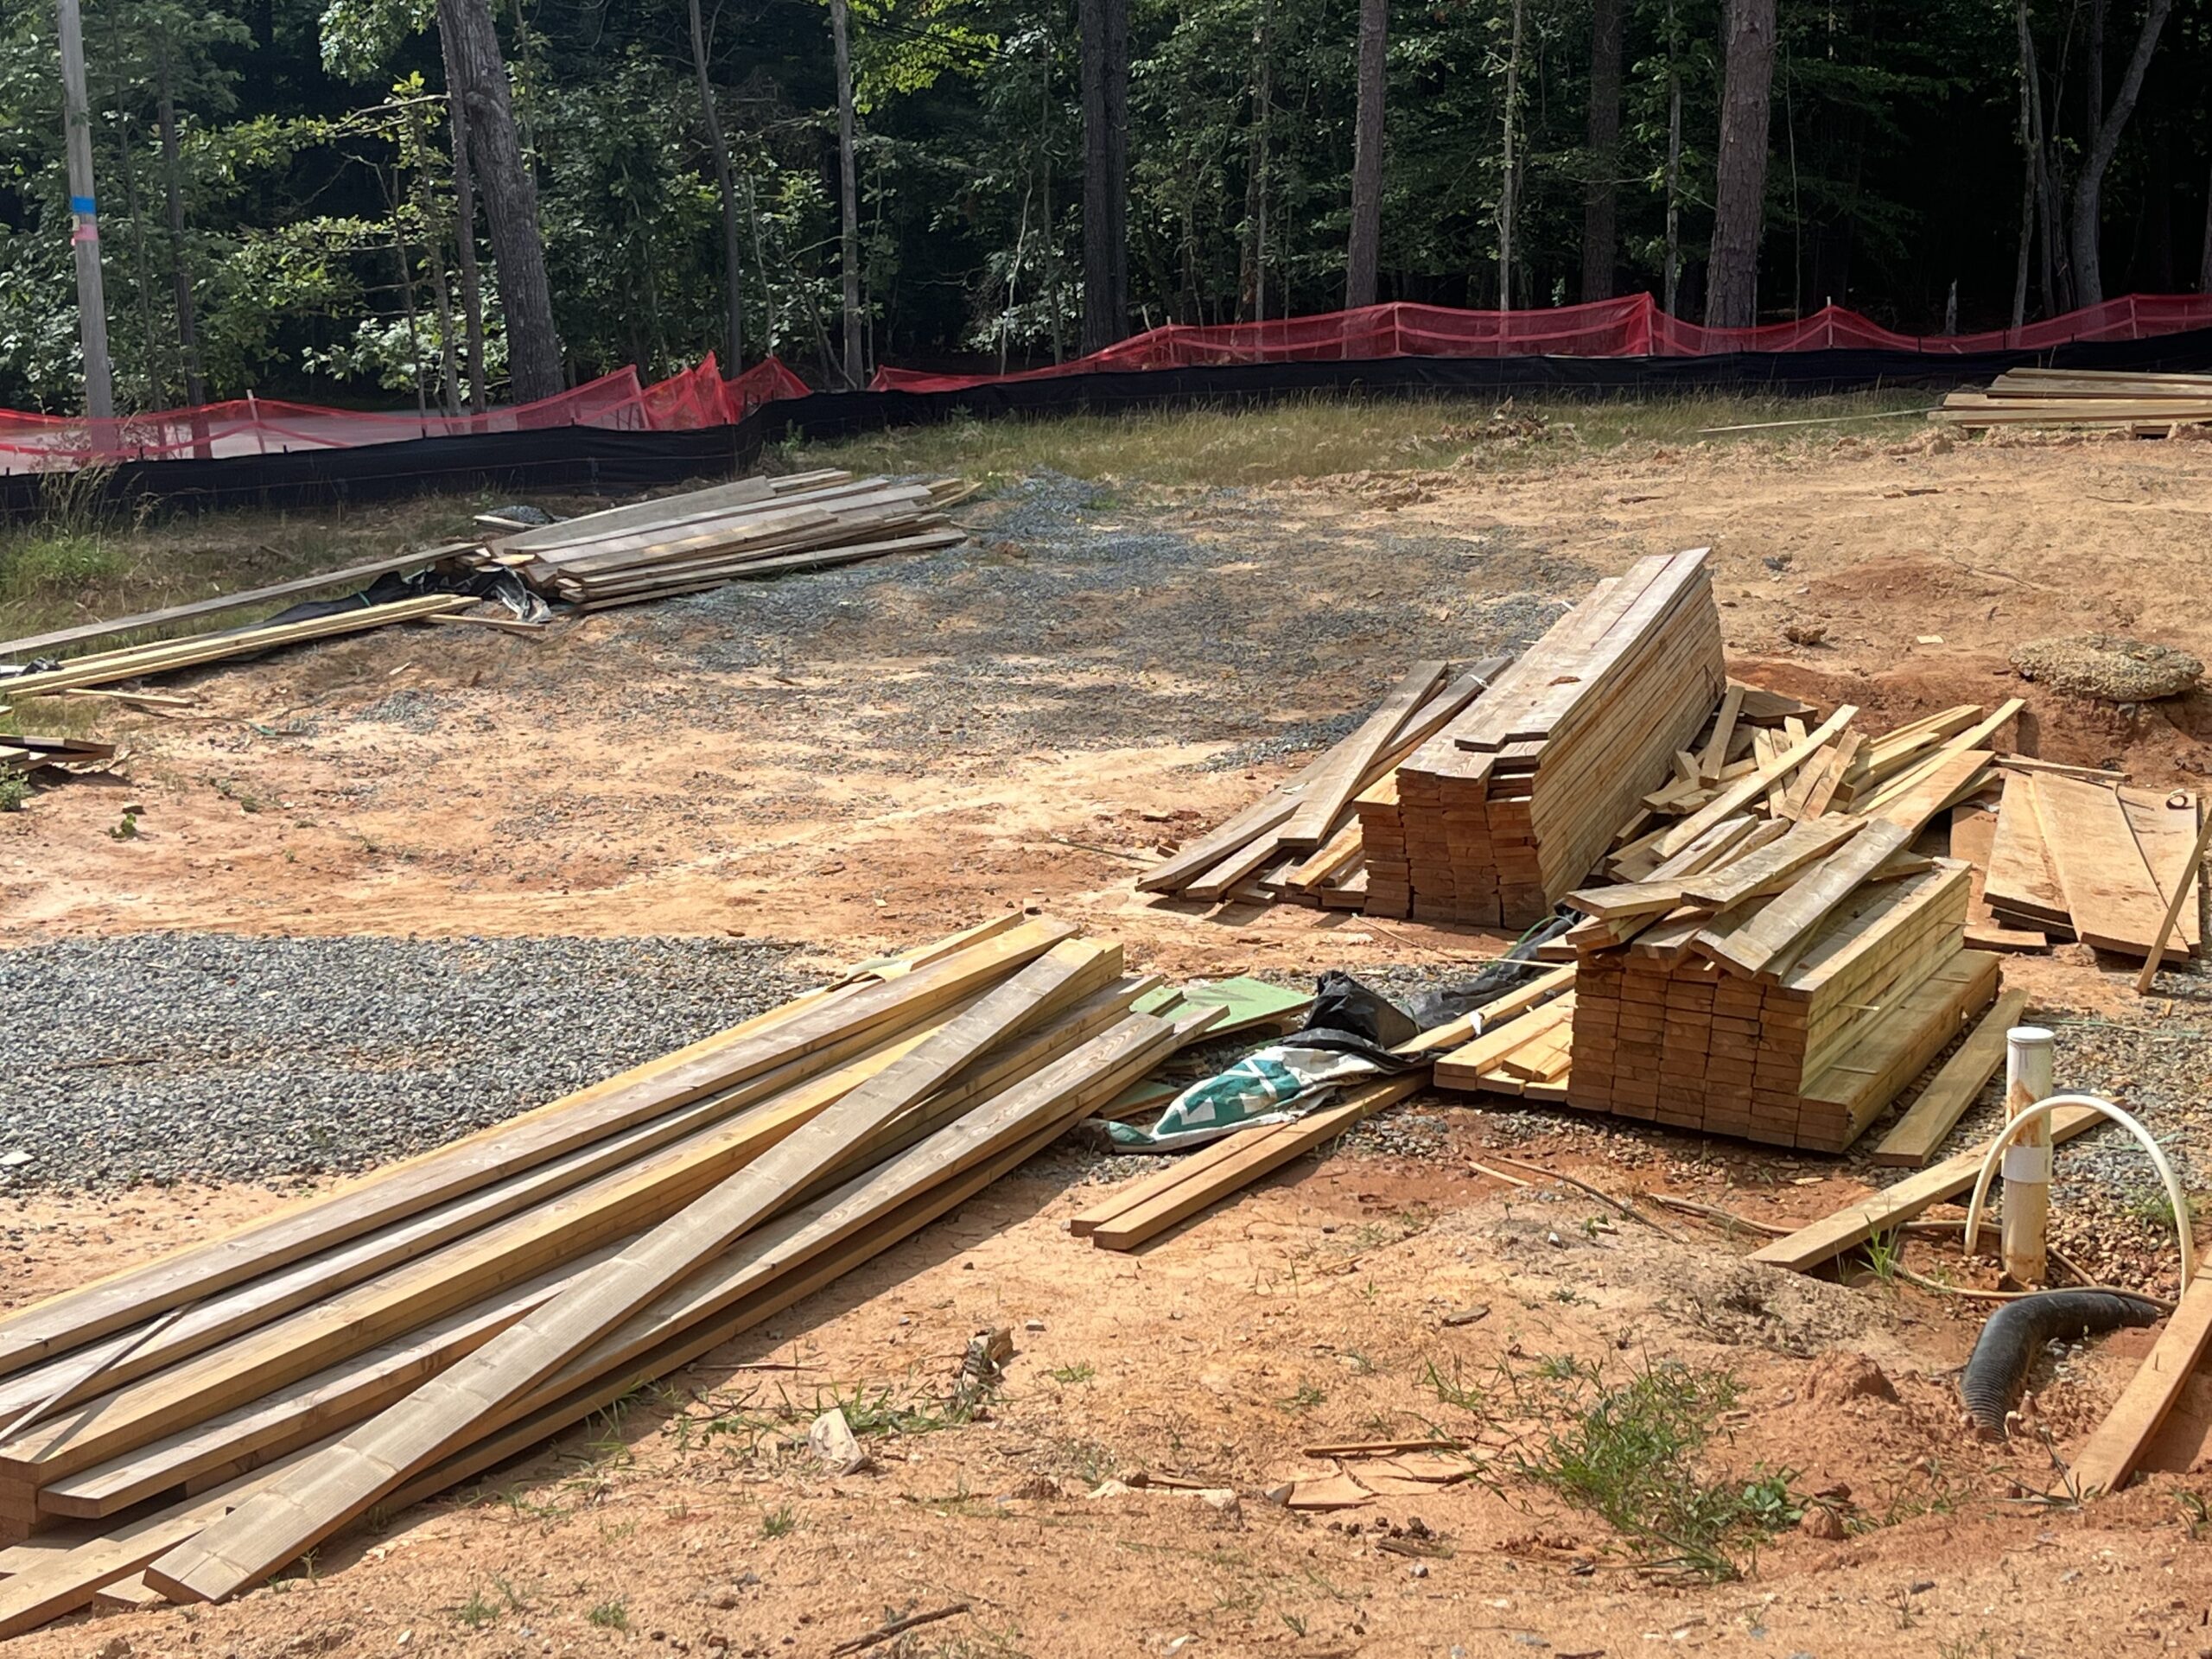
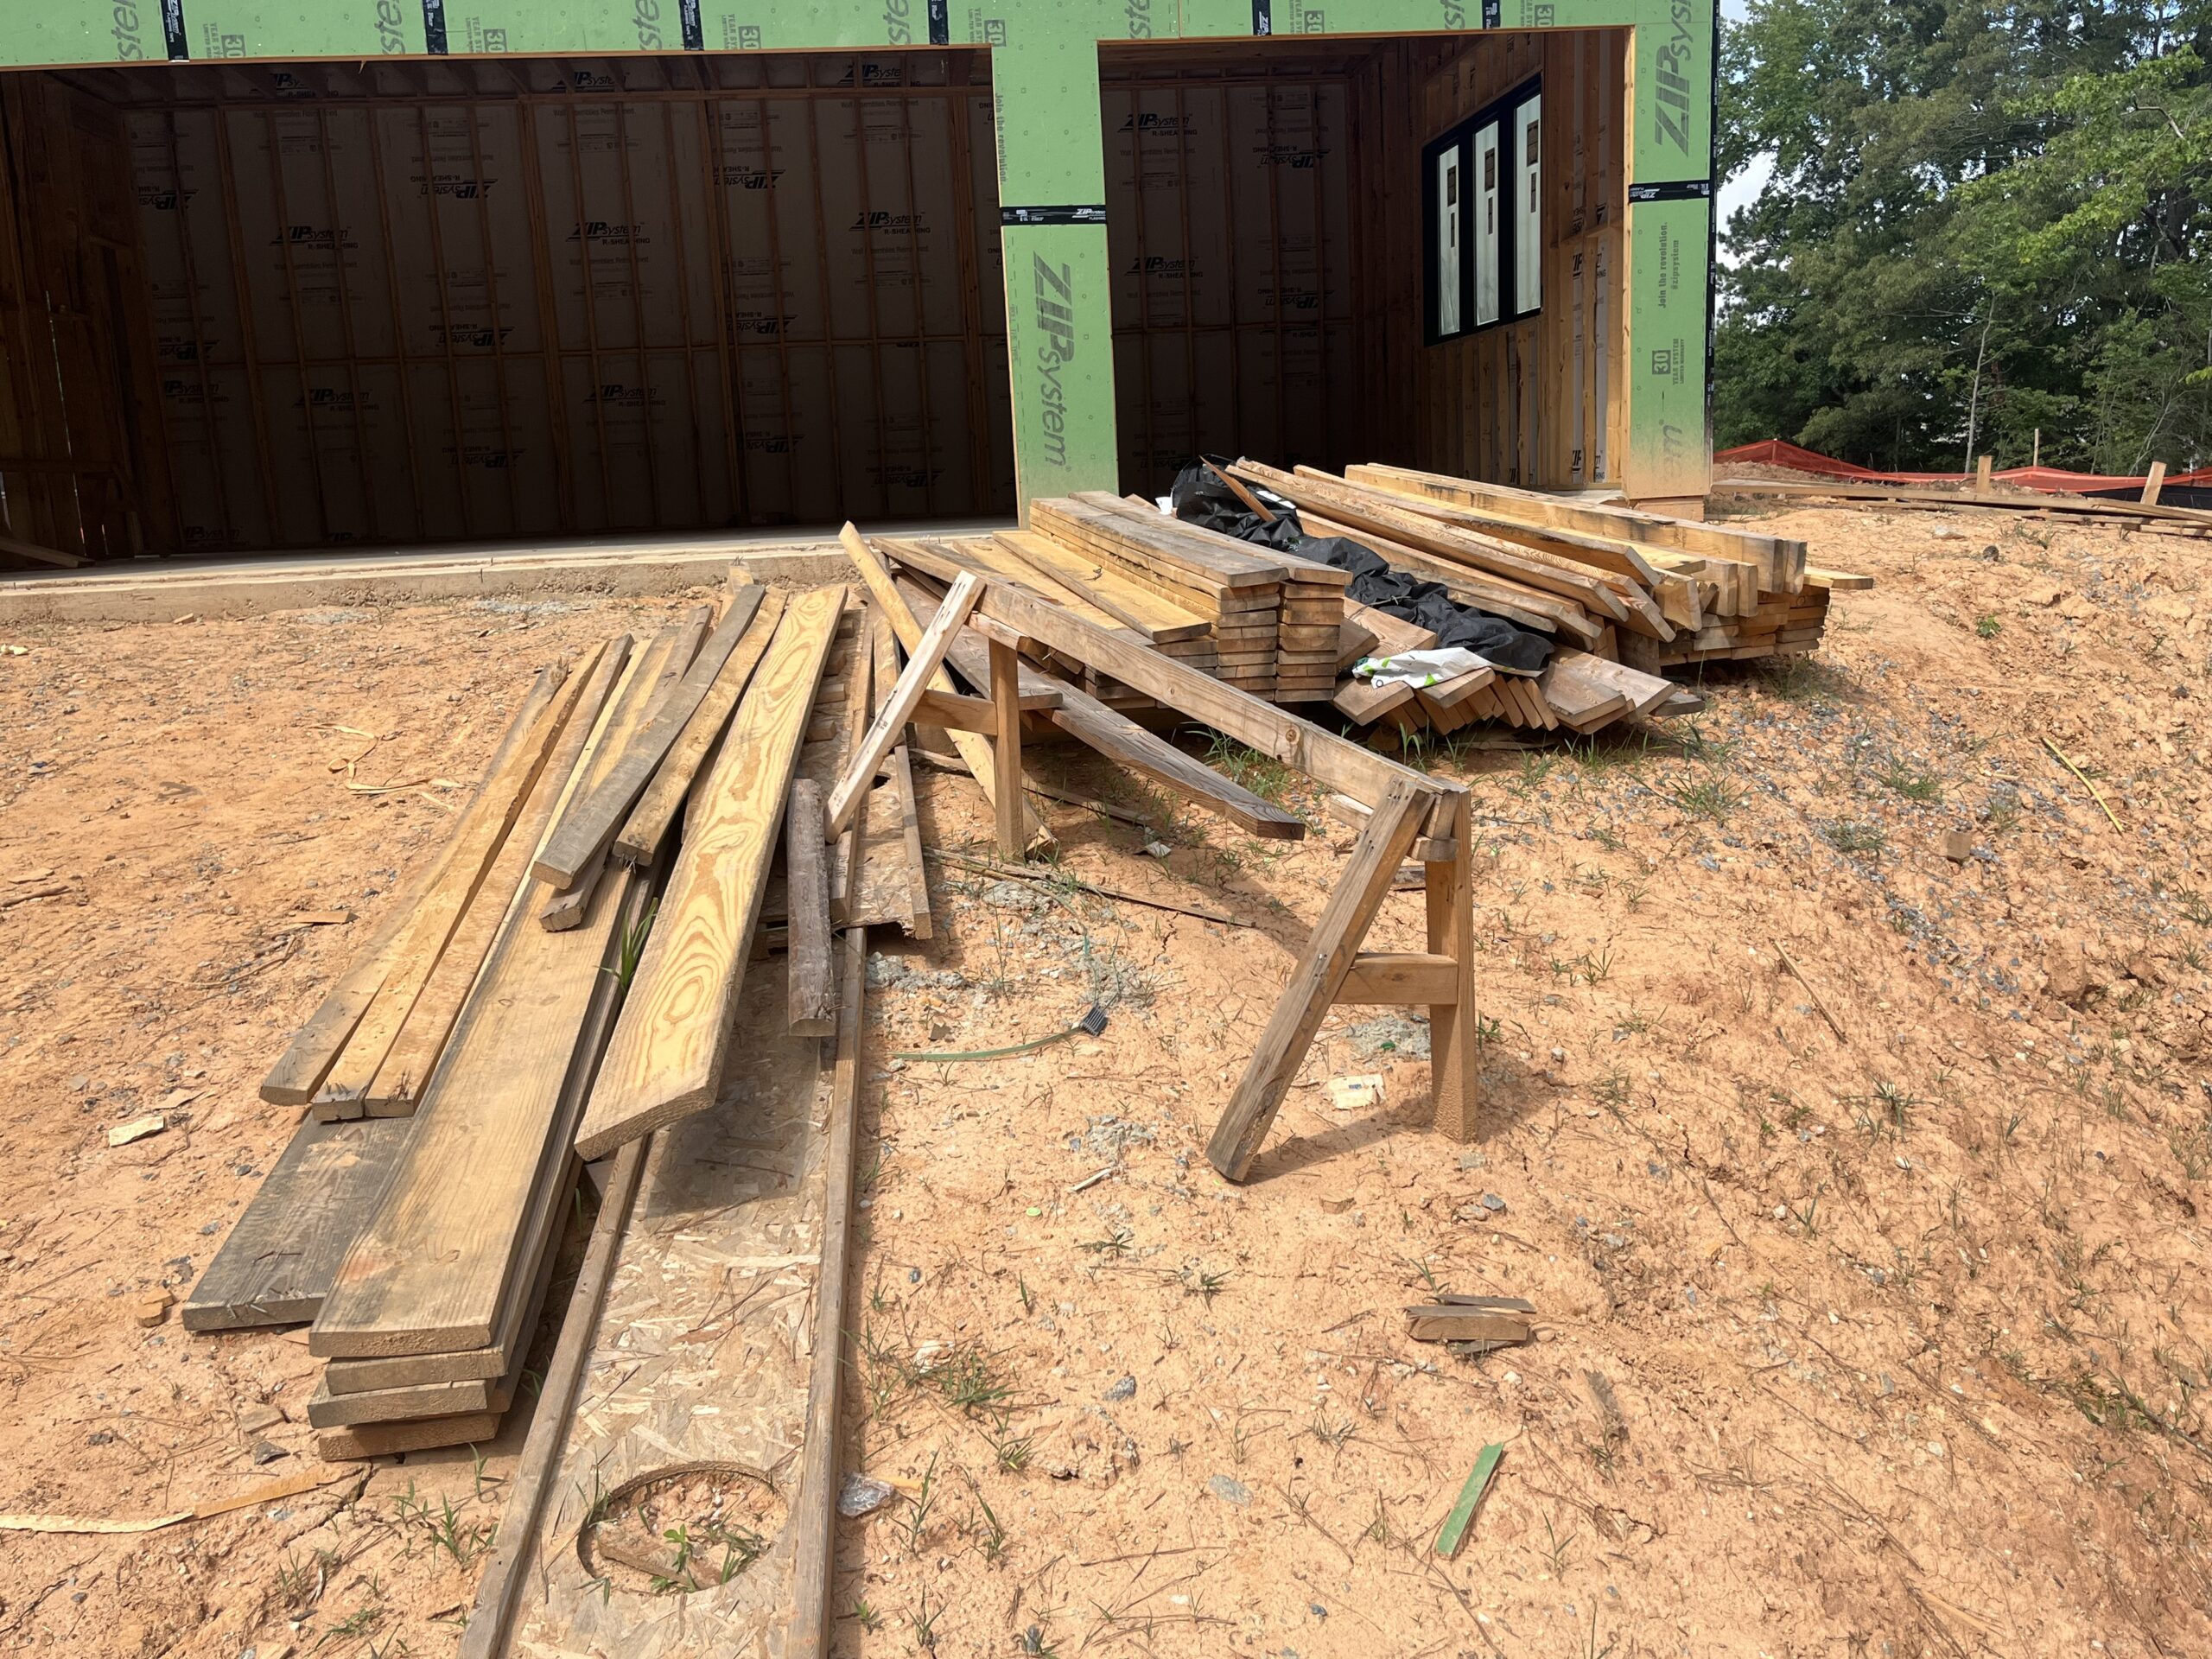
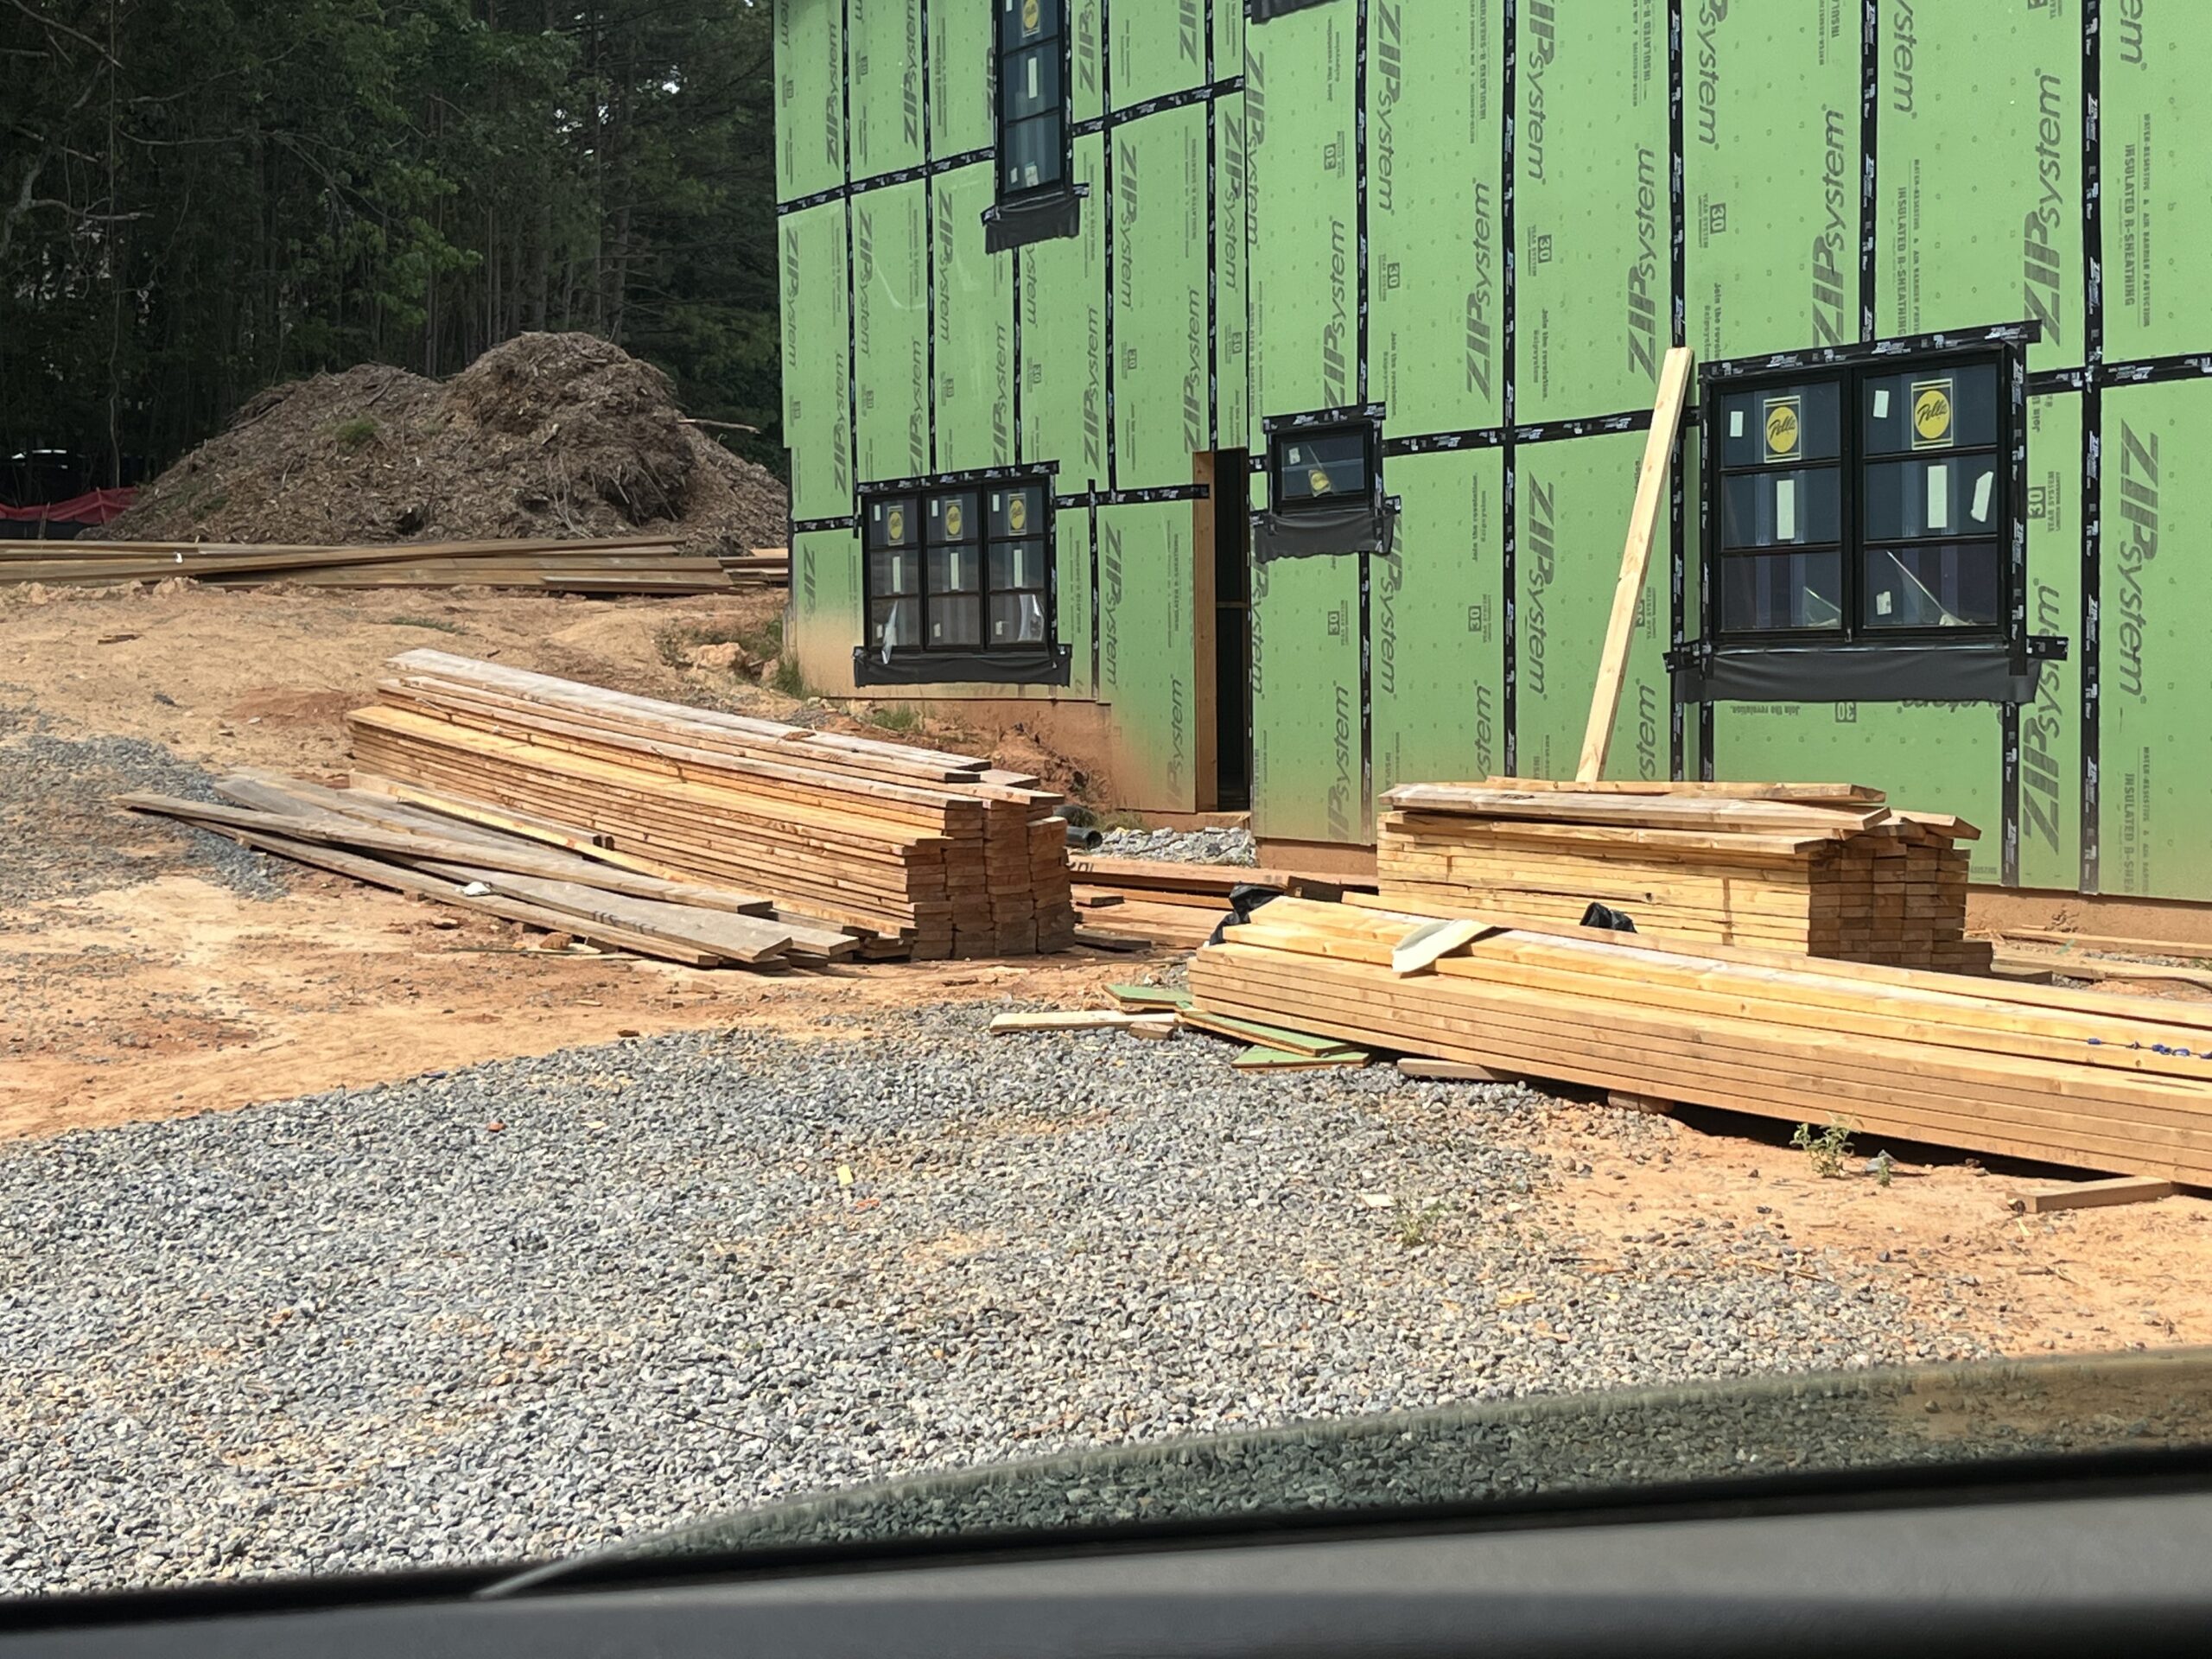
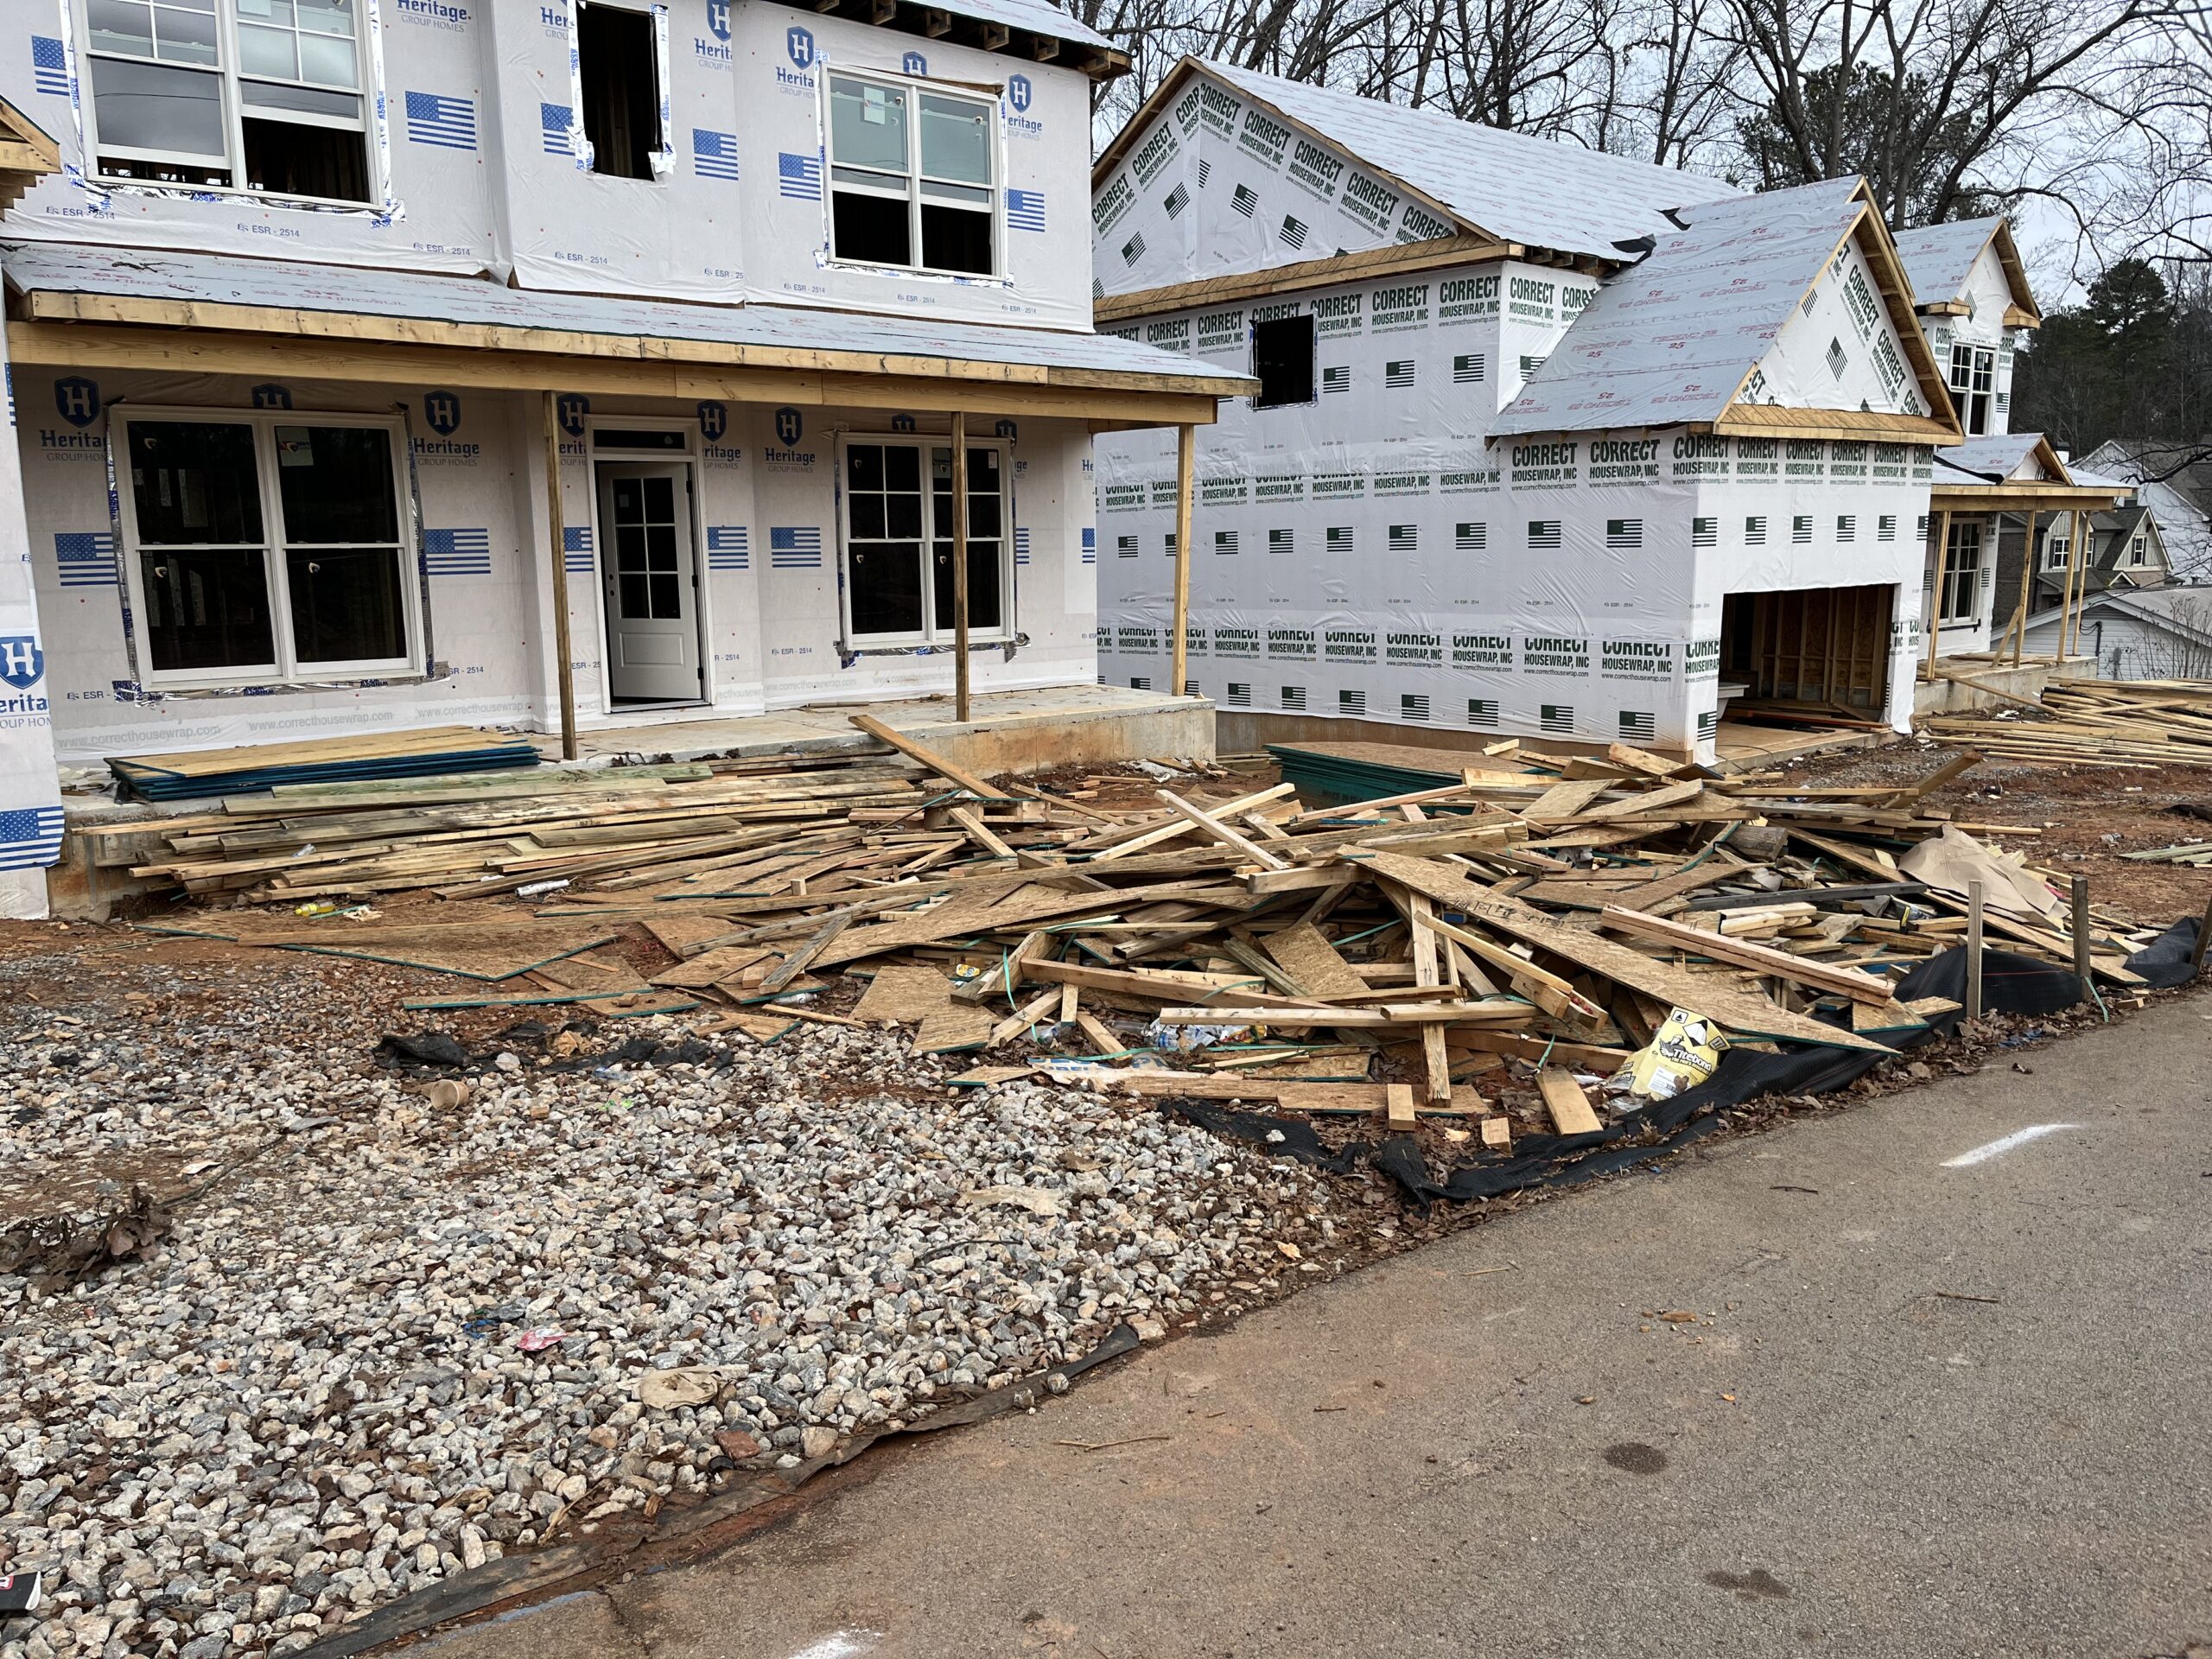
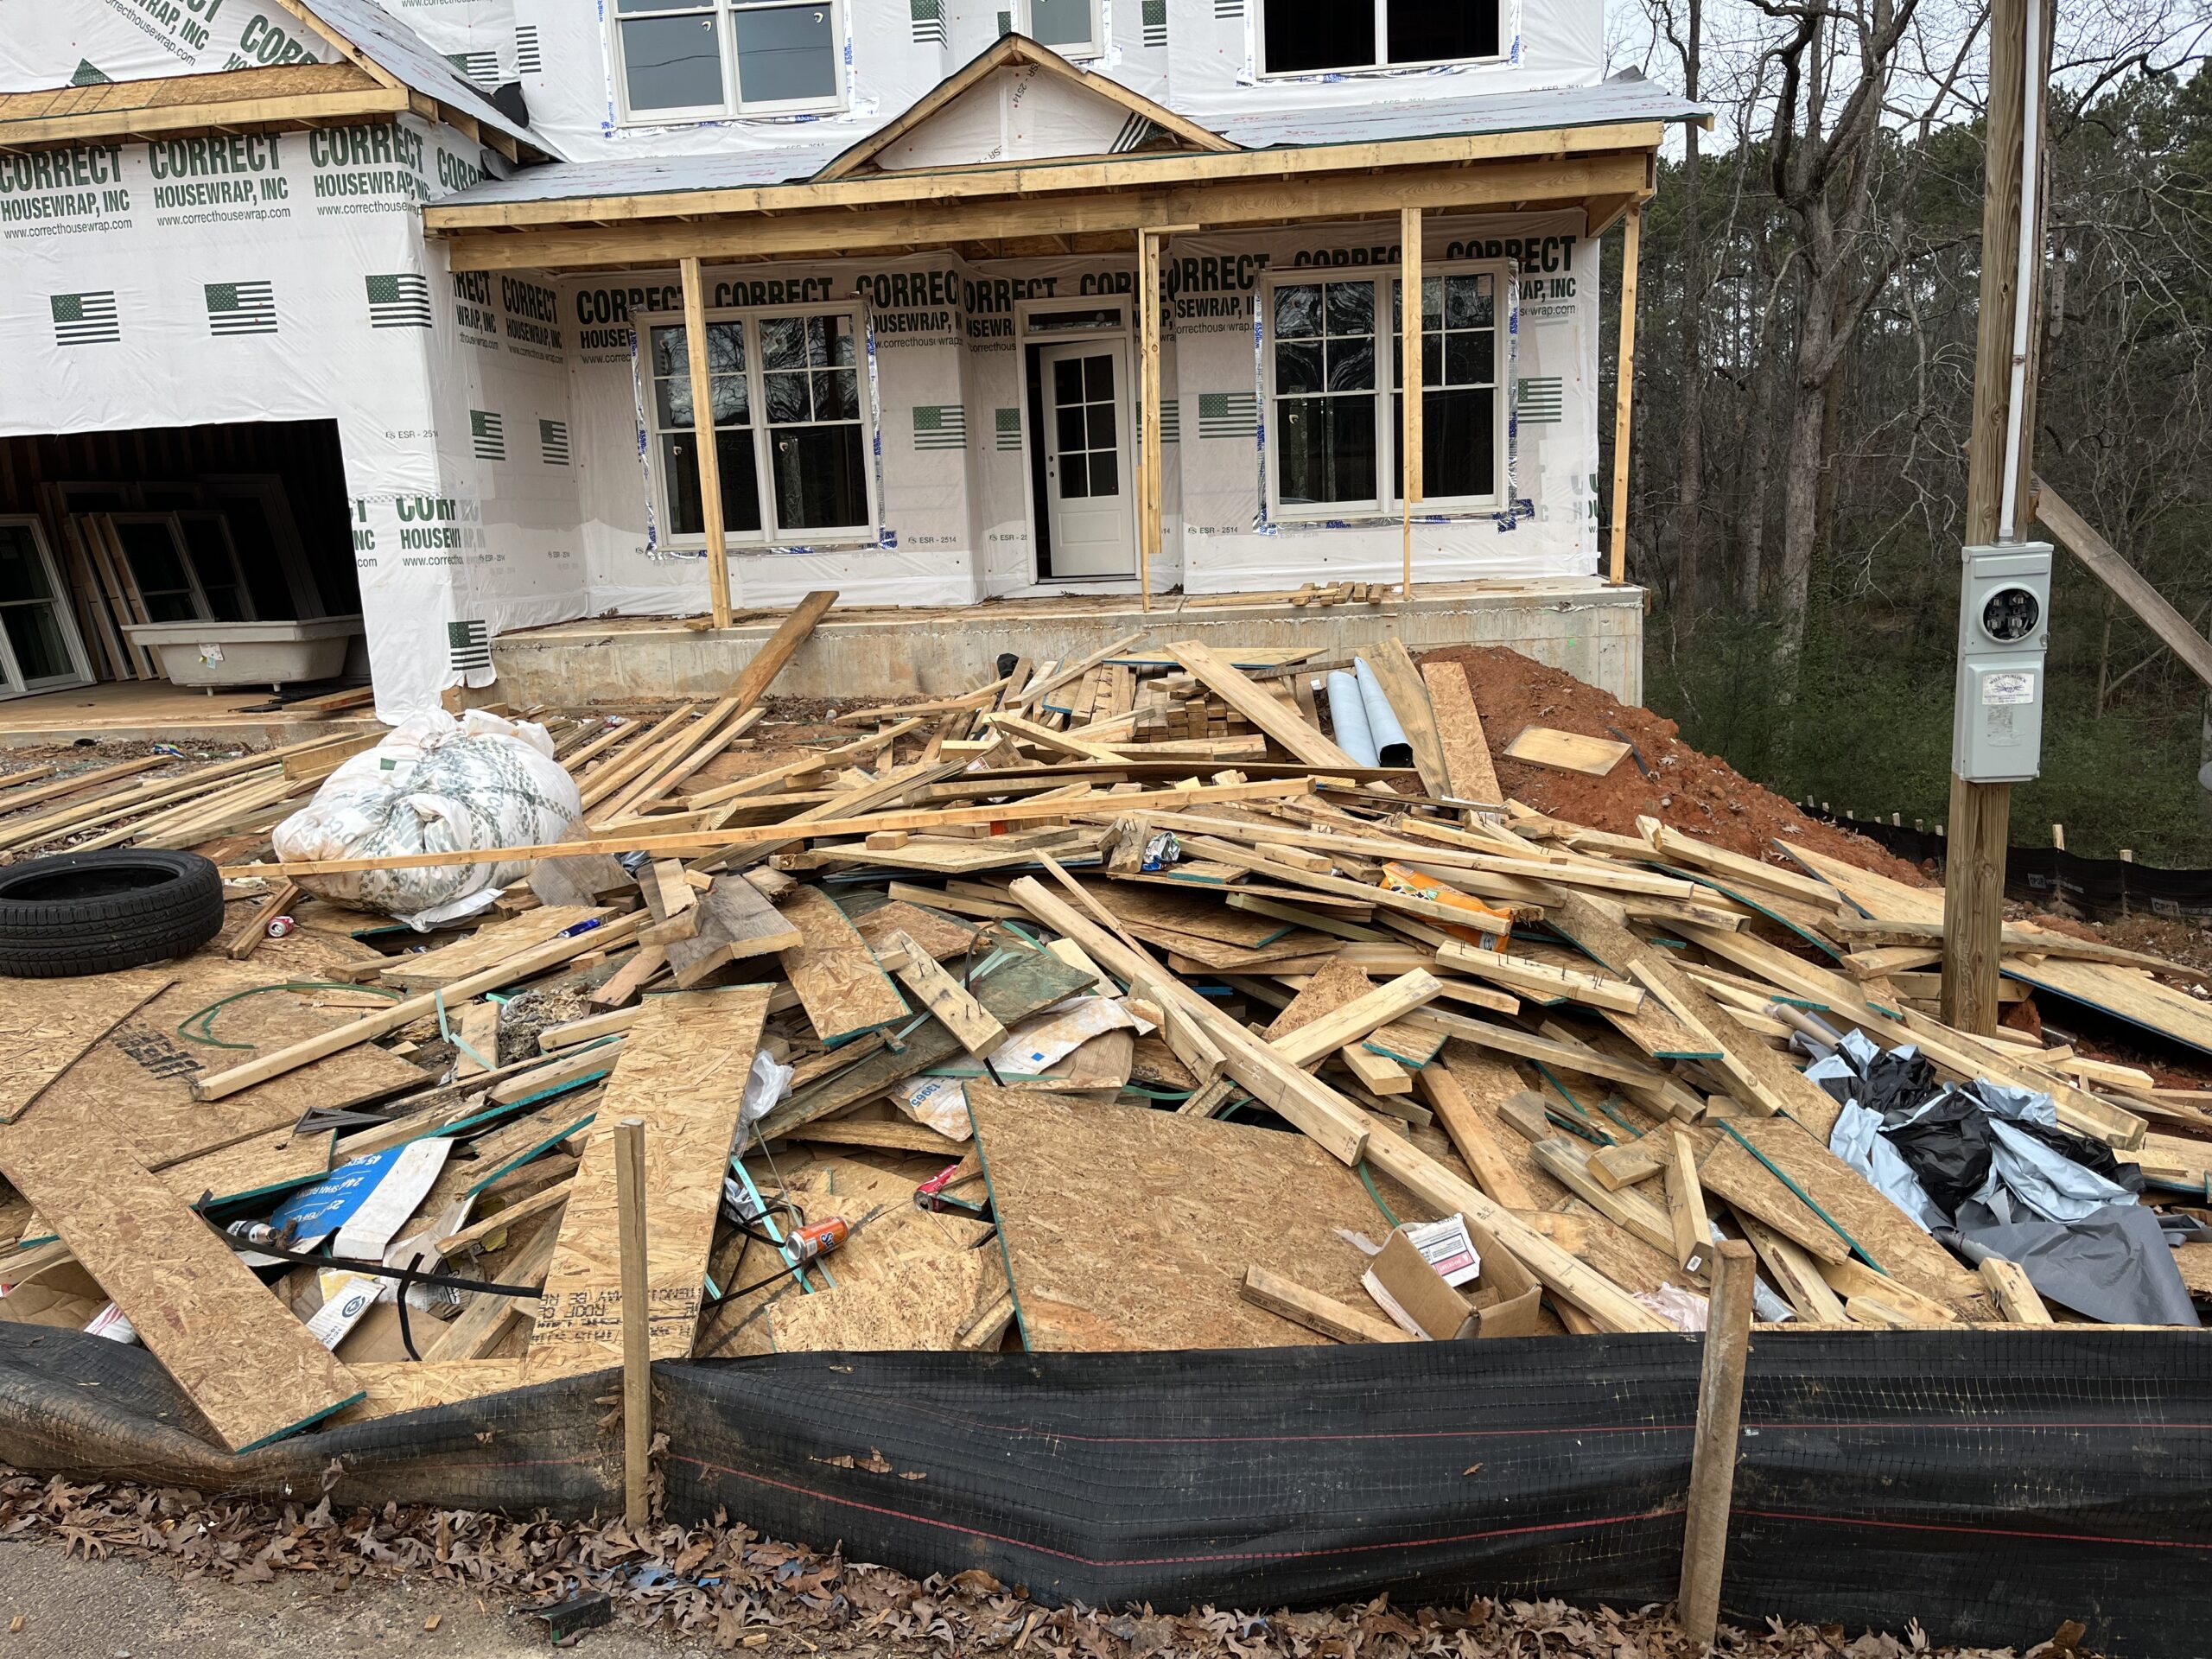
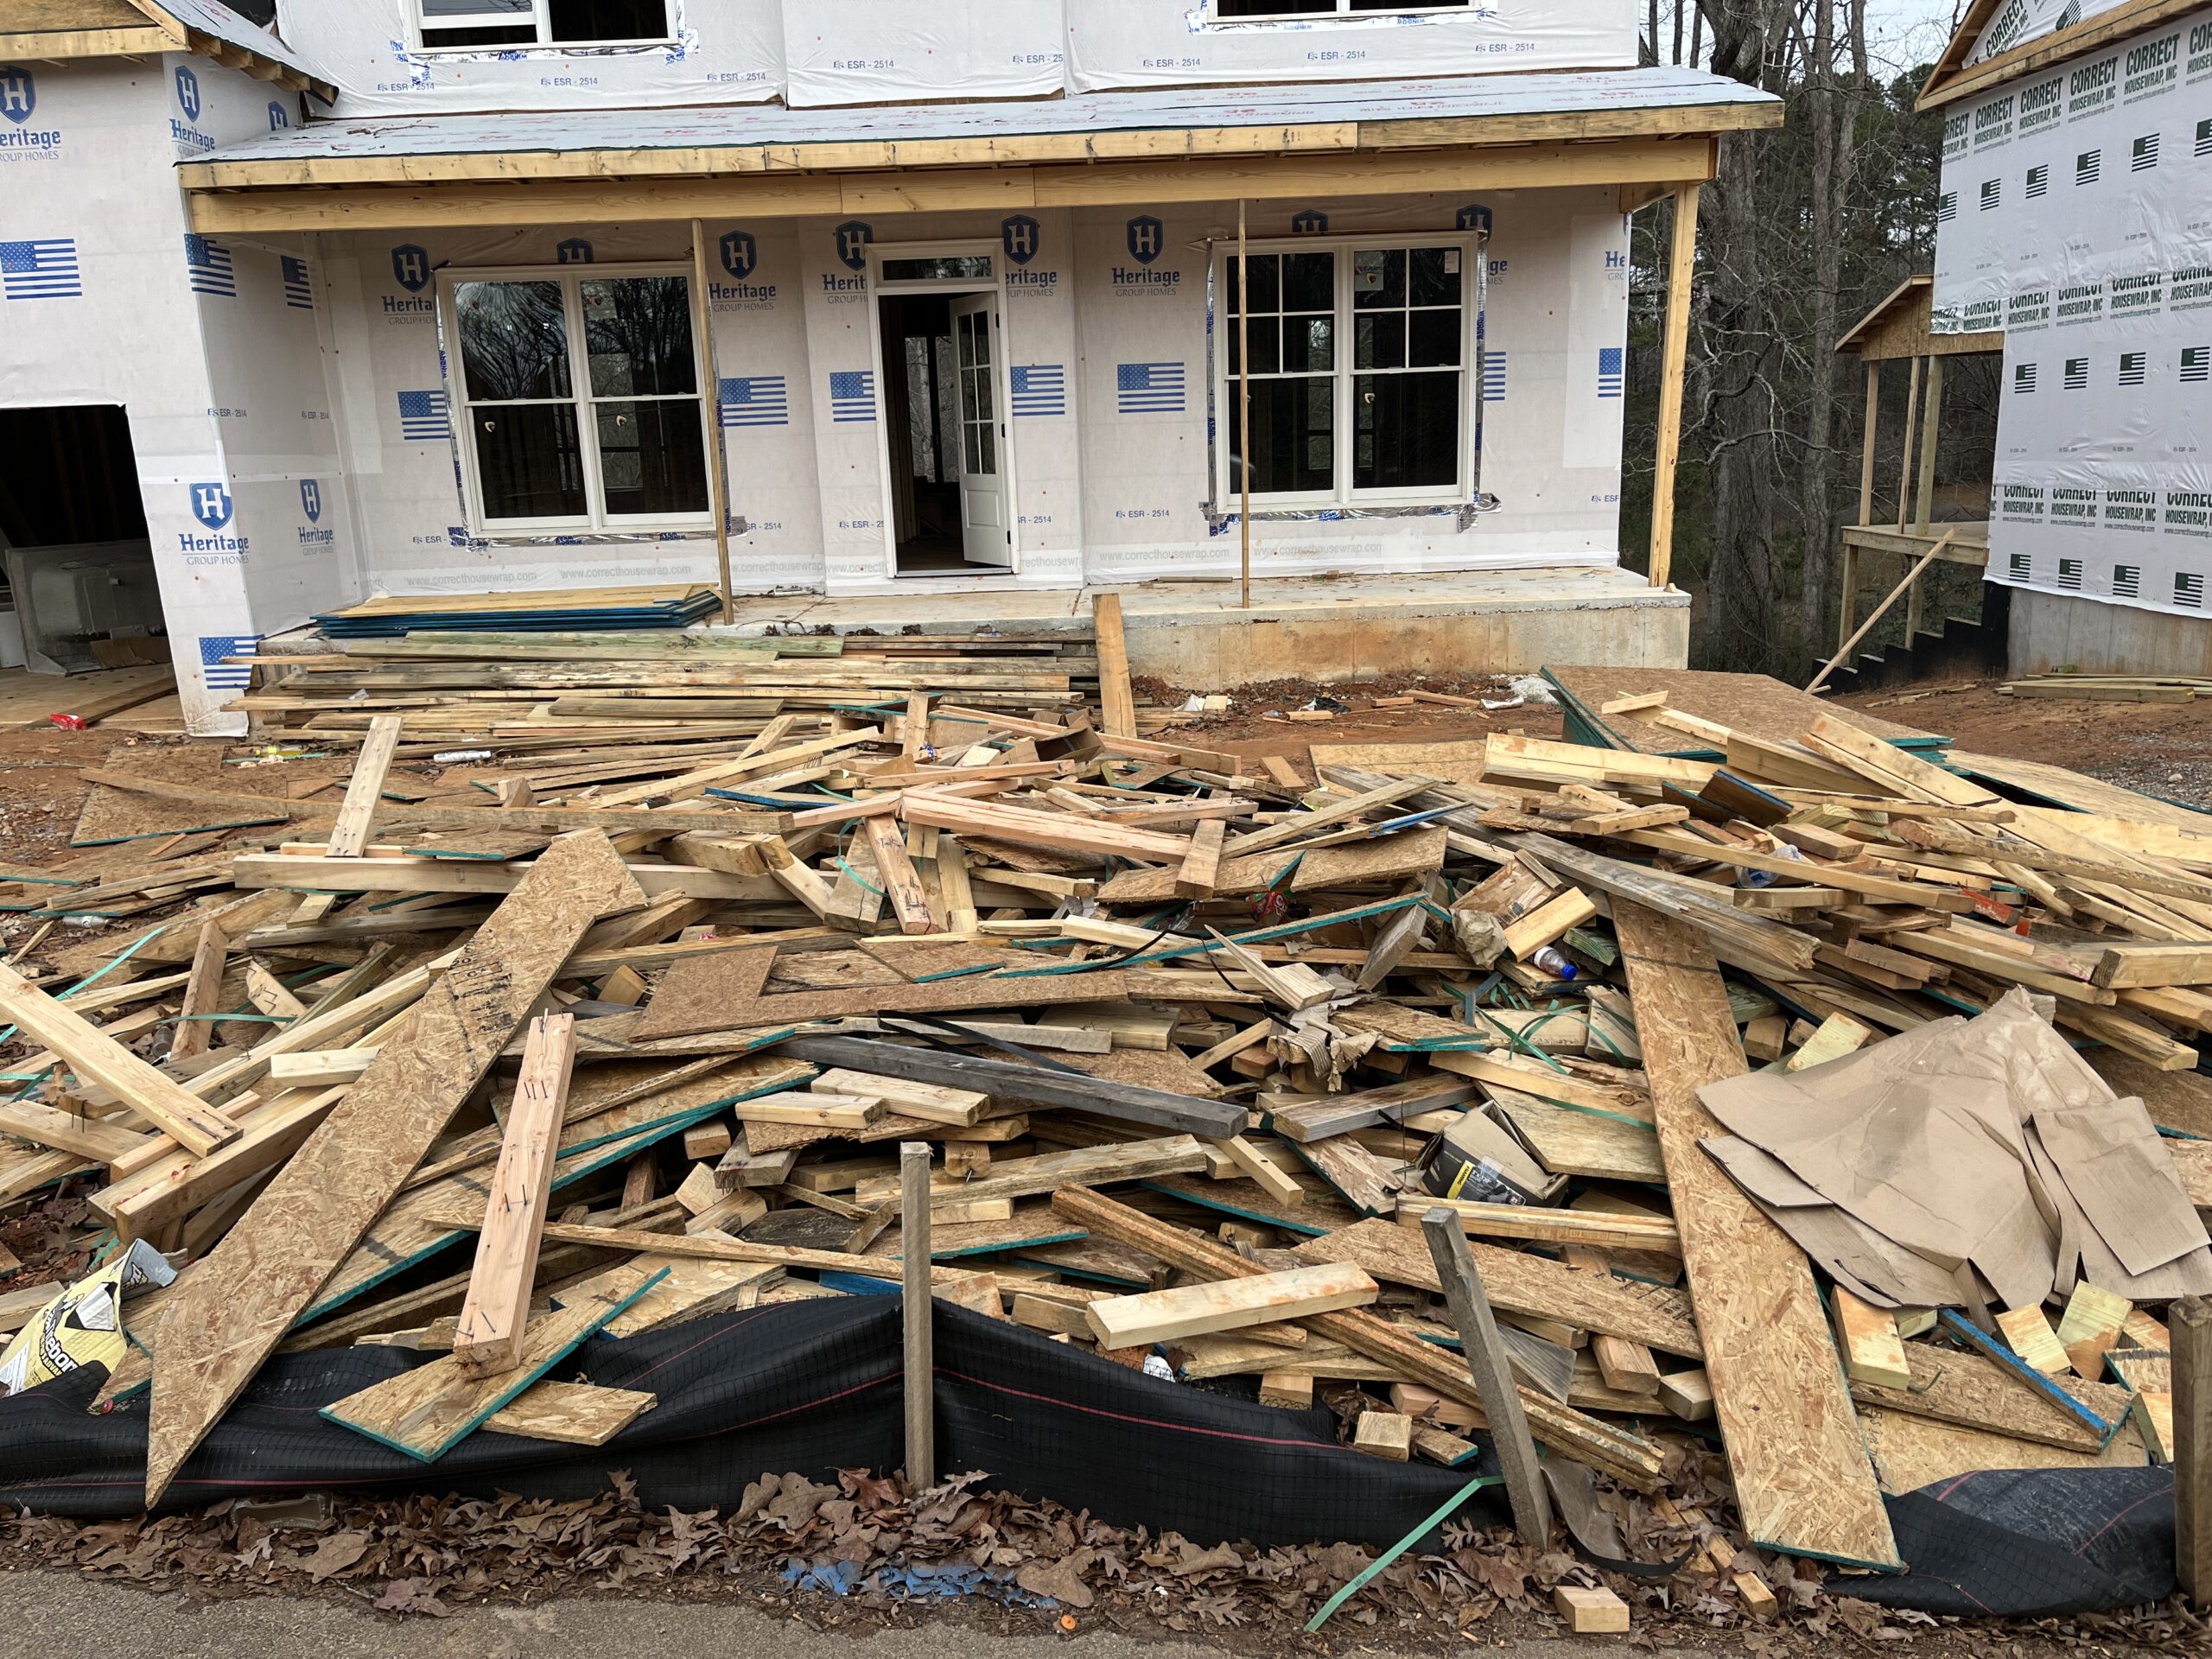
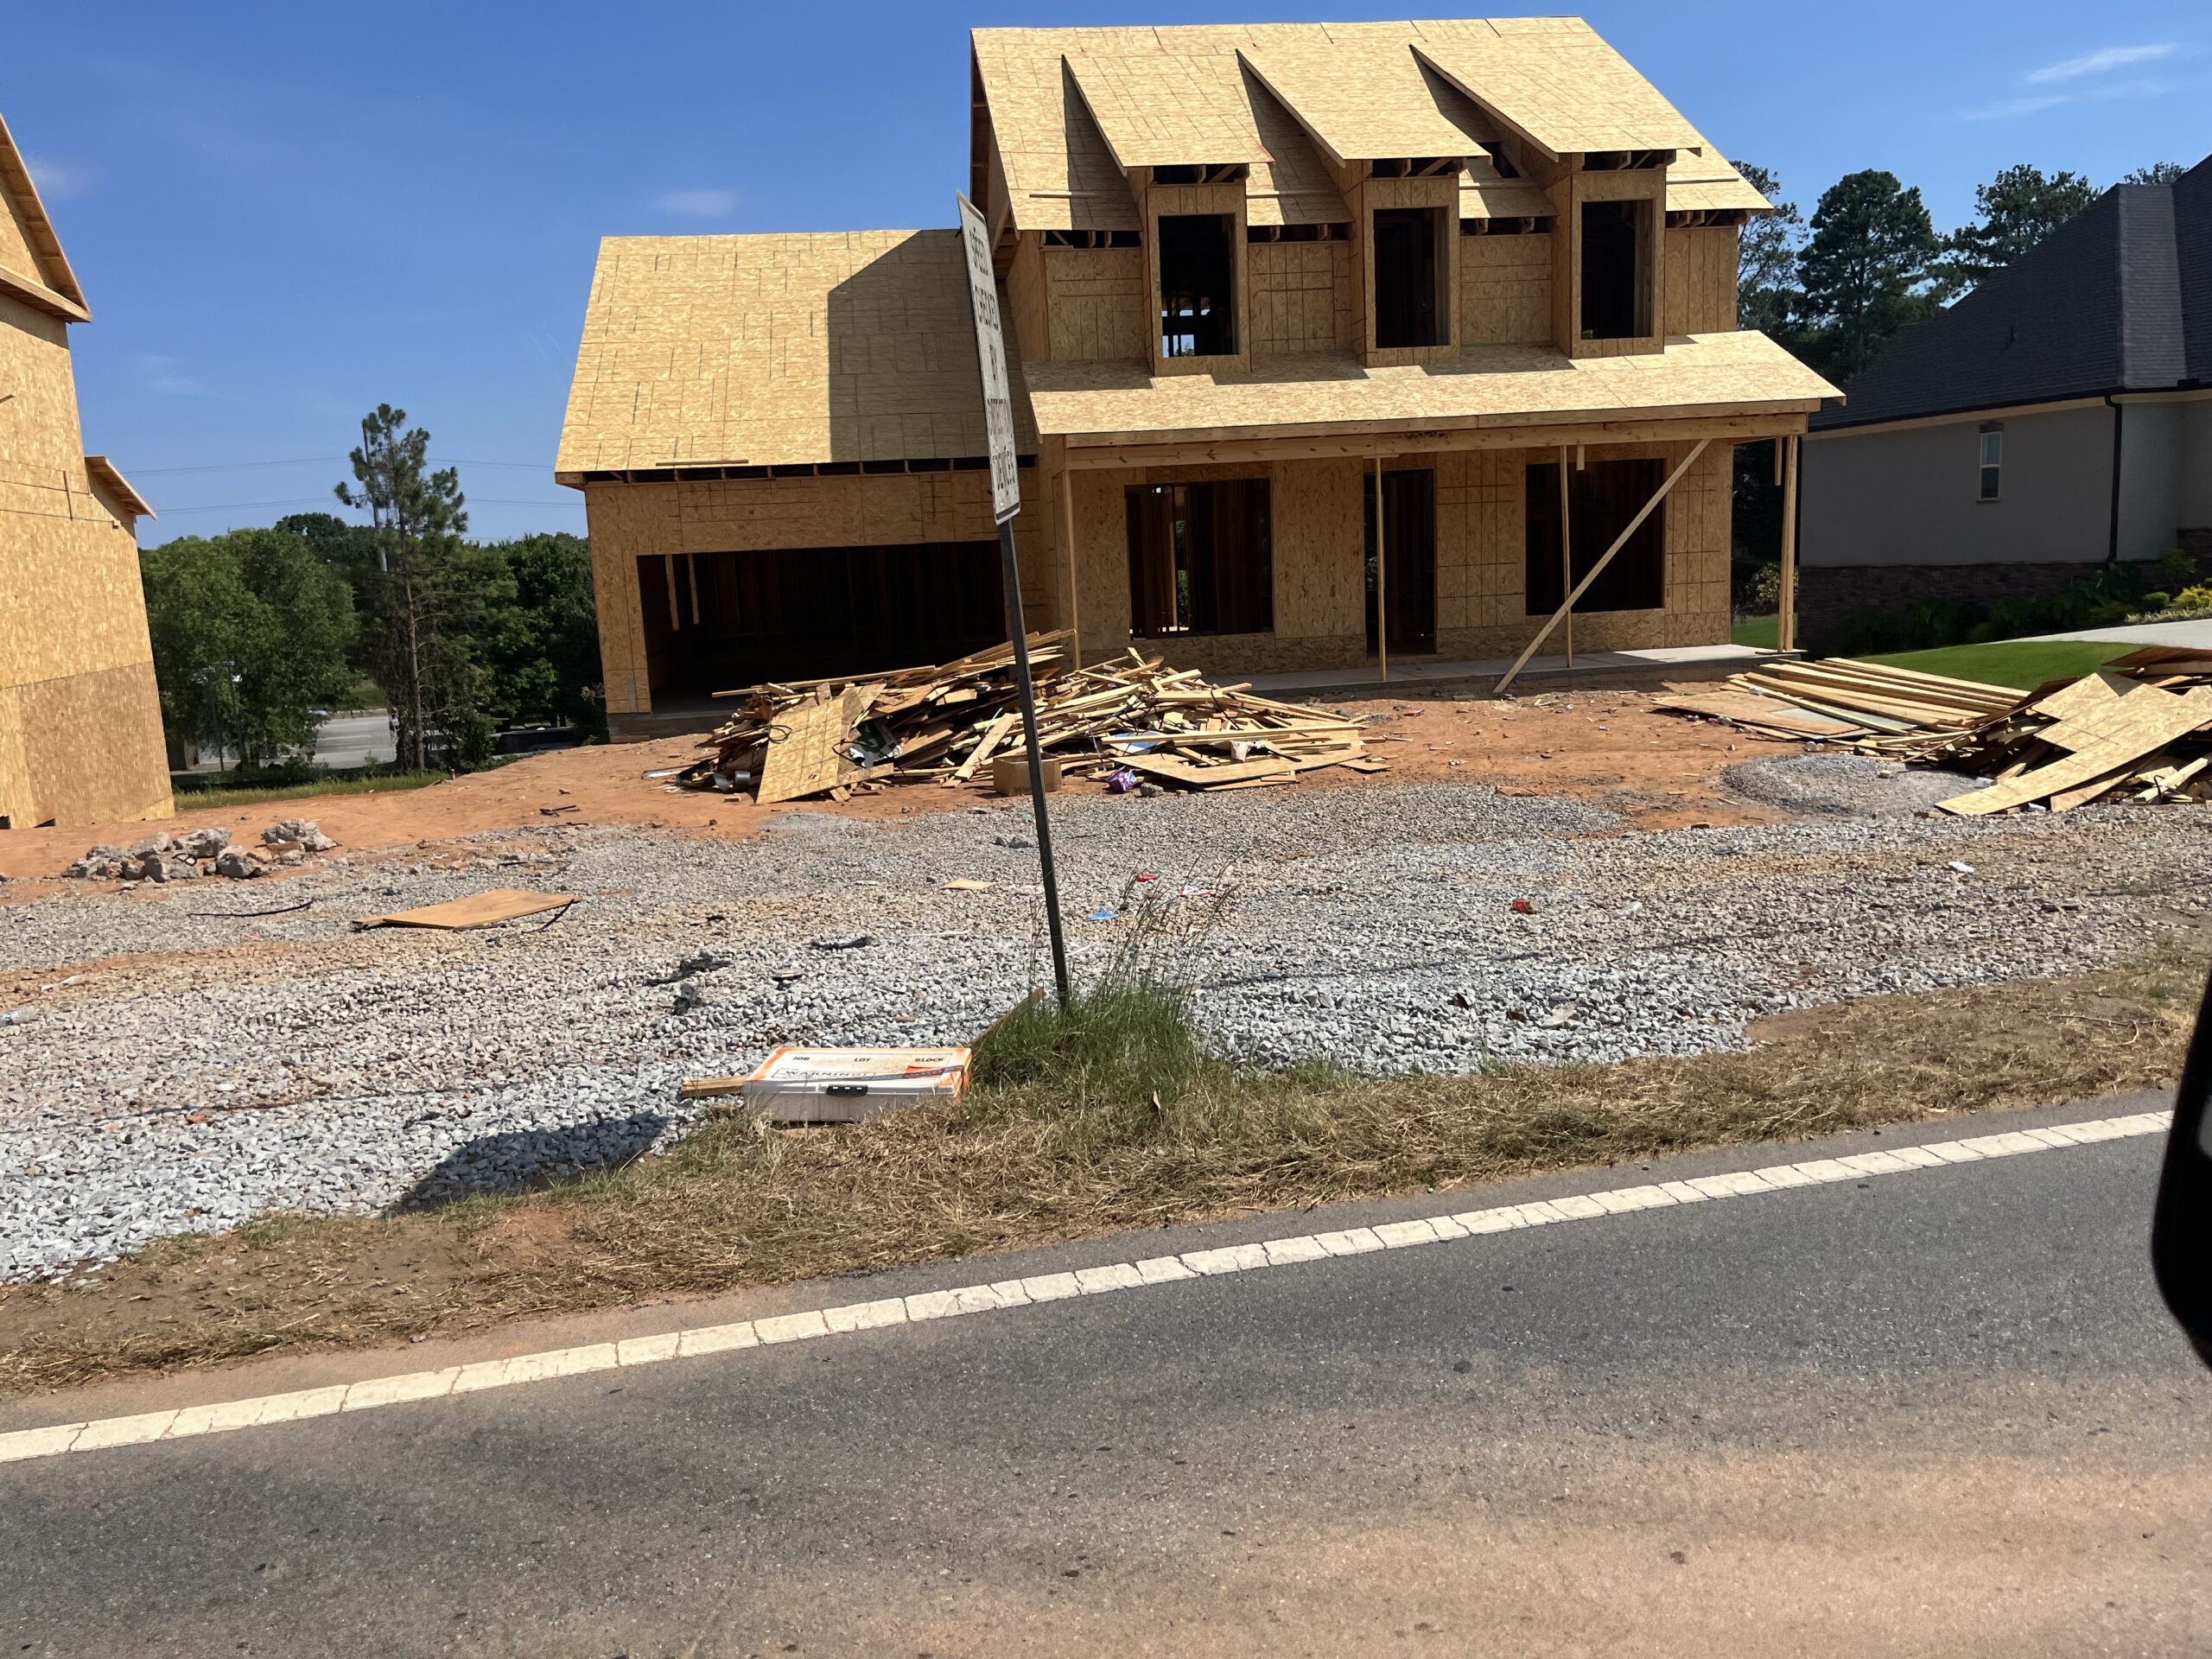
A Shotgun Takeoff is NOT a complete or accurate Material List and CAN NOT BE USED to get a firm Pre-construction material cost. It is usually prepared by a Sales rep to ballpark an estimate or by the Framer on-site during construction. This is a quick list of material put together to get started that results in multiple orders and deliveries of material that are usually the wrong lengths and quantities. This slows production and by the time the Roof System has been cut and set, the jobsite has huge piles of waste with multiple dumpster runs or stacks of expensive lumber waiting to be picked up for a credit return. This is not Smart Cost Control or Material Management and can create problems with budgeting in other areas of the project.
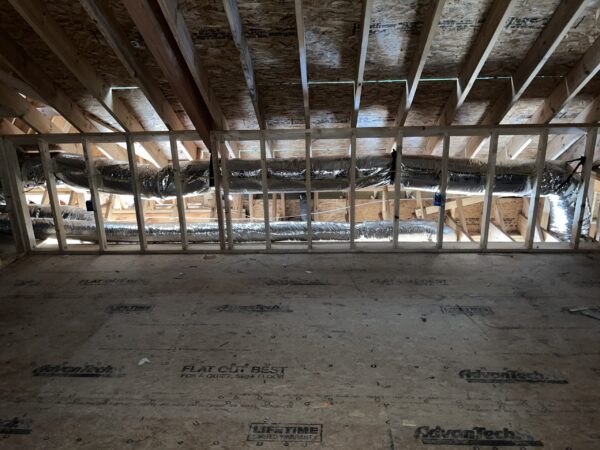
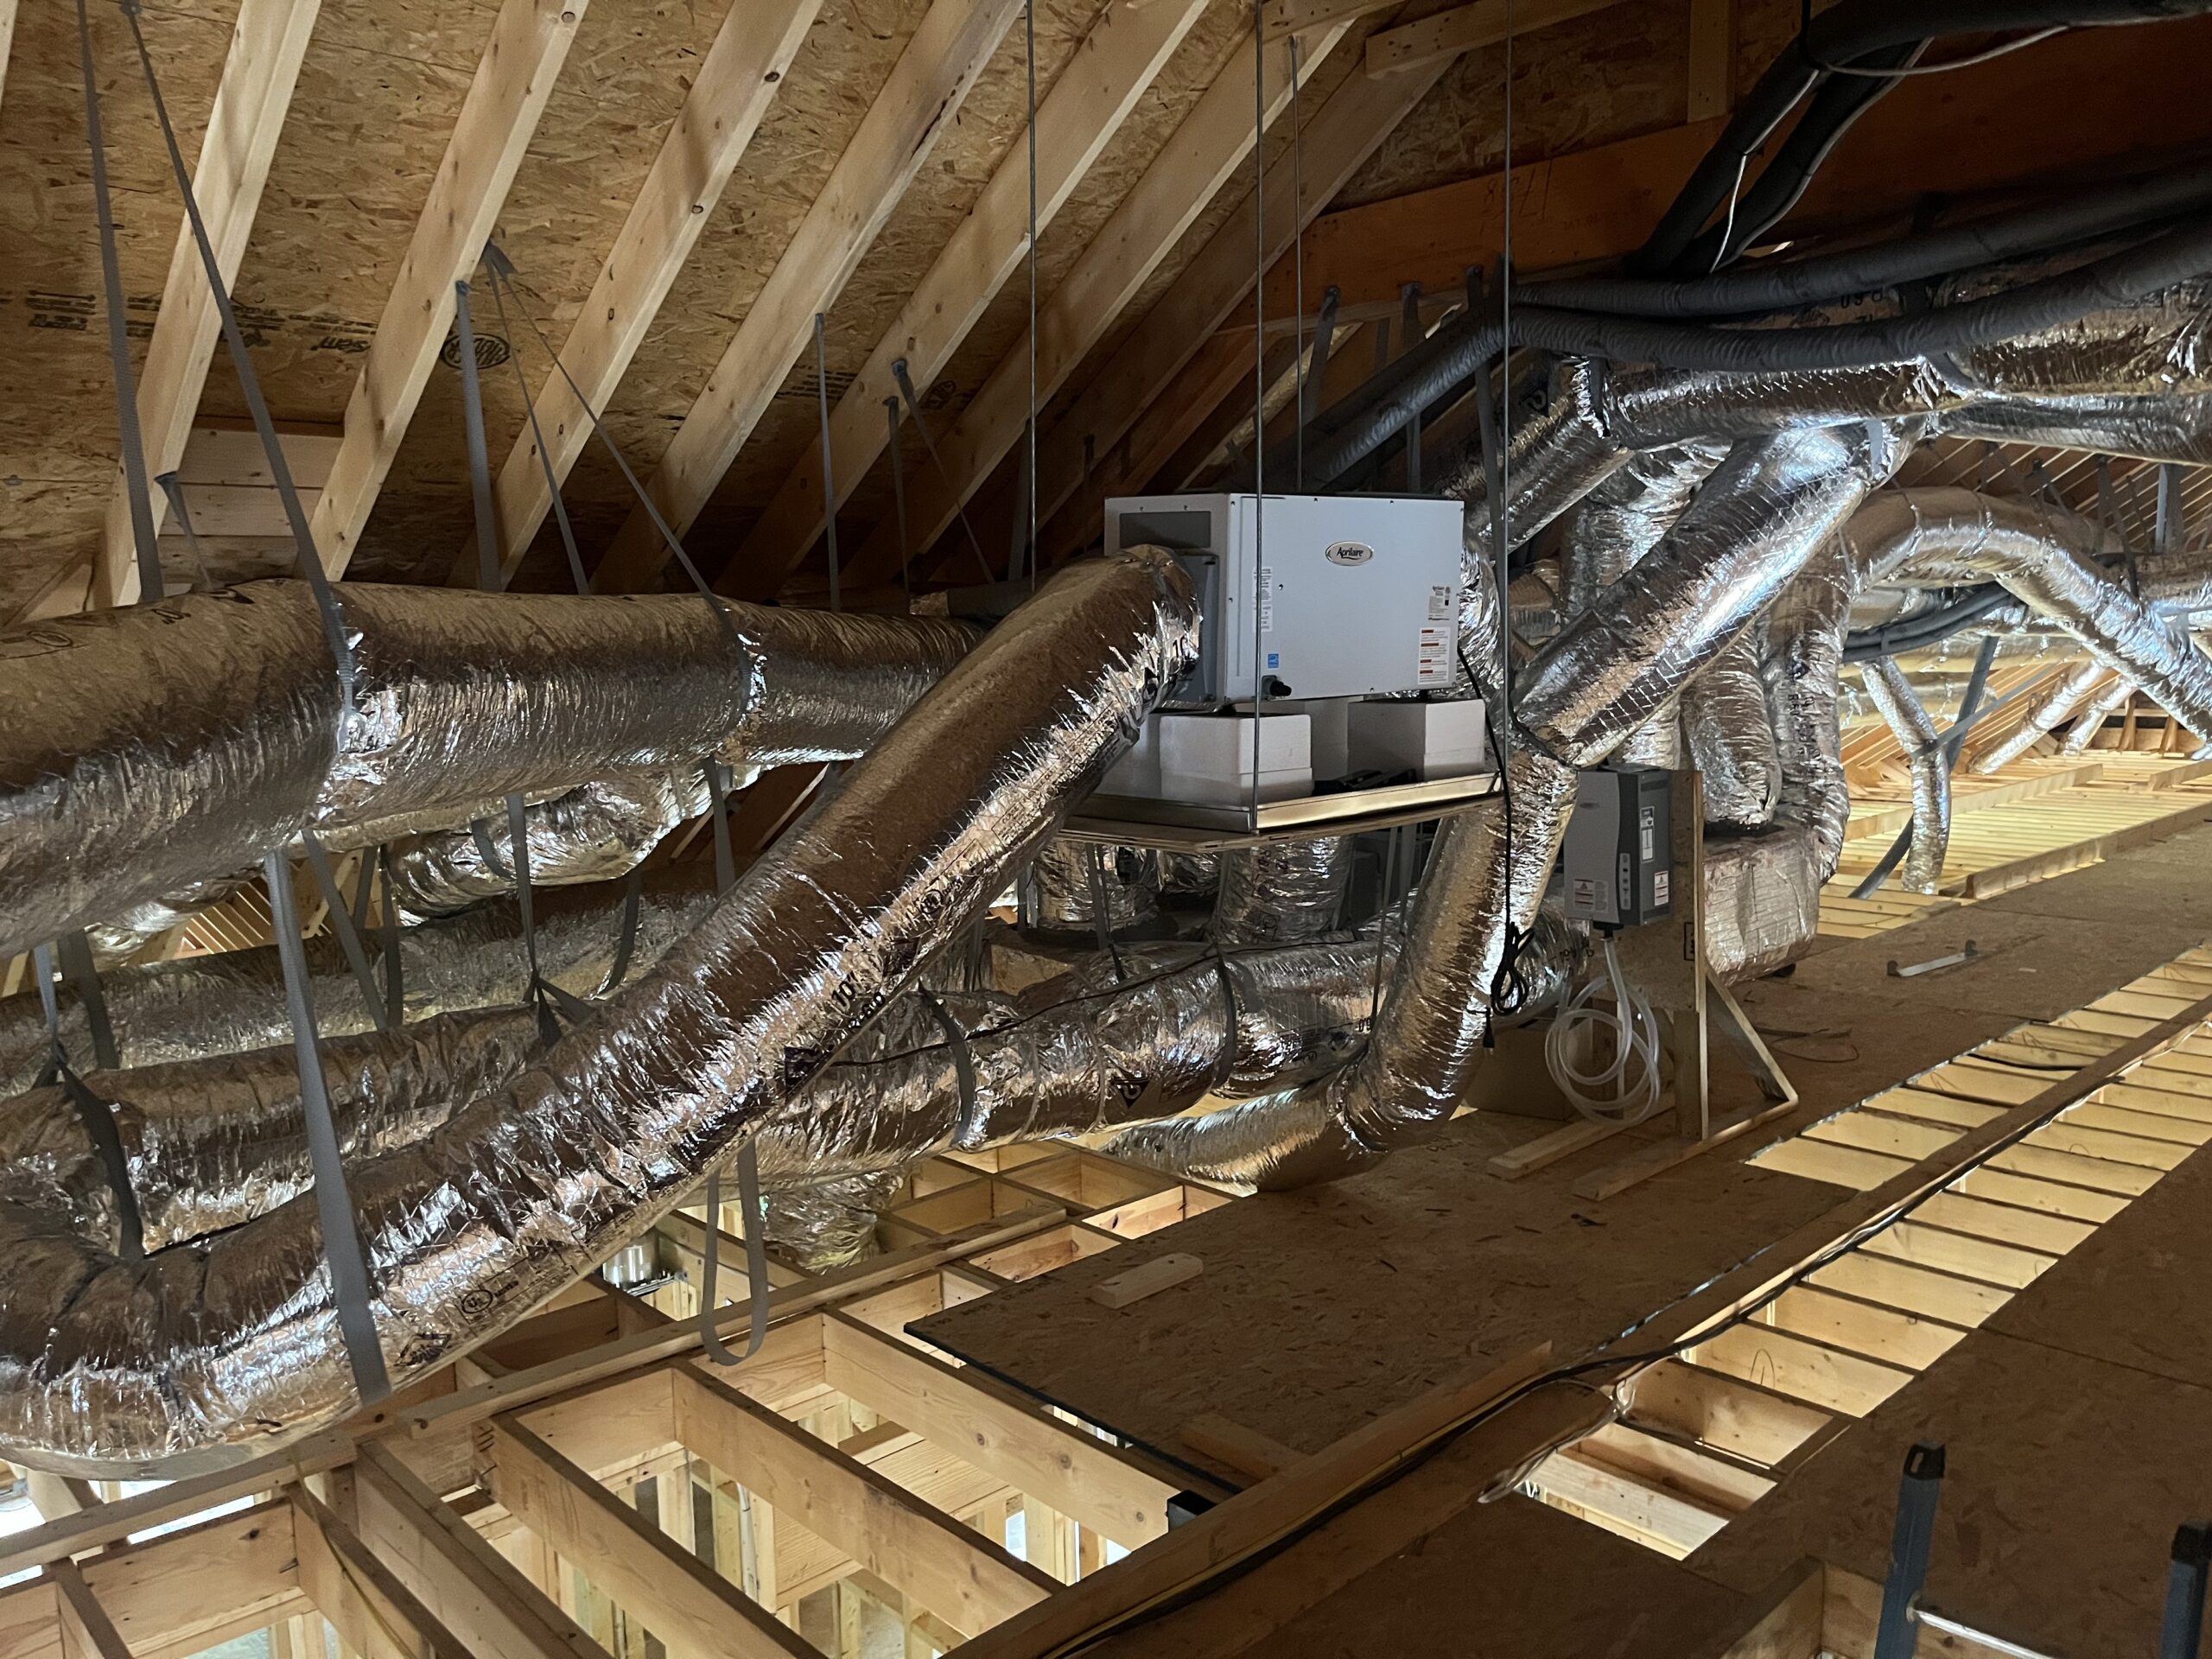
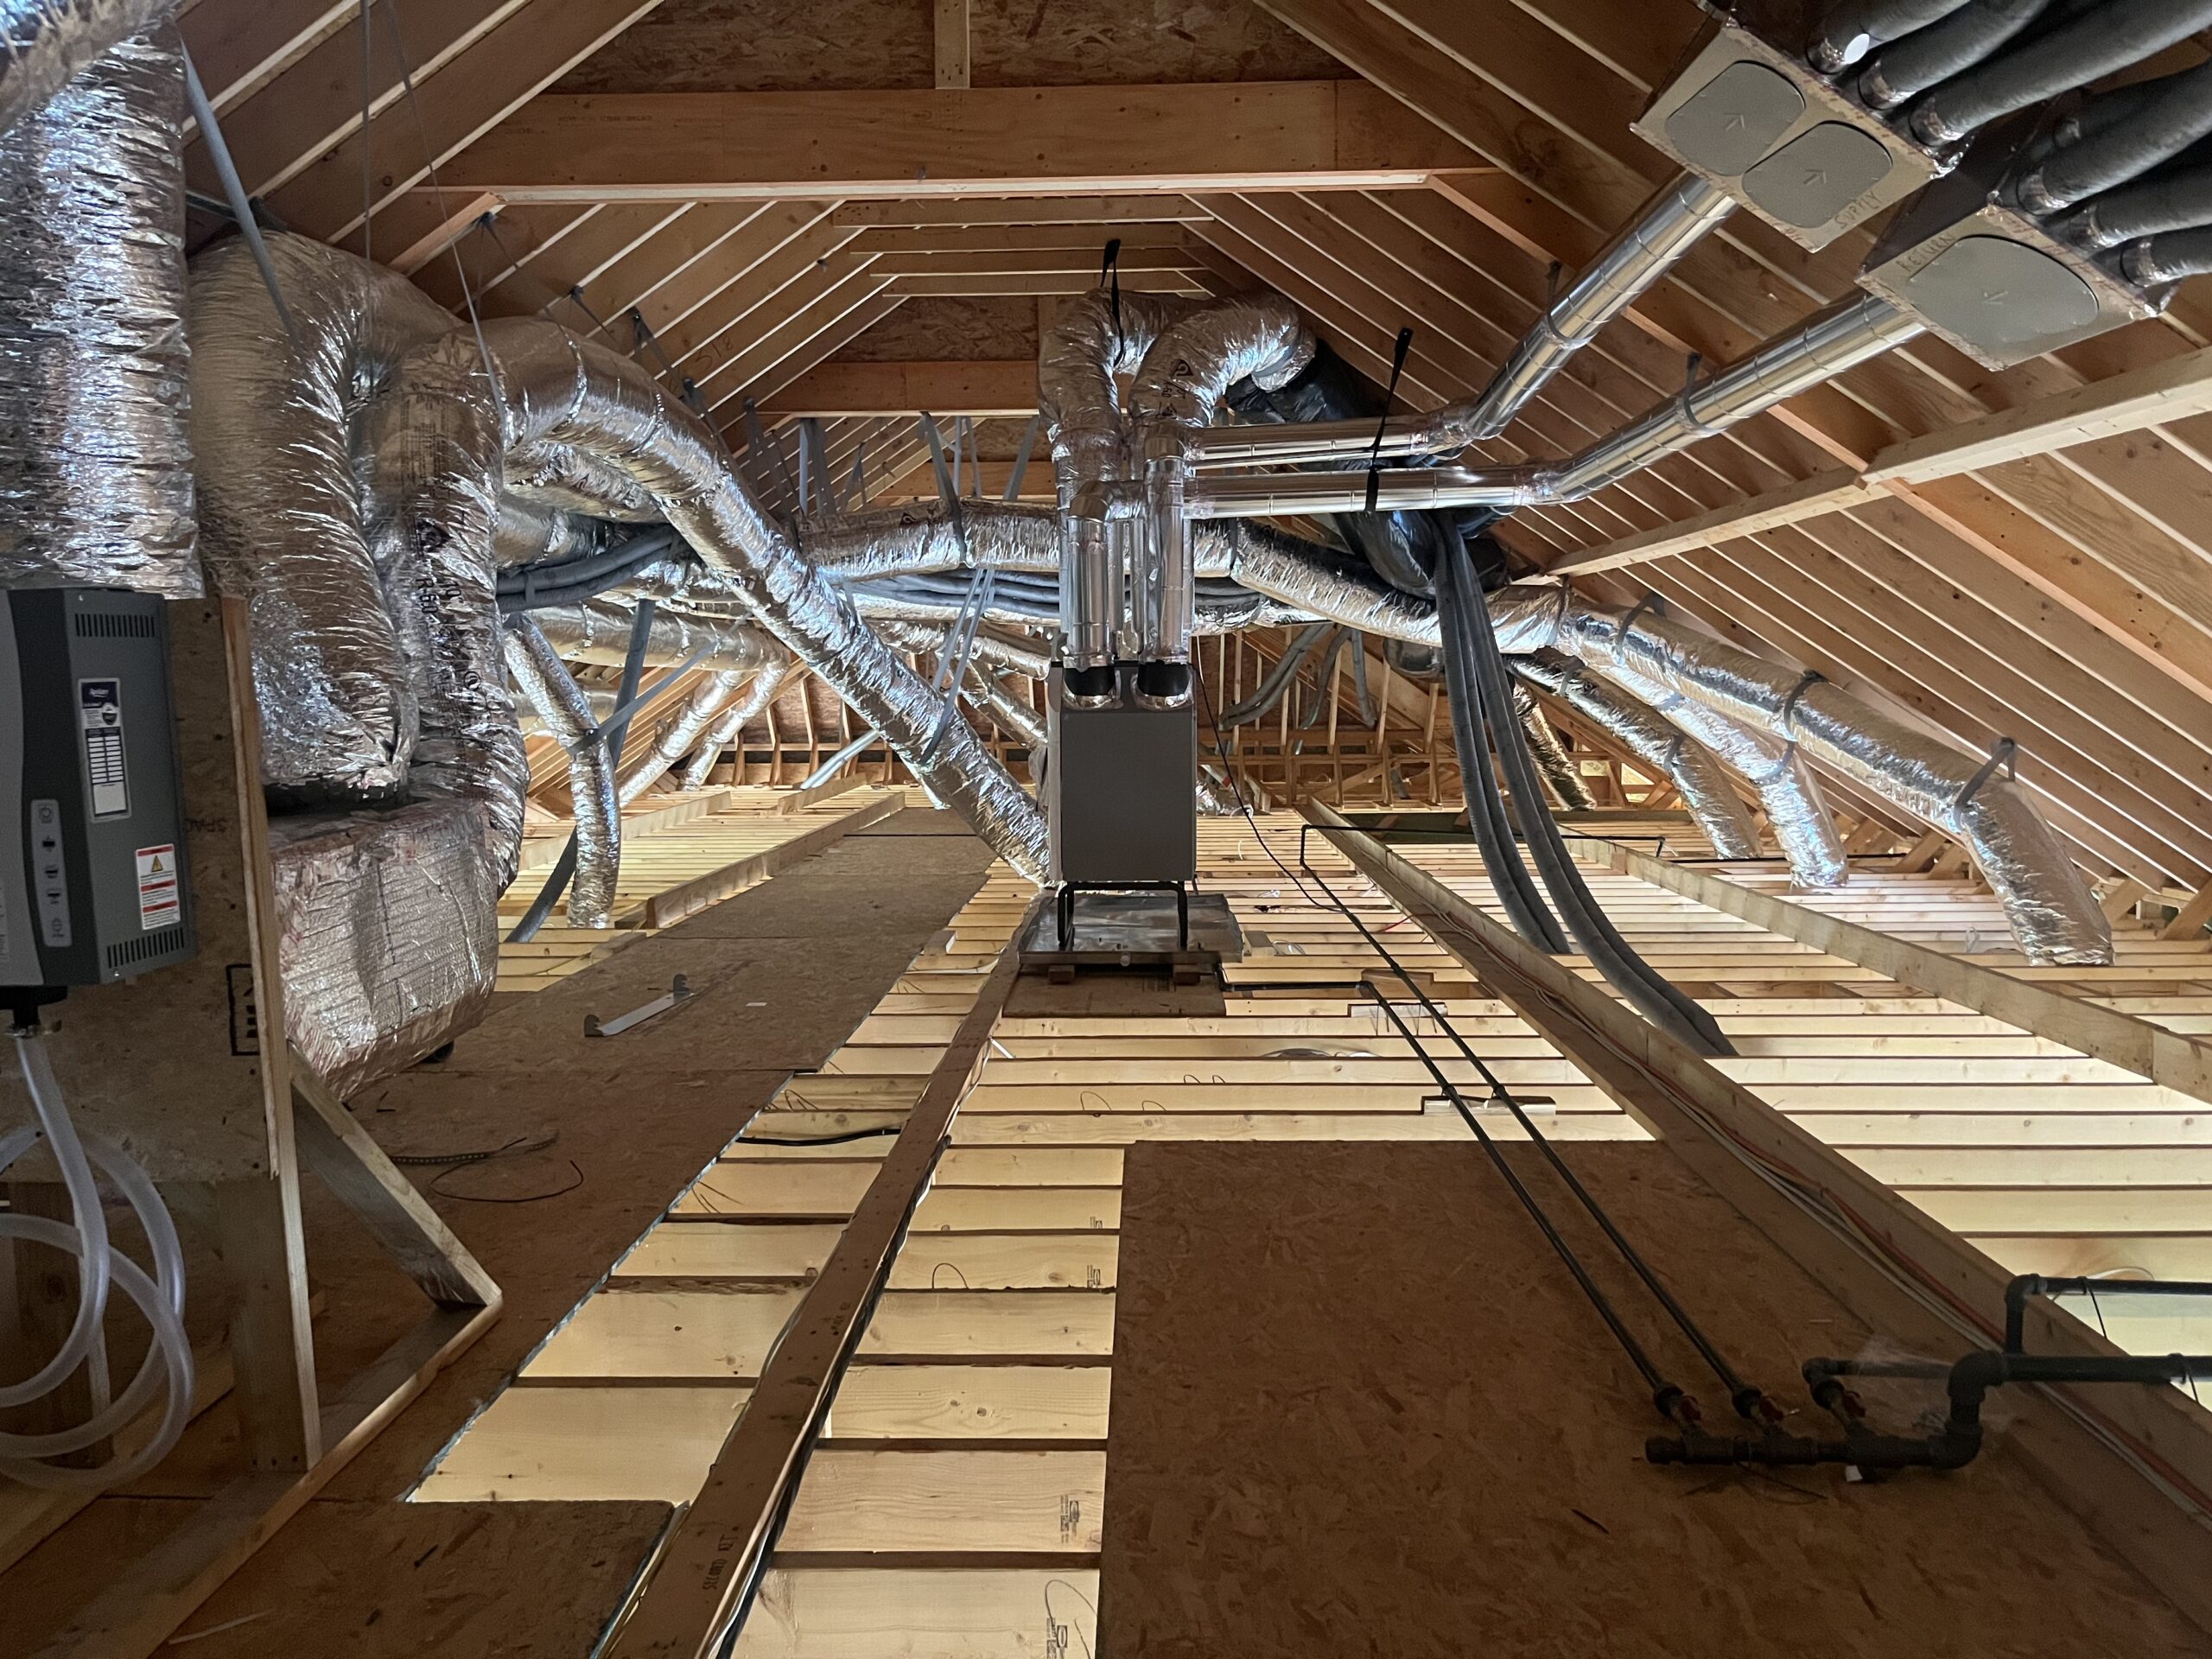
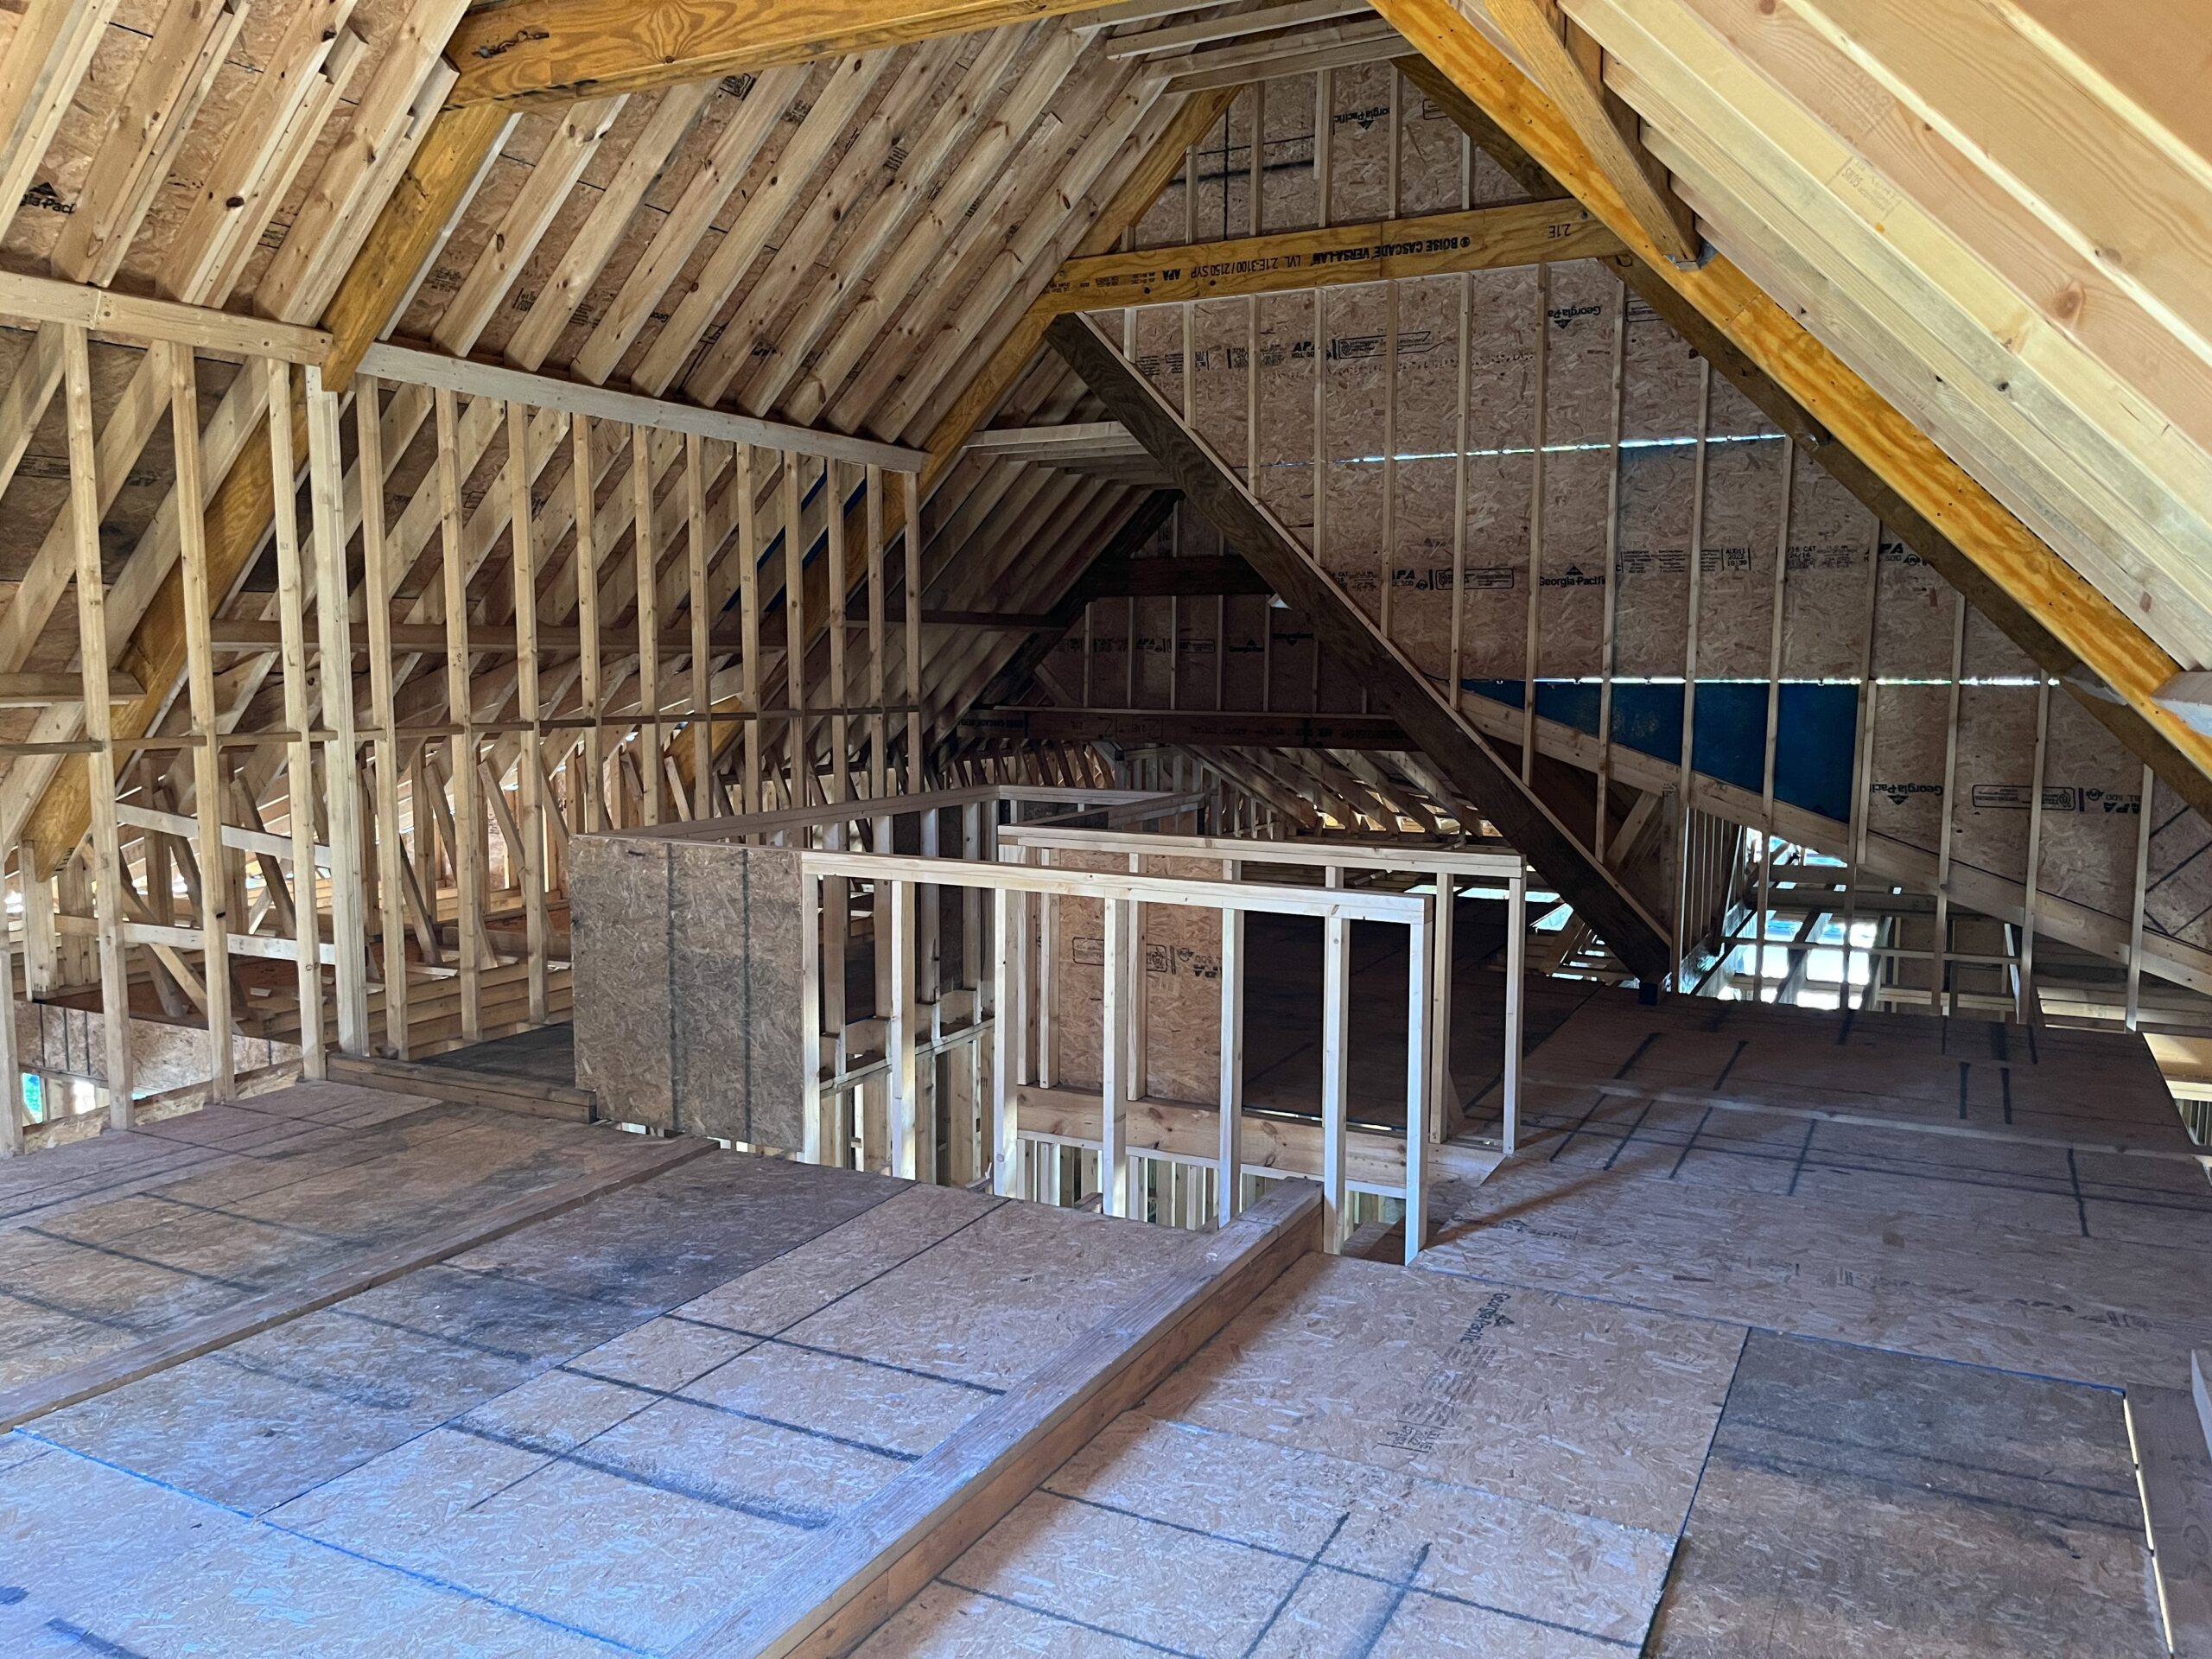
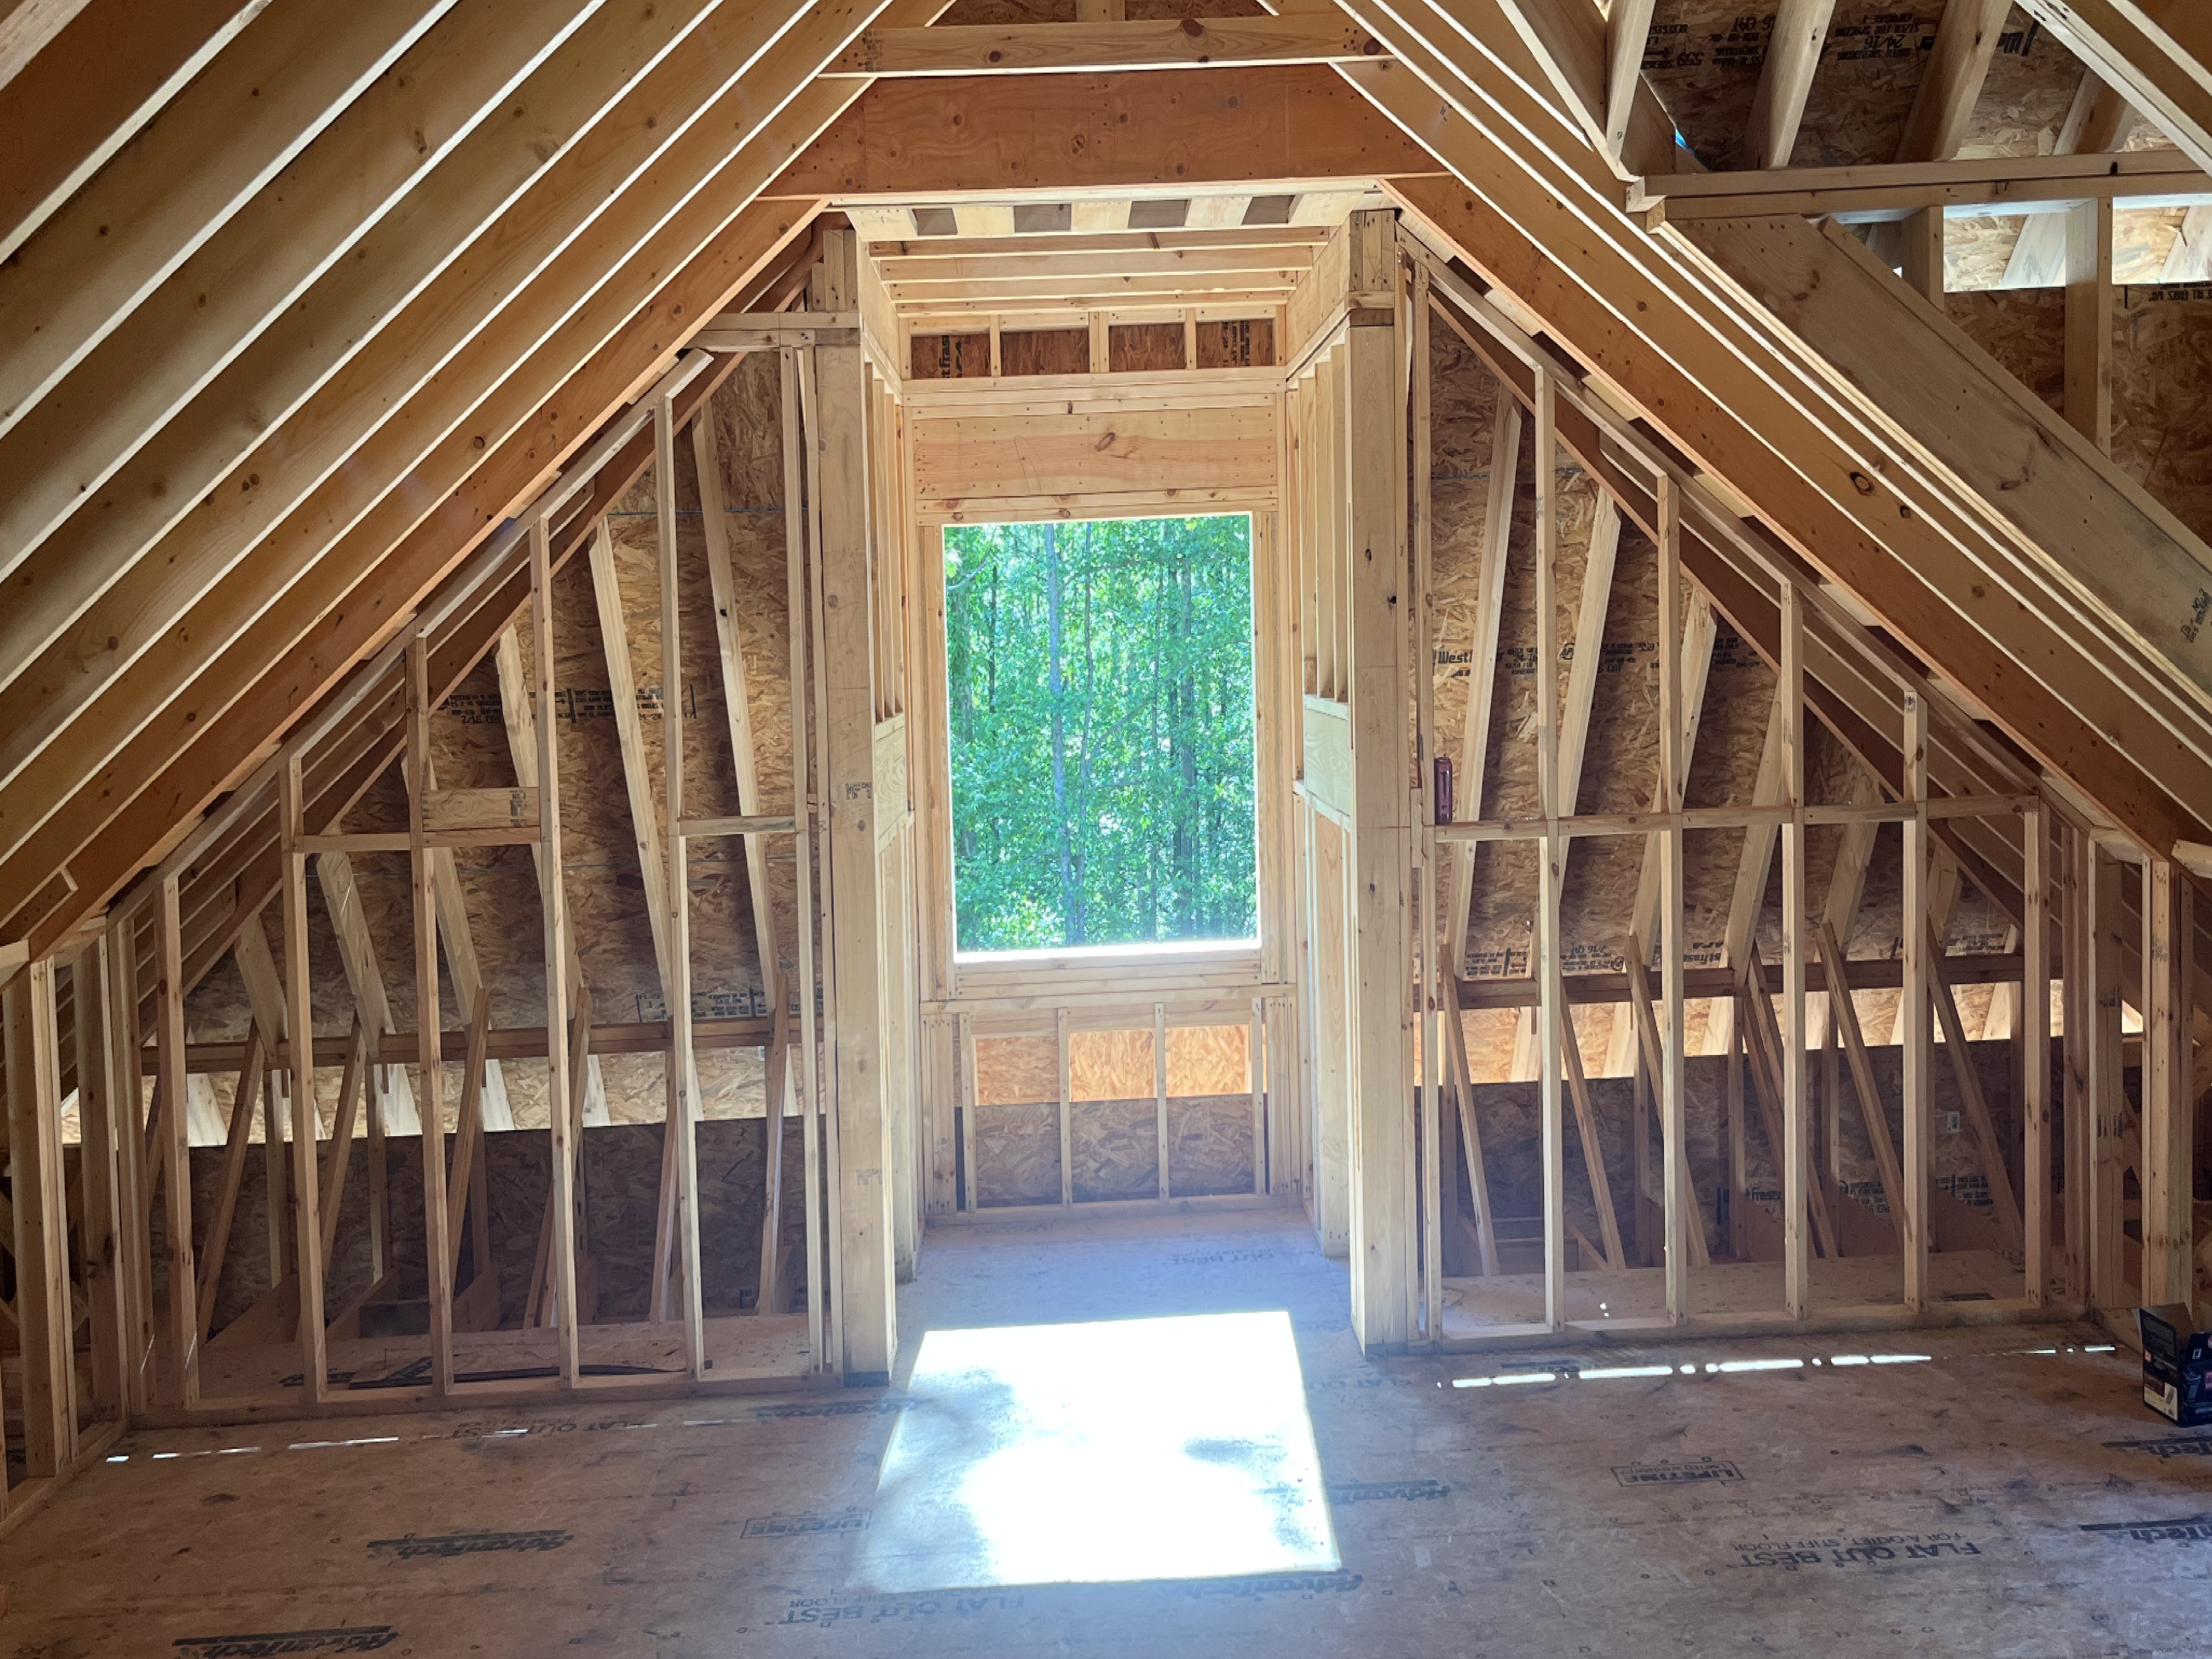
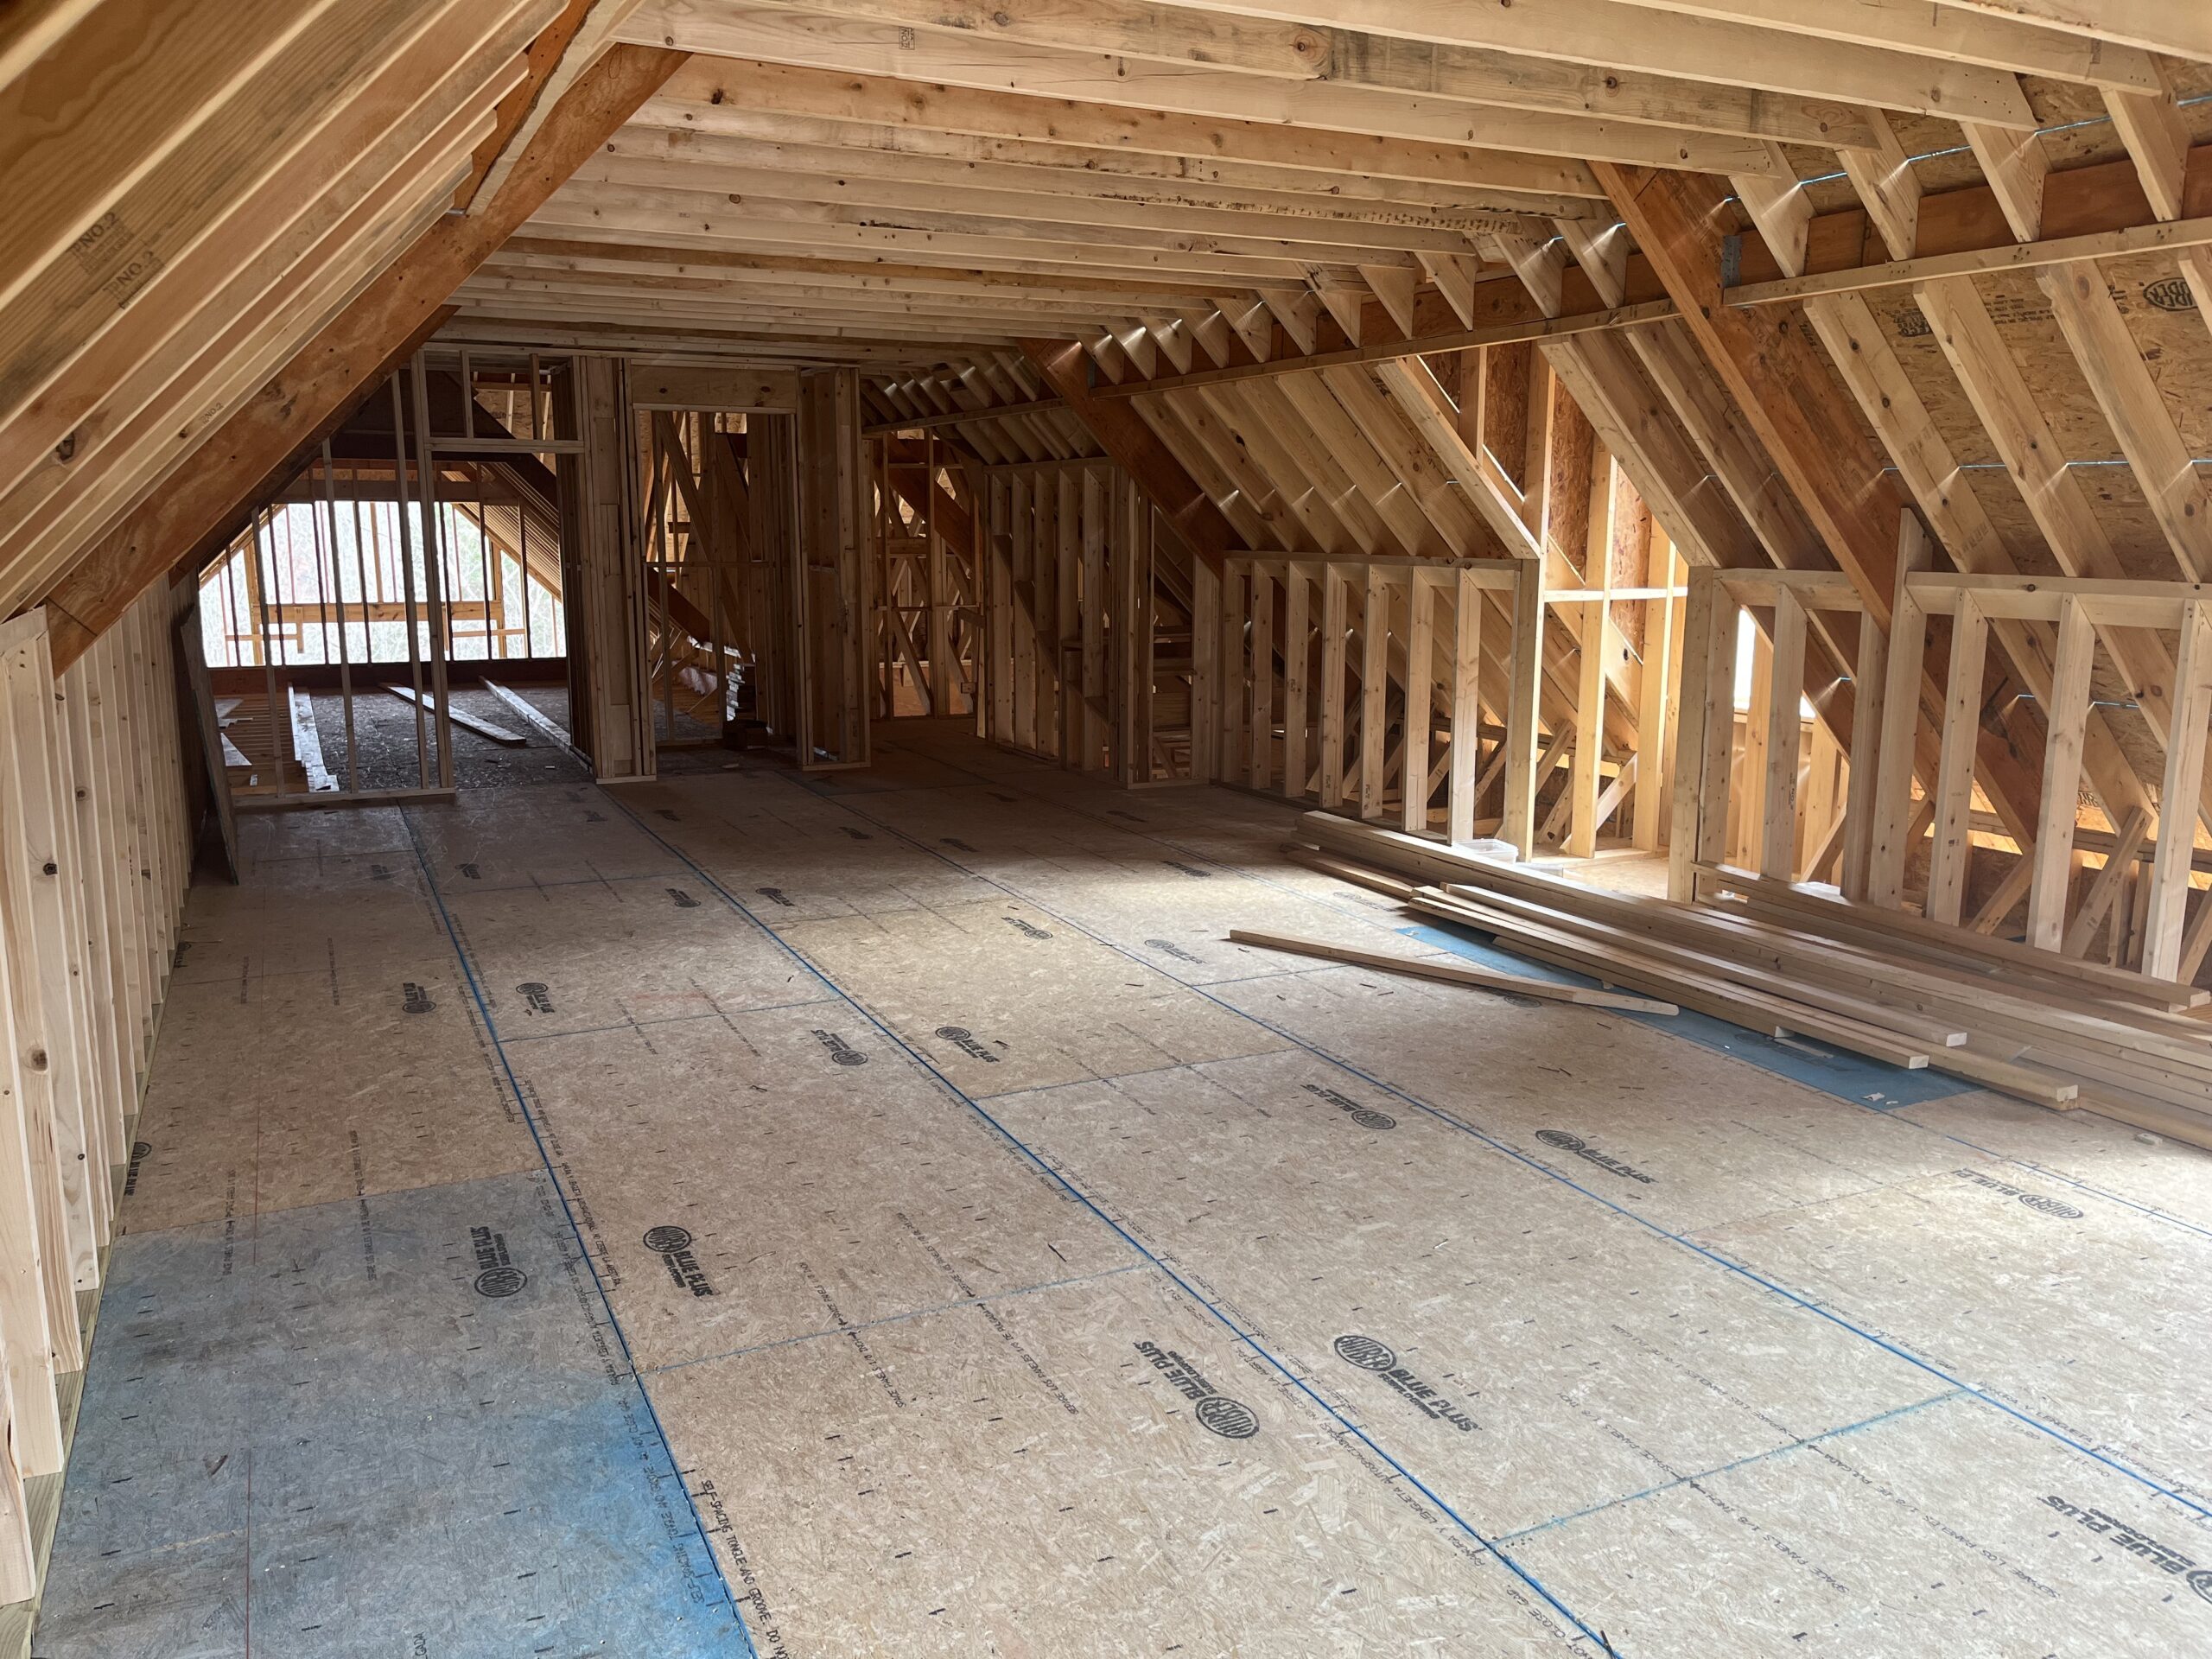
This is an example of a Designated Mechanical Closet in the Finished area of a Brace Free Open Attic Roof System Designed by Roof Framing Solutions. Having this closet allows for easy Installation and Smarter, Straighter Ductwork behind the new Finished walls to protect them from damage or crushing. With the HVAC unit laid out in an organized easily accessible way and the ductwork hanging from the rafters with ductstraps, this area will also be used for Conditioned Storage with access to other areas for unconditioned storage. Note the full-size entry door for easy access for maintenance.
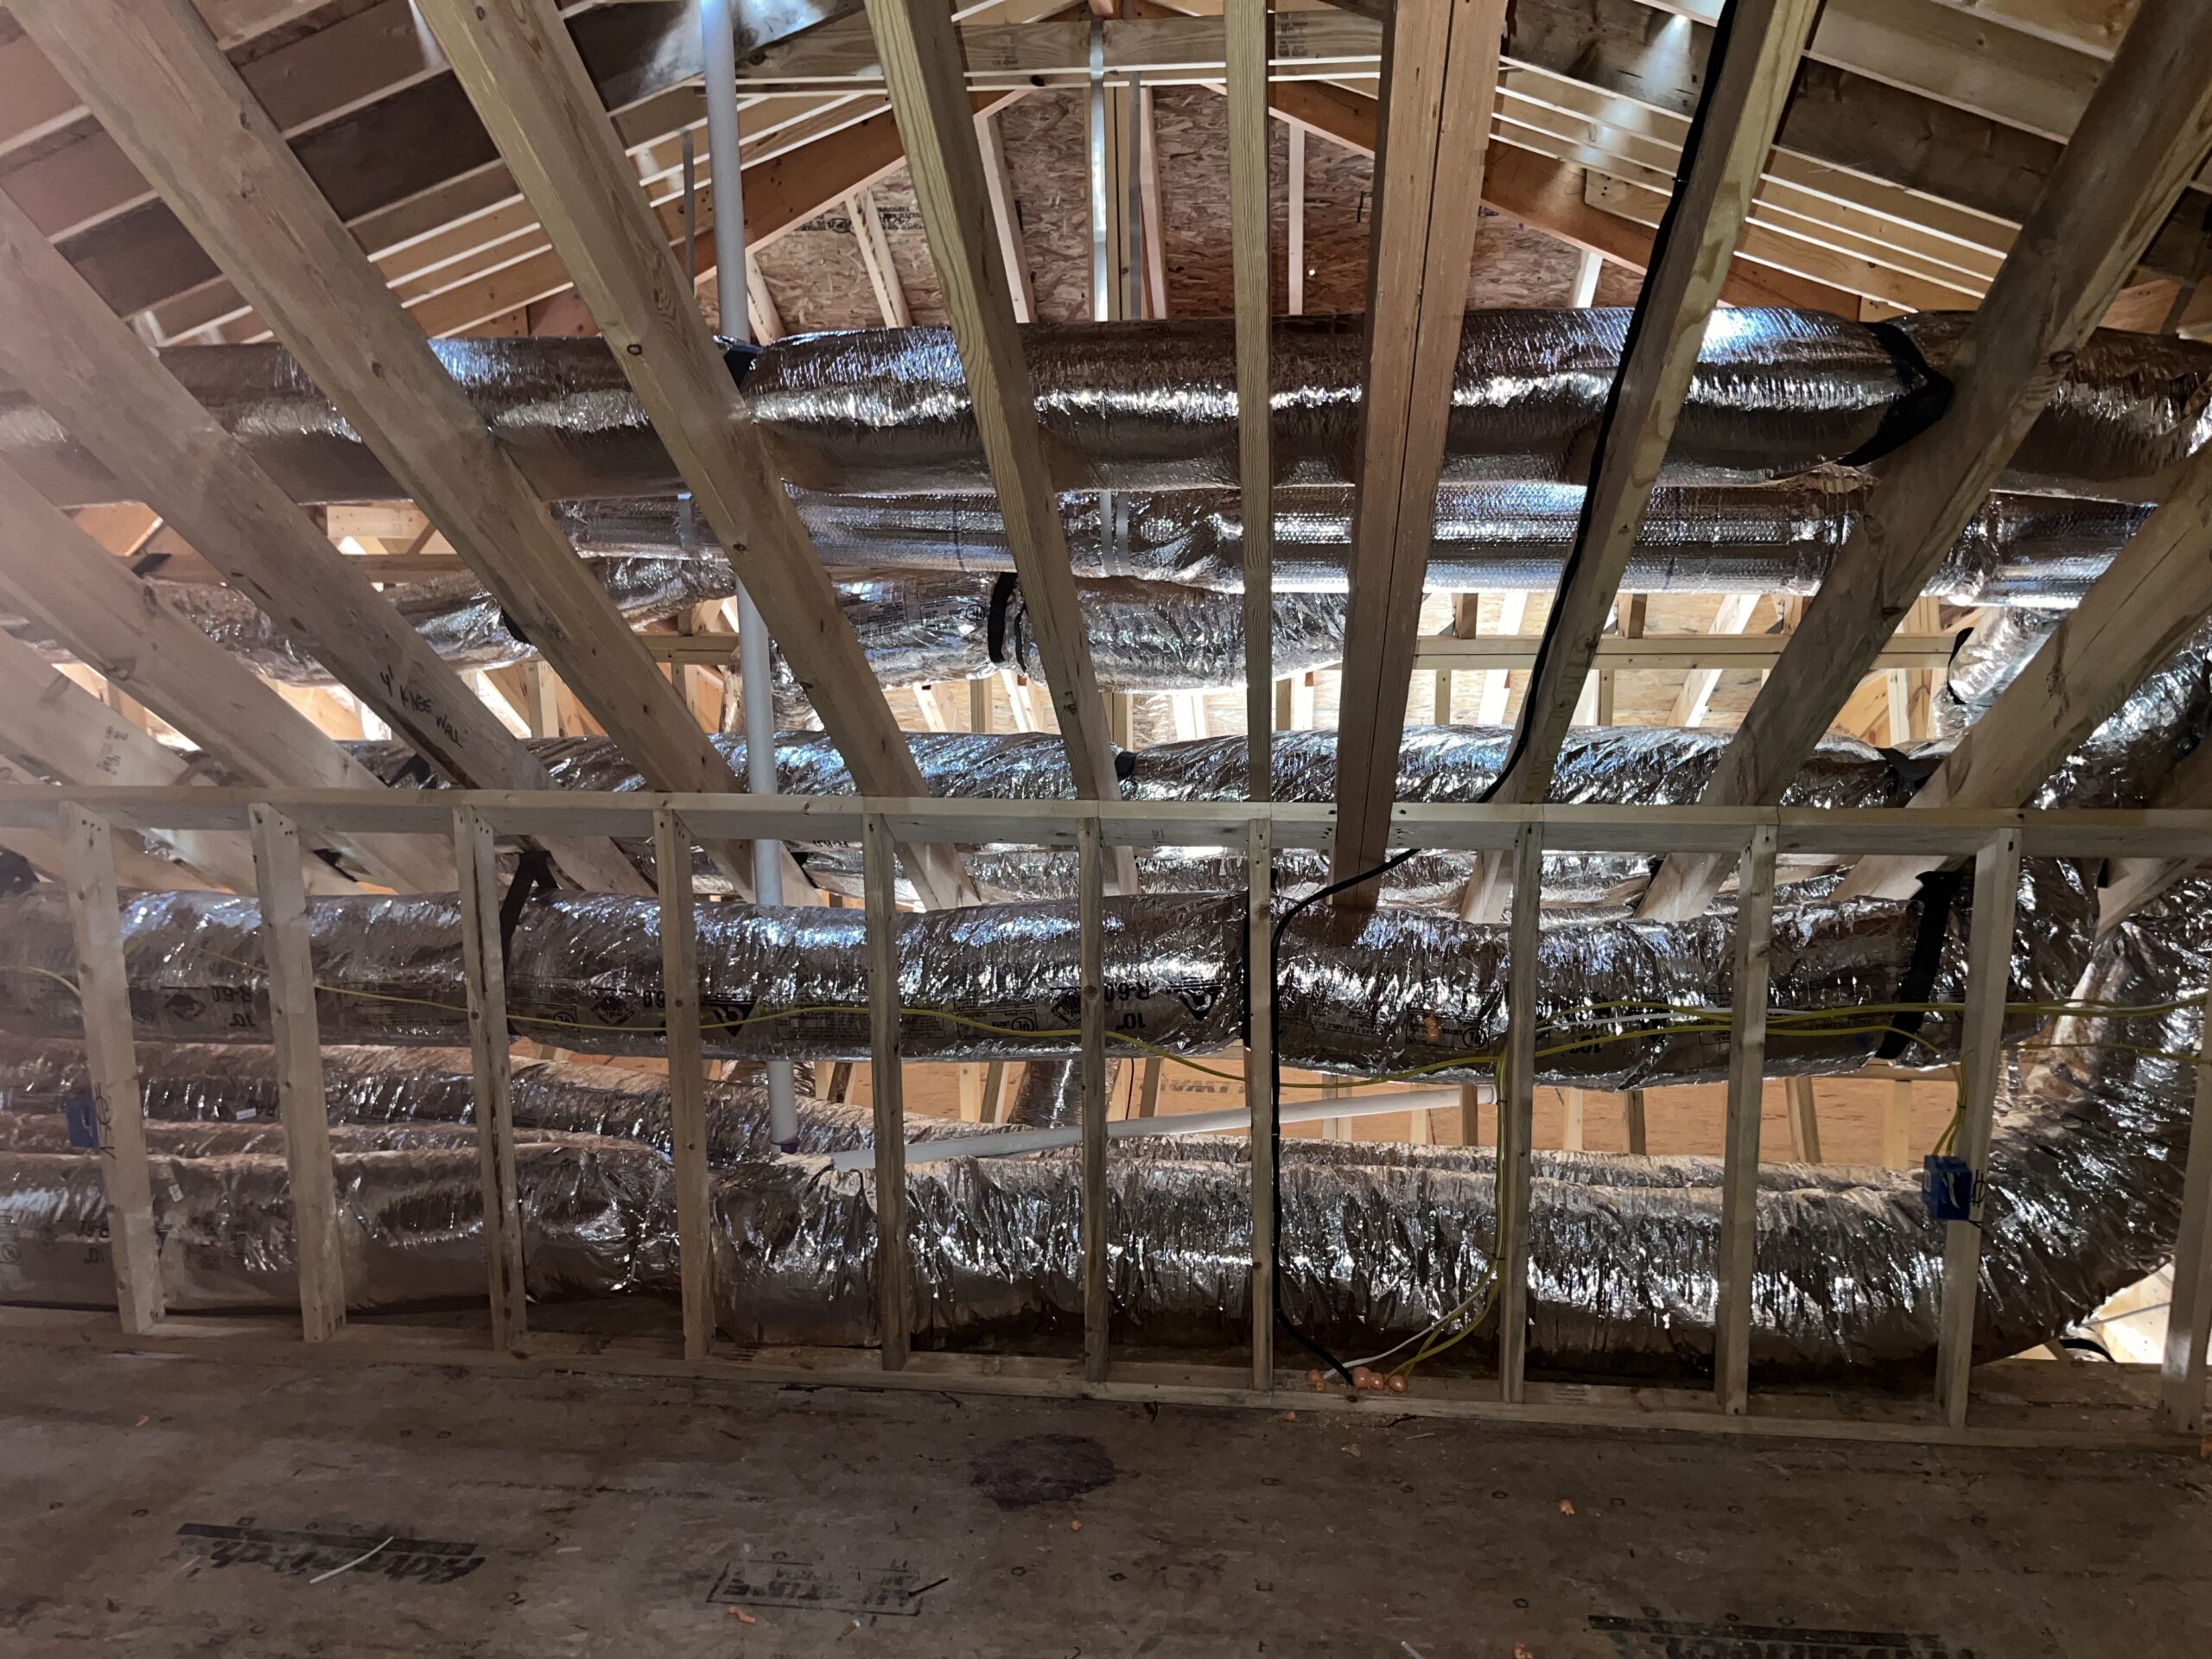
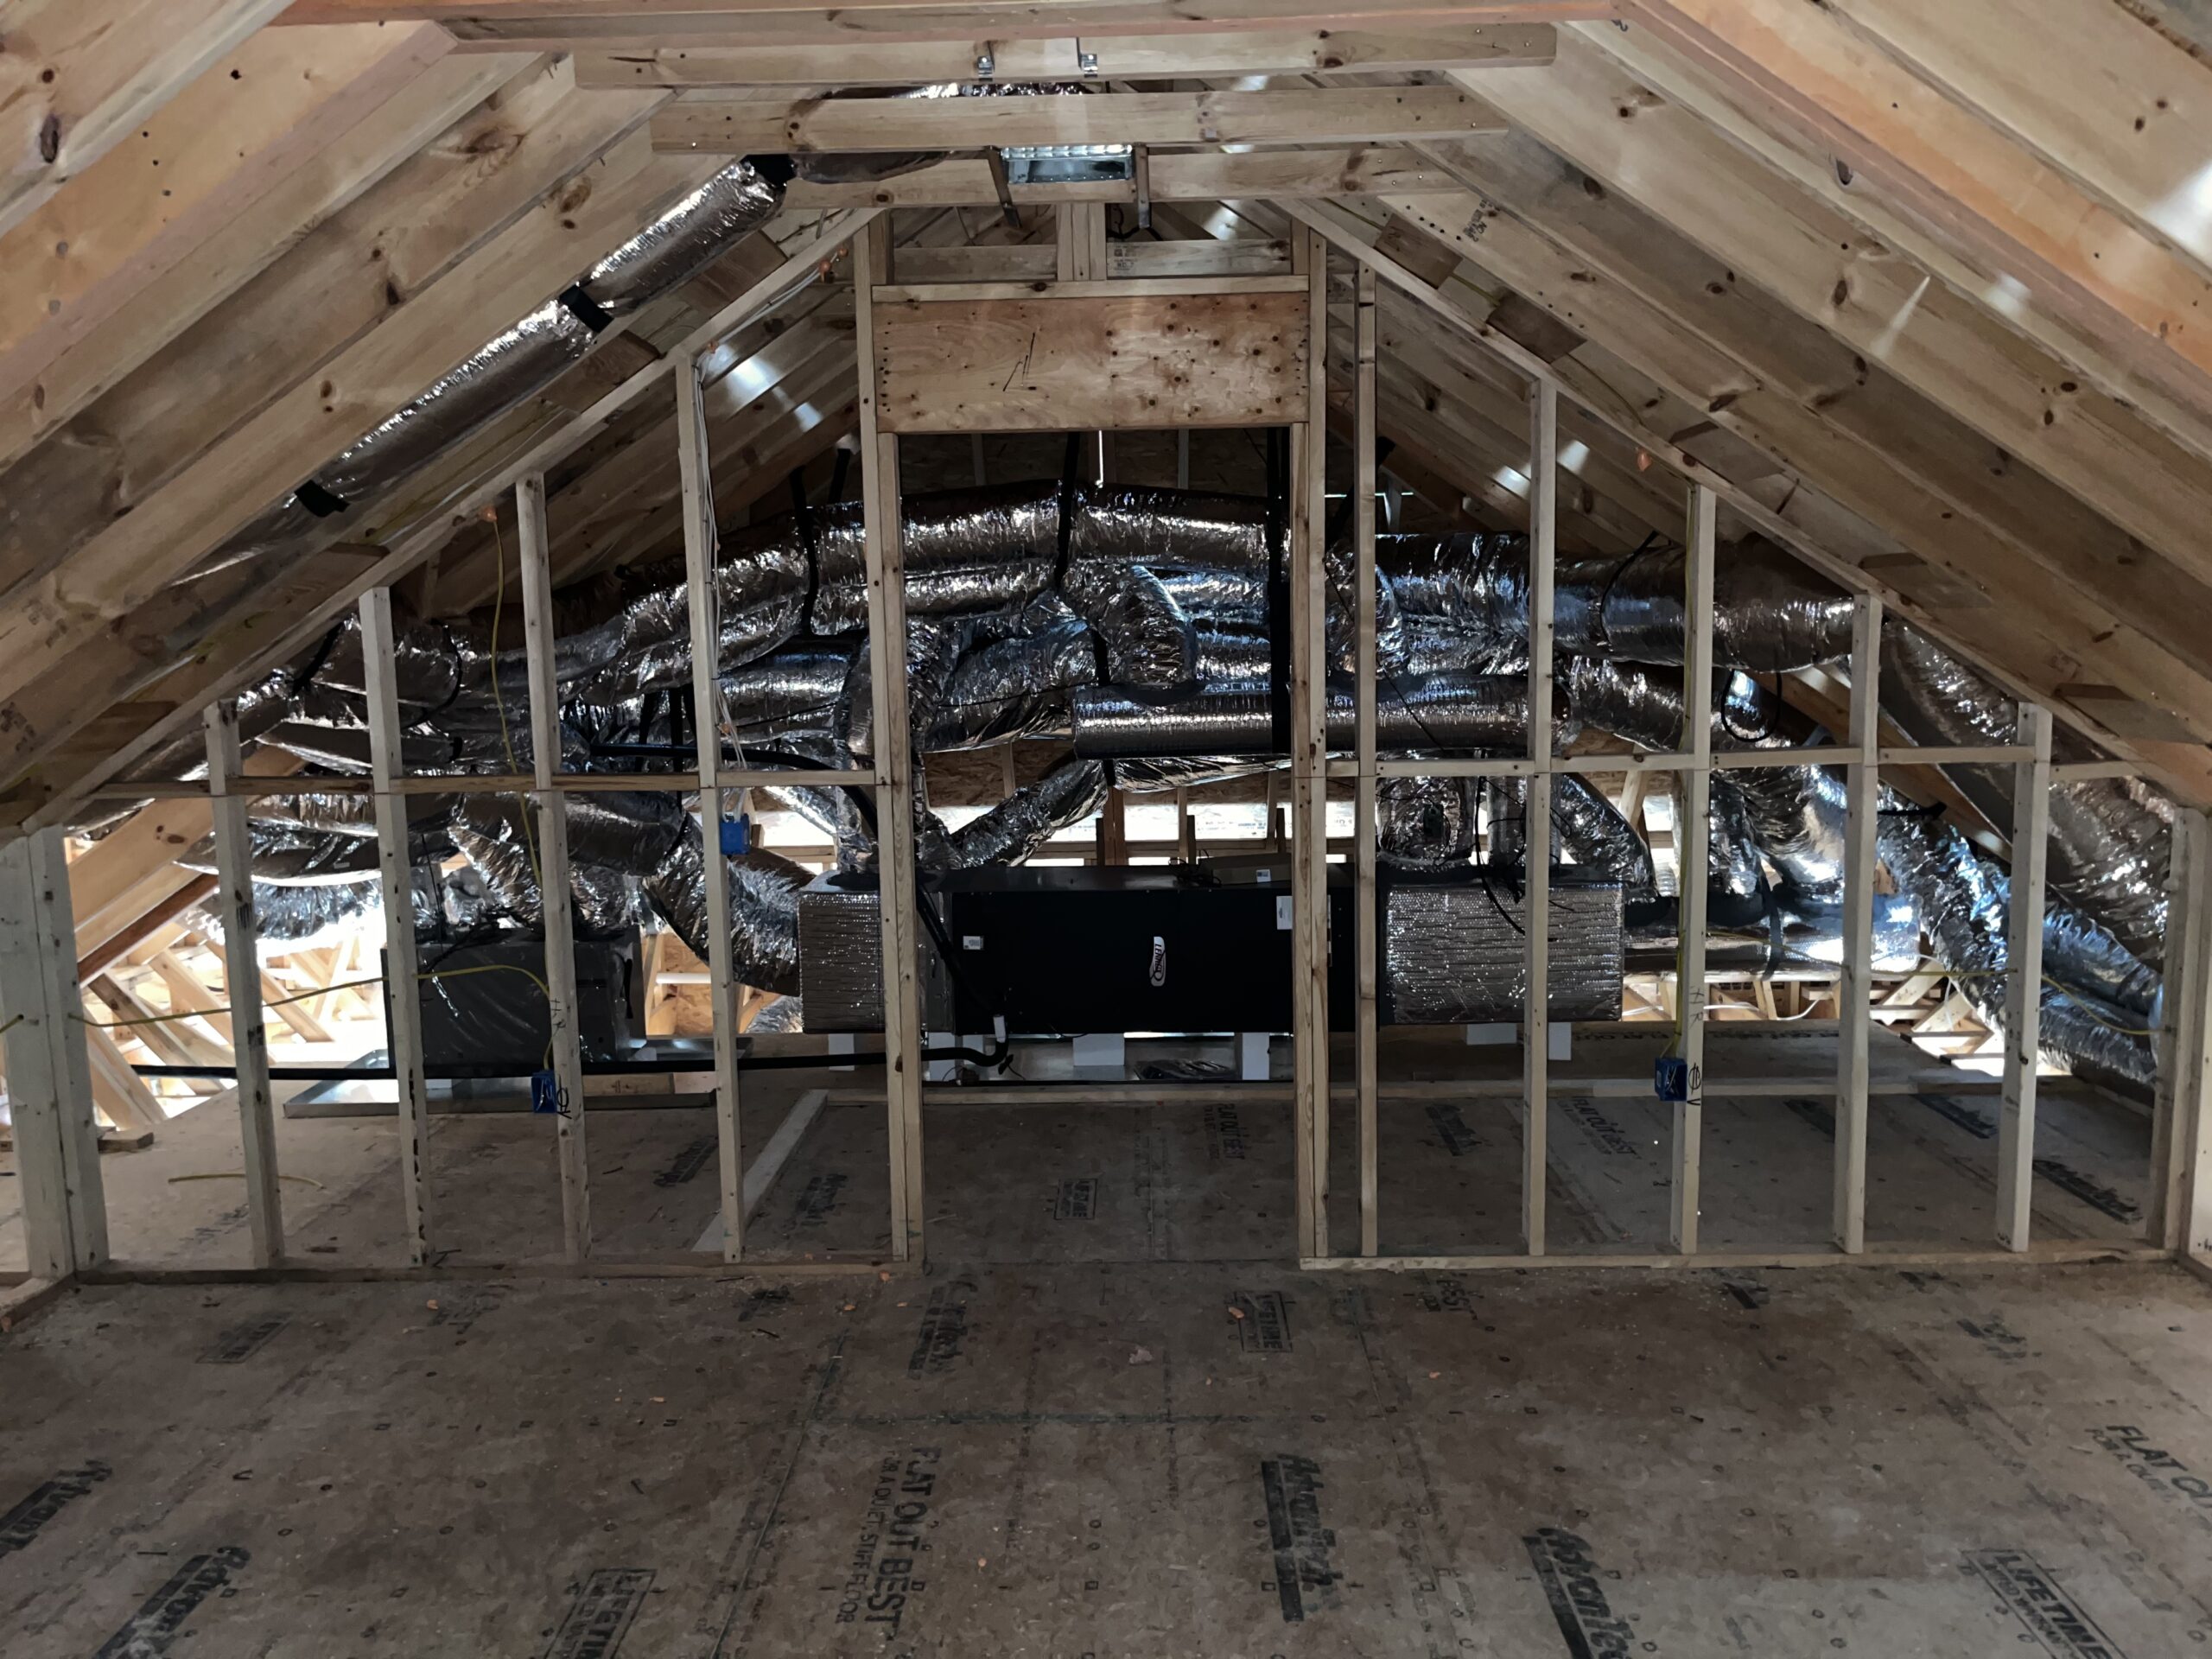
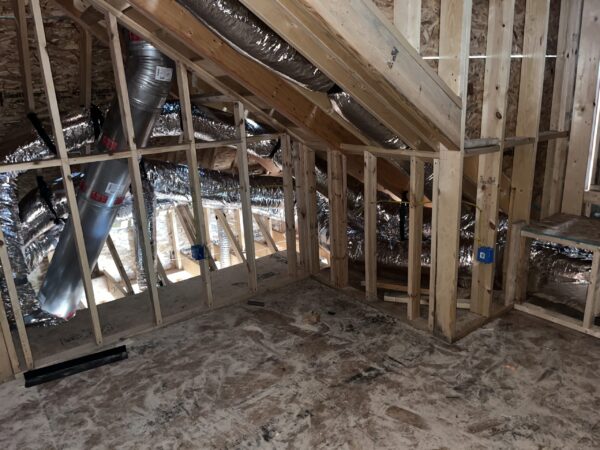
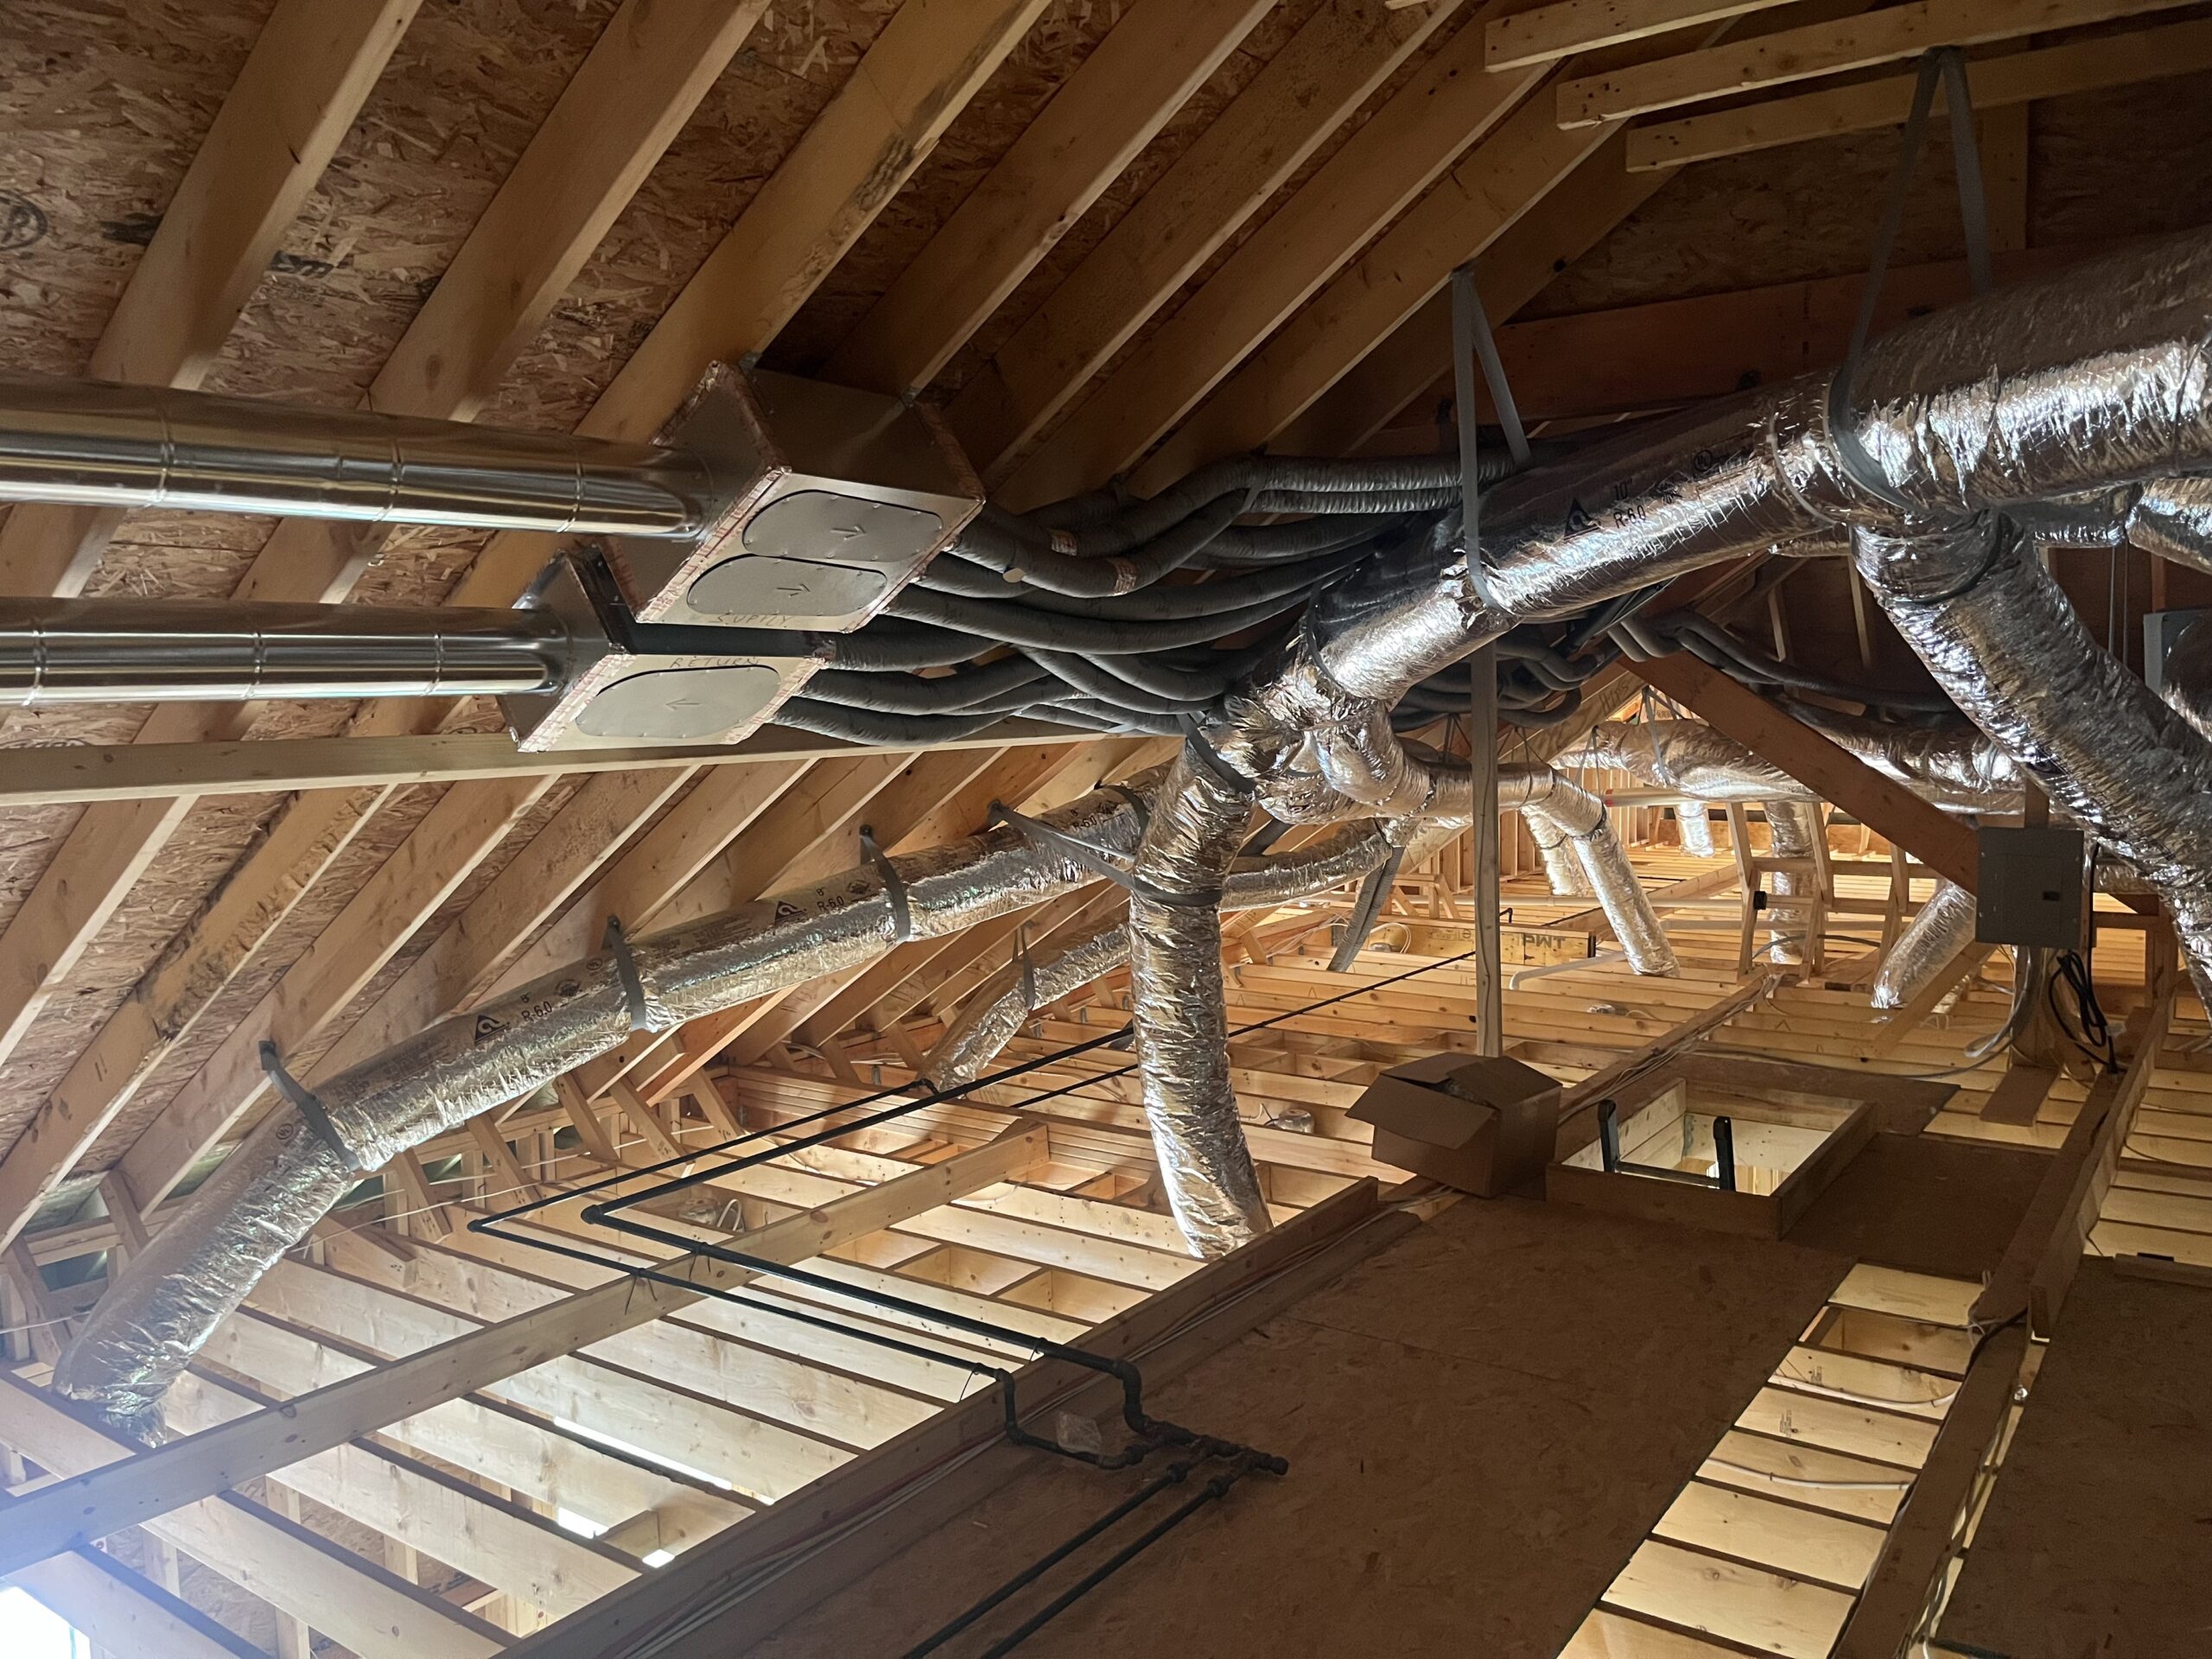
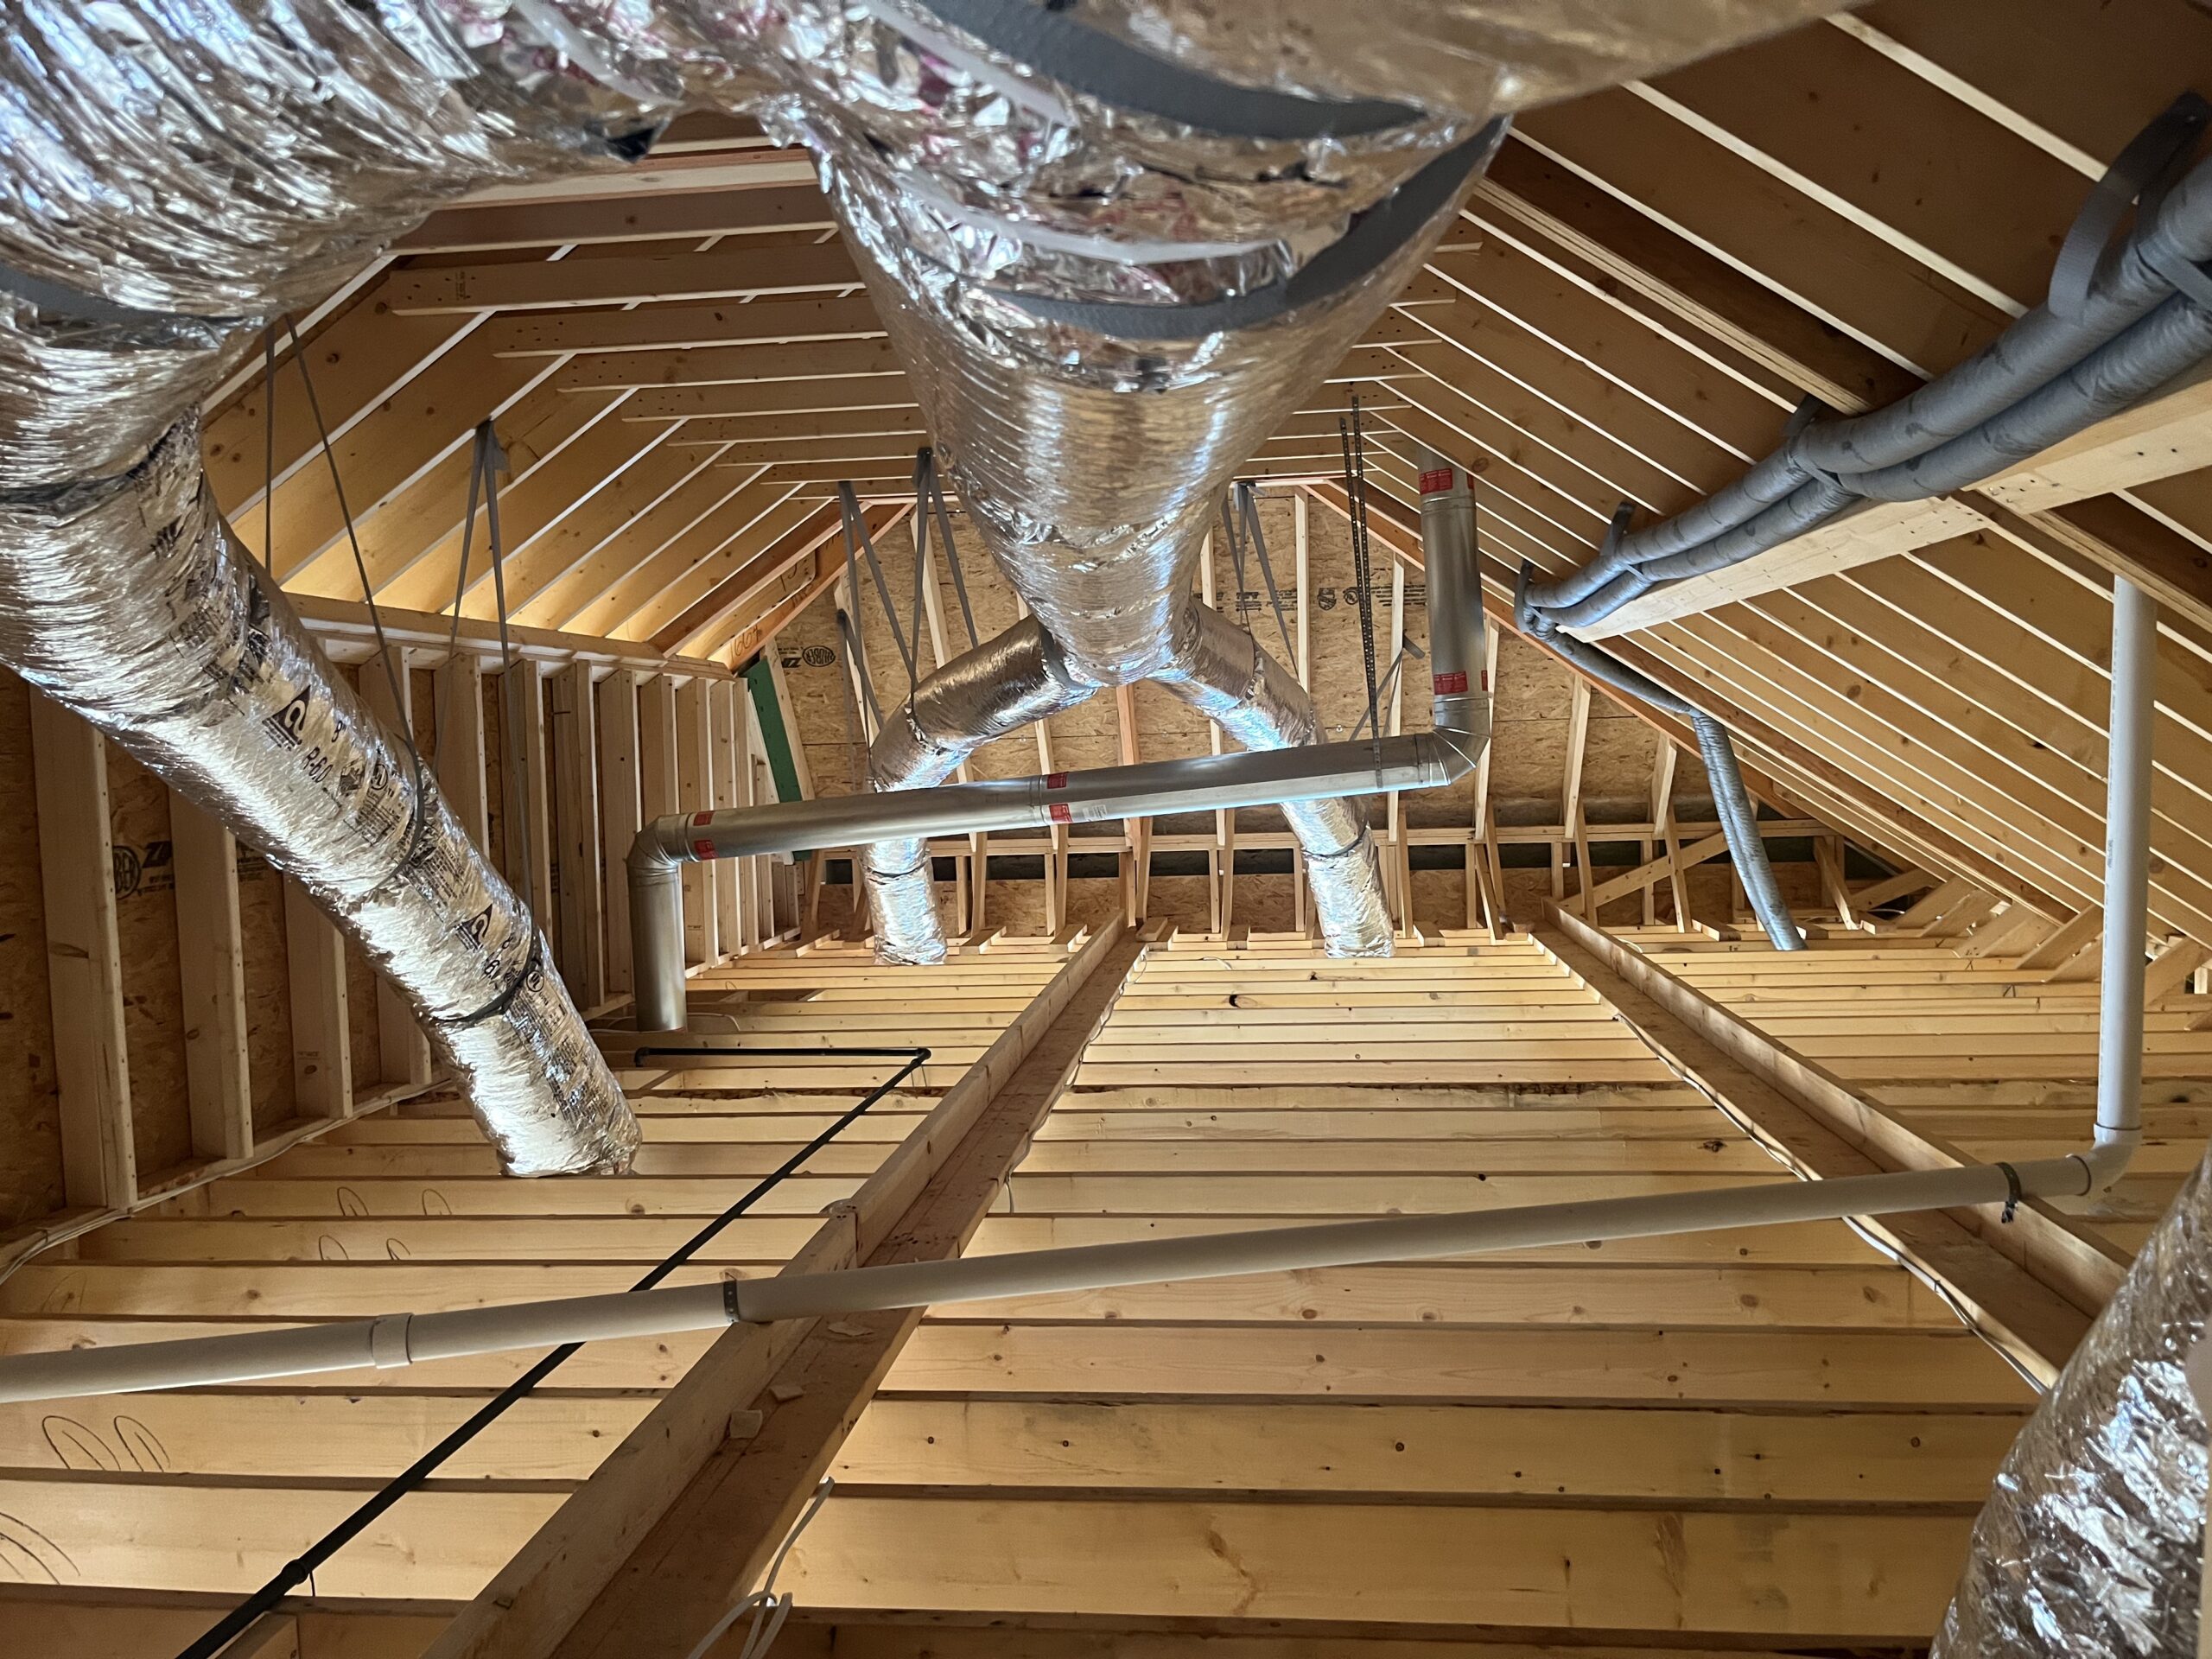
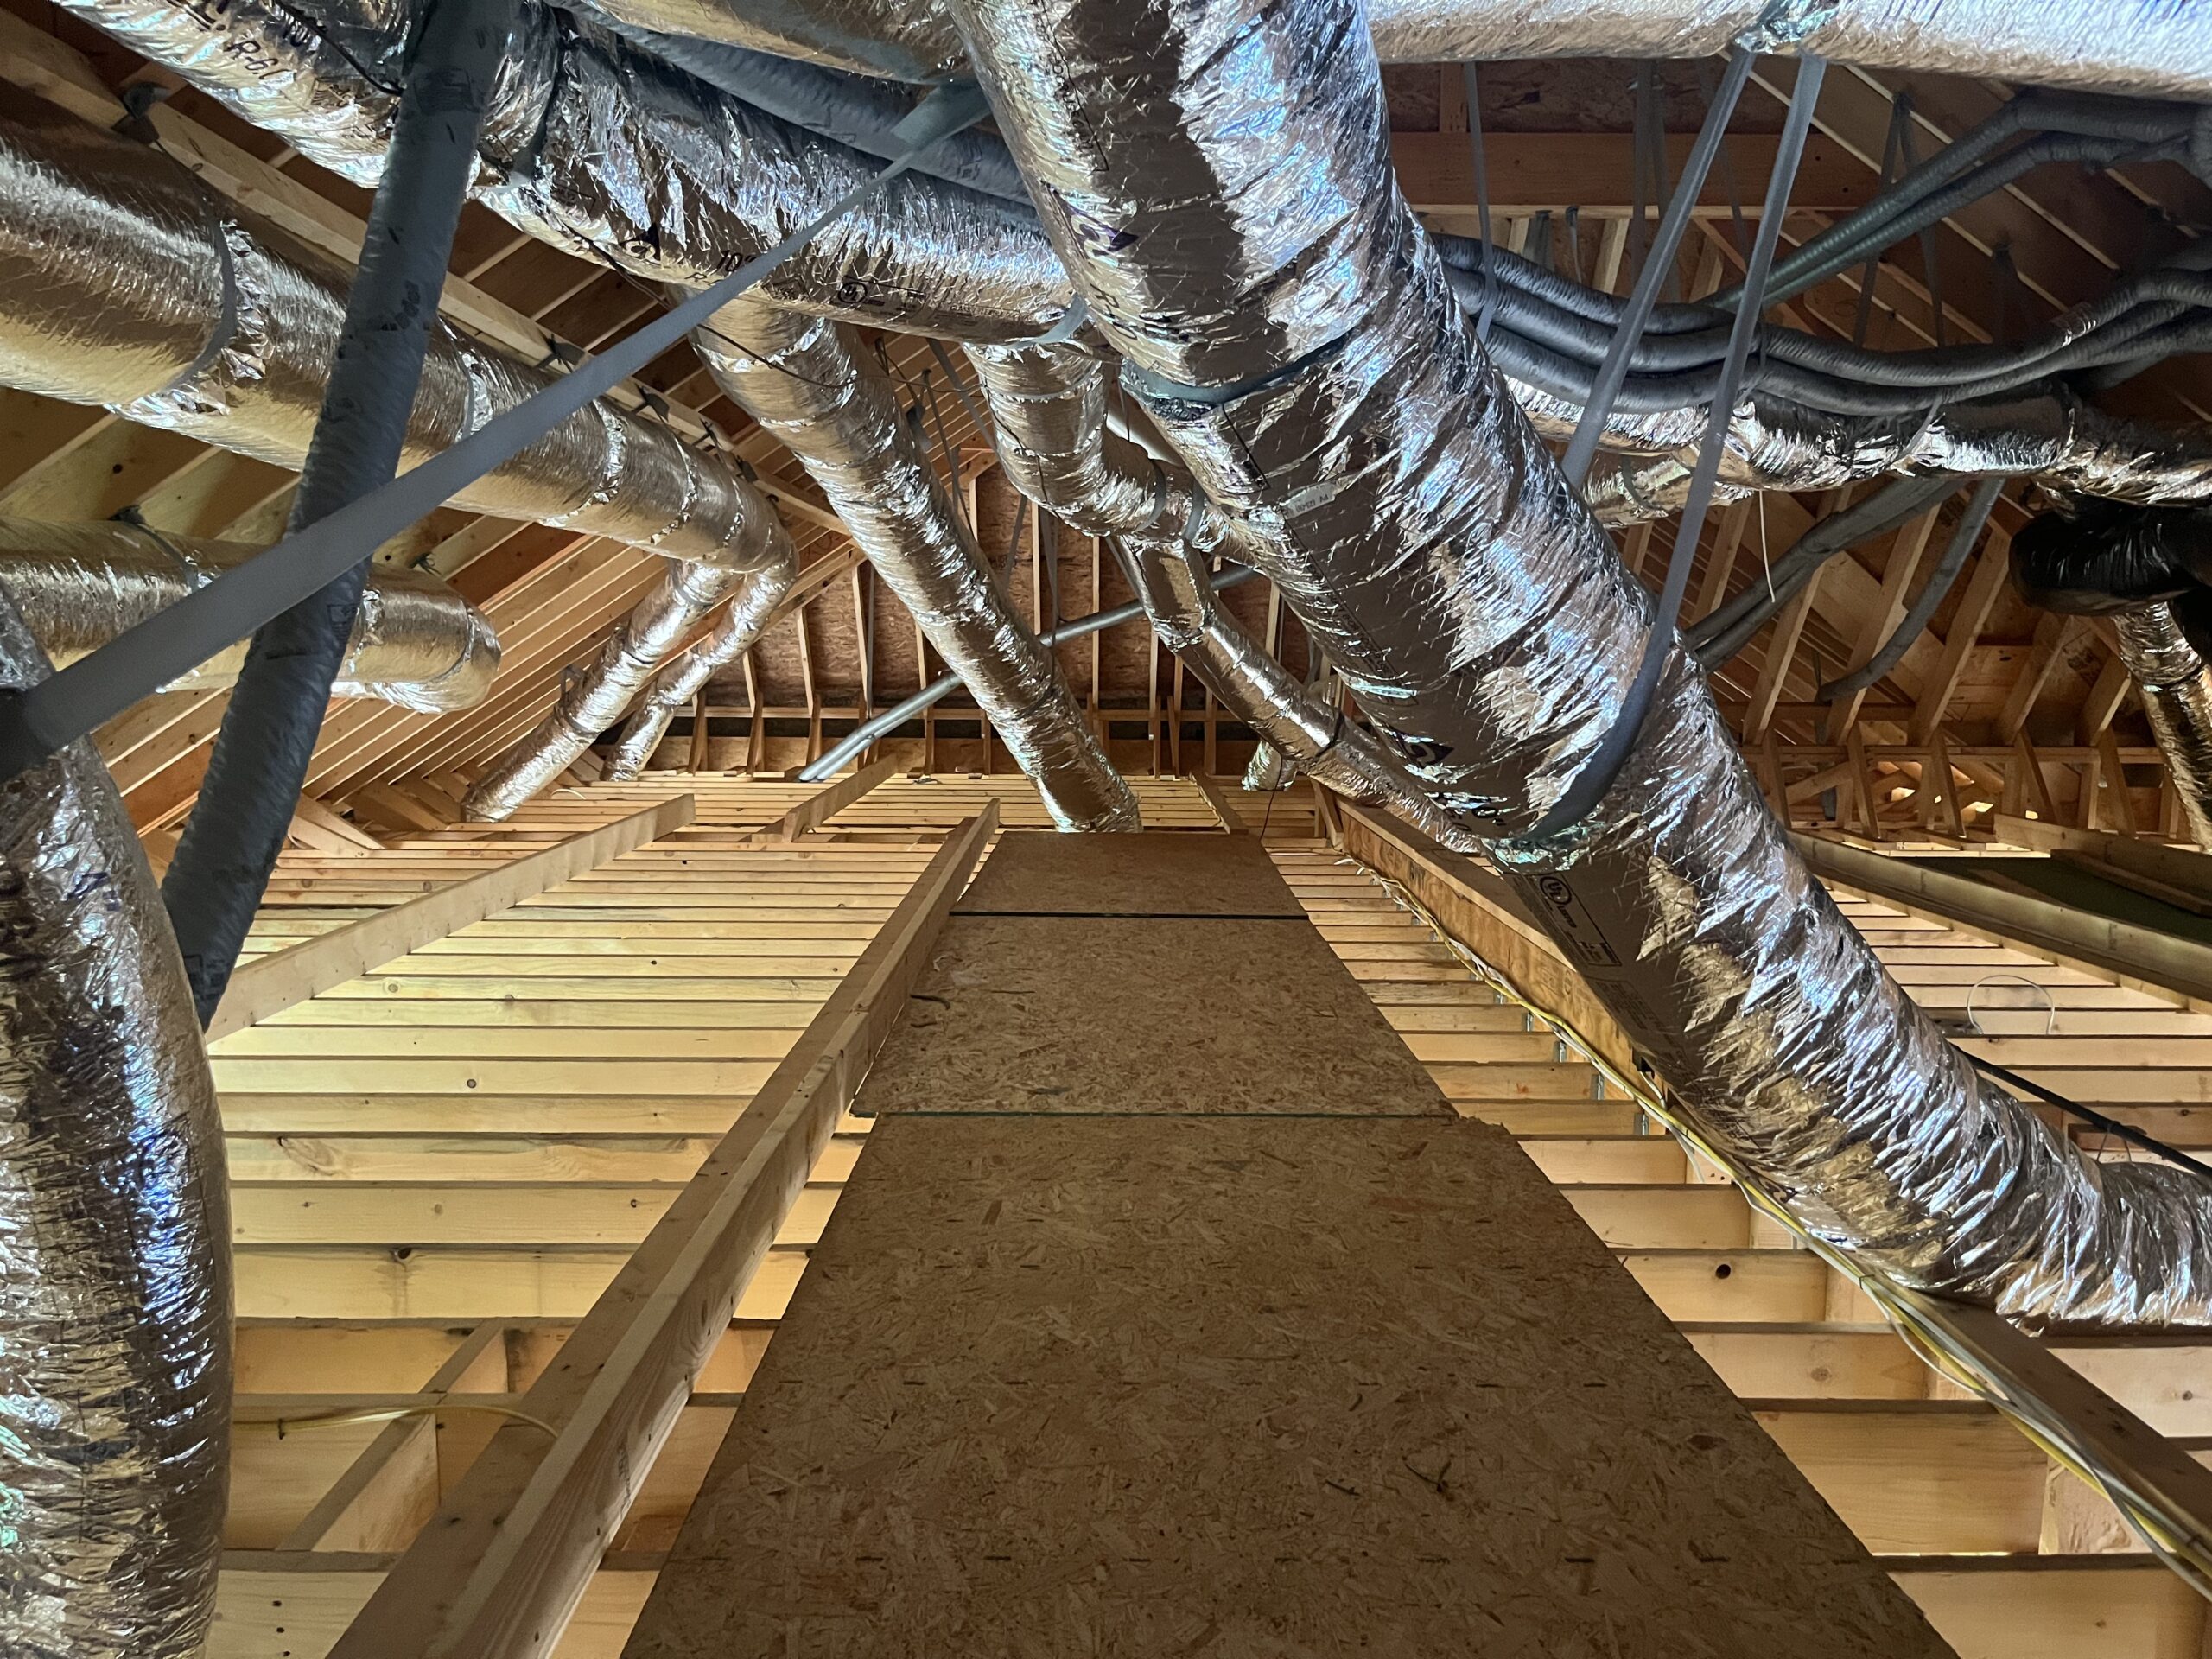
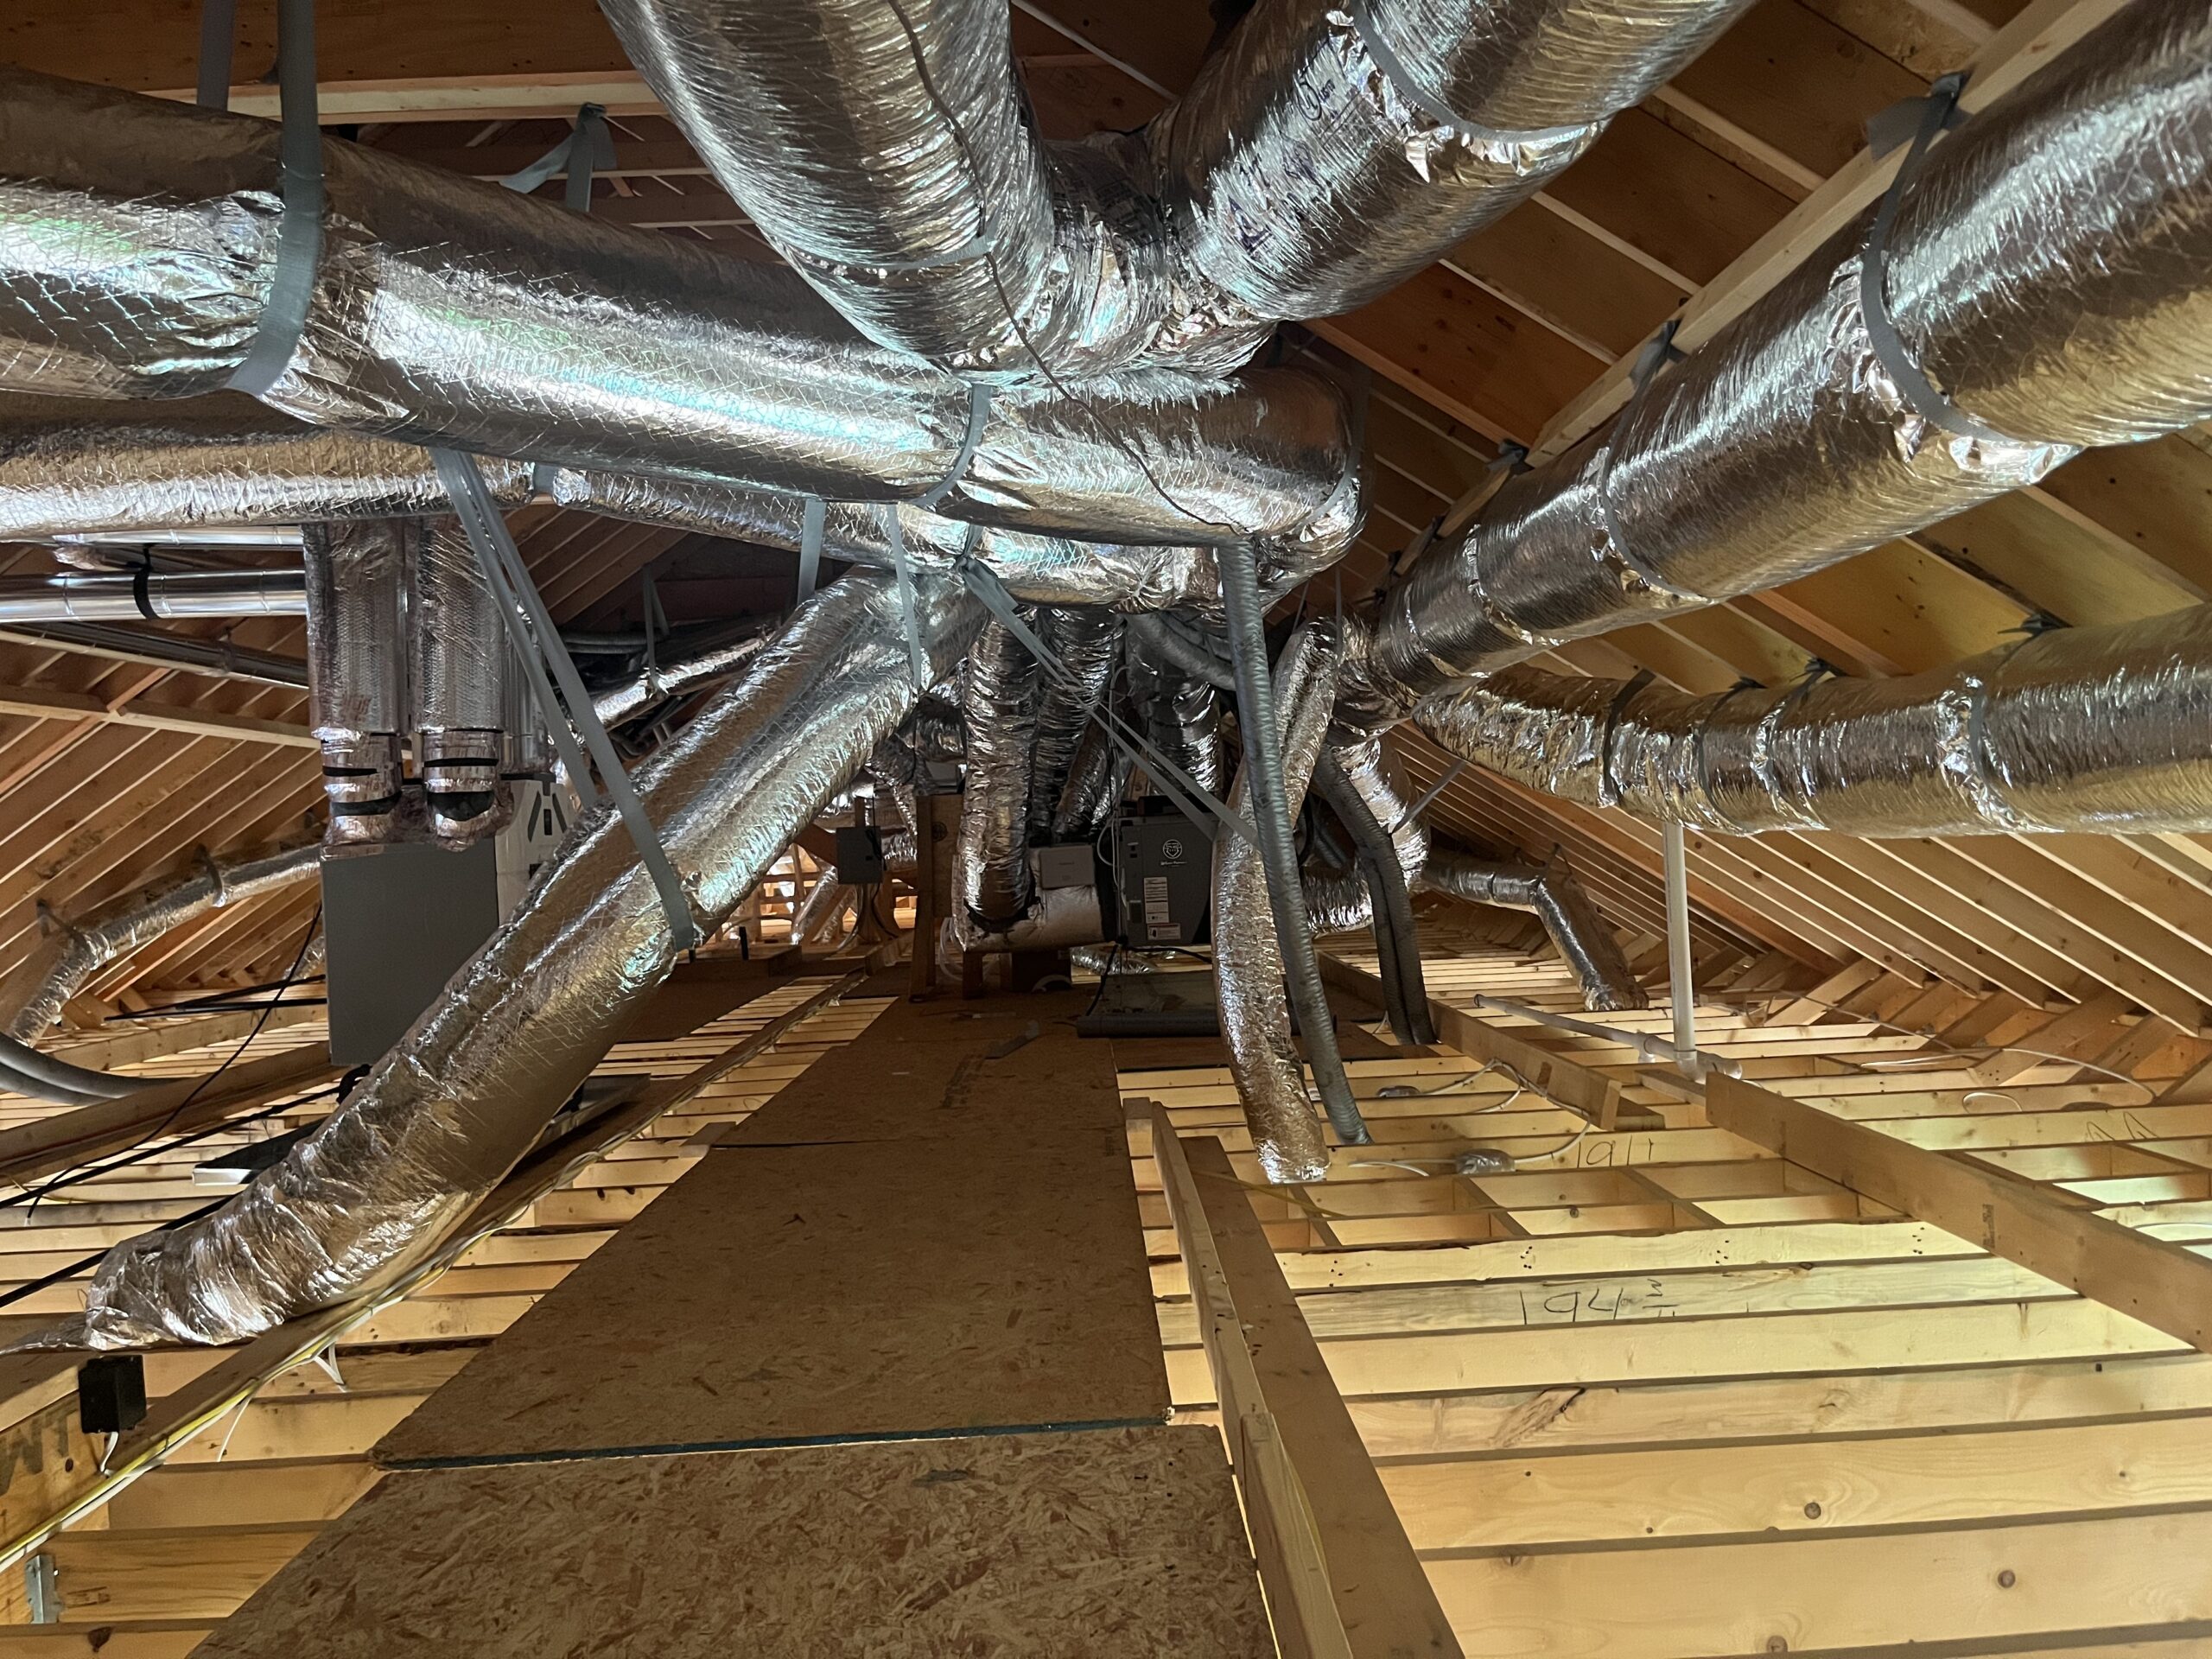
Here is an example of an HVAC unit in a Brace Free Open Attic Roof System Designed by Roof Framing Solutions. With no need for the outdated Roof Bracing methods used currently the attic is clear and open for easy installation and clear access for maintenance. Using Spray Foam Insulation, the ductwork can hang from the rafters with ductstraps to ensure that it is straight and has minimal bends or sags which can restrict airflow and efficiency. It is also easier to check for leaks and protect them from being damaged or crushed in the future storage area. Also note how much space is available for storage.
With Roof Systems being as complicated as they are, any information provided needs to be clear and understandable. Not using complicated Architectural or Engineering terminology the Roof Framing Solutions method uses terms and phrases familiar with and used by Framing crews so there is a quick easy transfer and understanding of complicated Roof information. The Roof Framing Material Layout Plan, Roof System Rafter Cut List, and the Roof System Rafter Layout Plan are all written and laid out using the Framers Language. This is a language that Framers understand and use daily so there is no confusion or misunderstandings. With a quick review any Framing crew can read and understand all the information provided. Just straight Roof information we need written and laid out in a language we use.
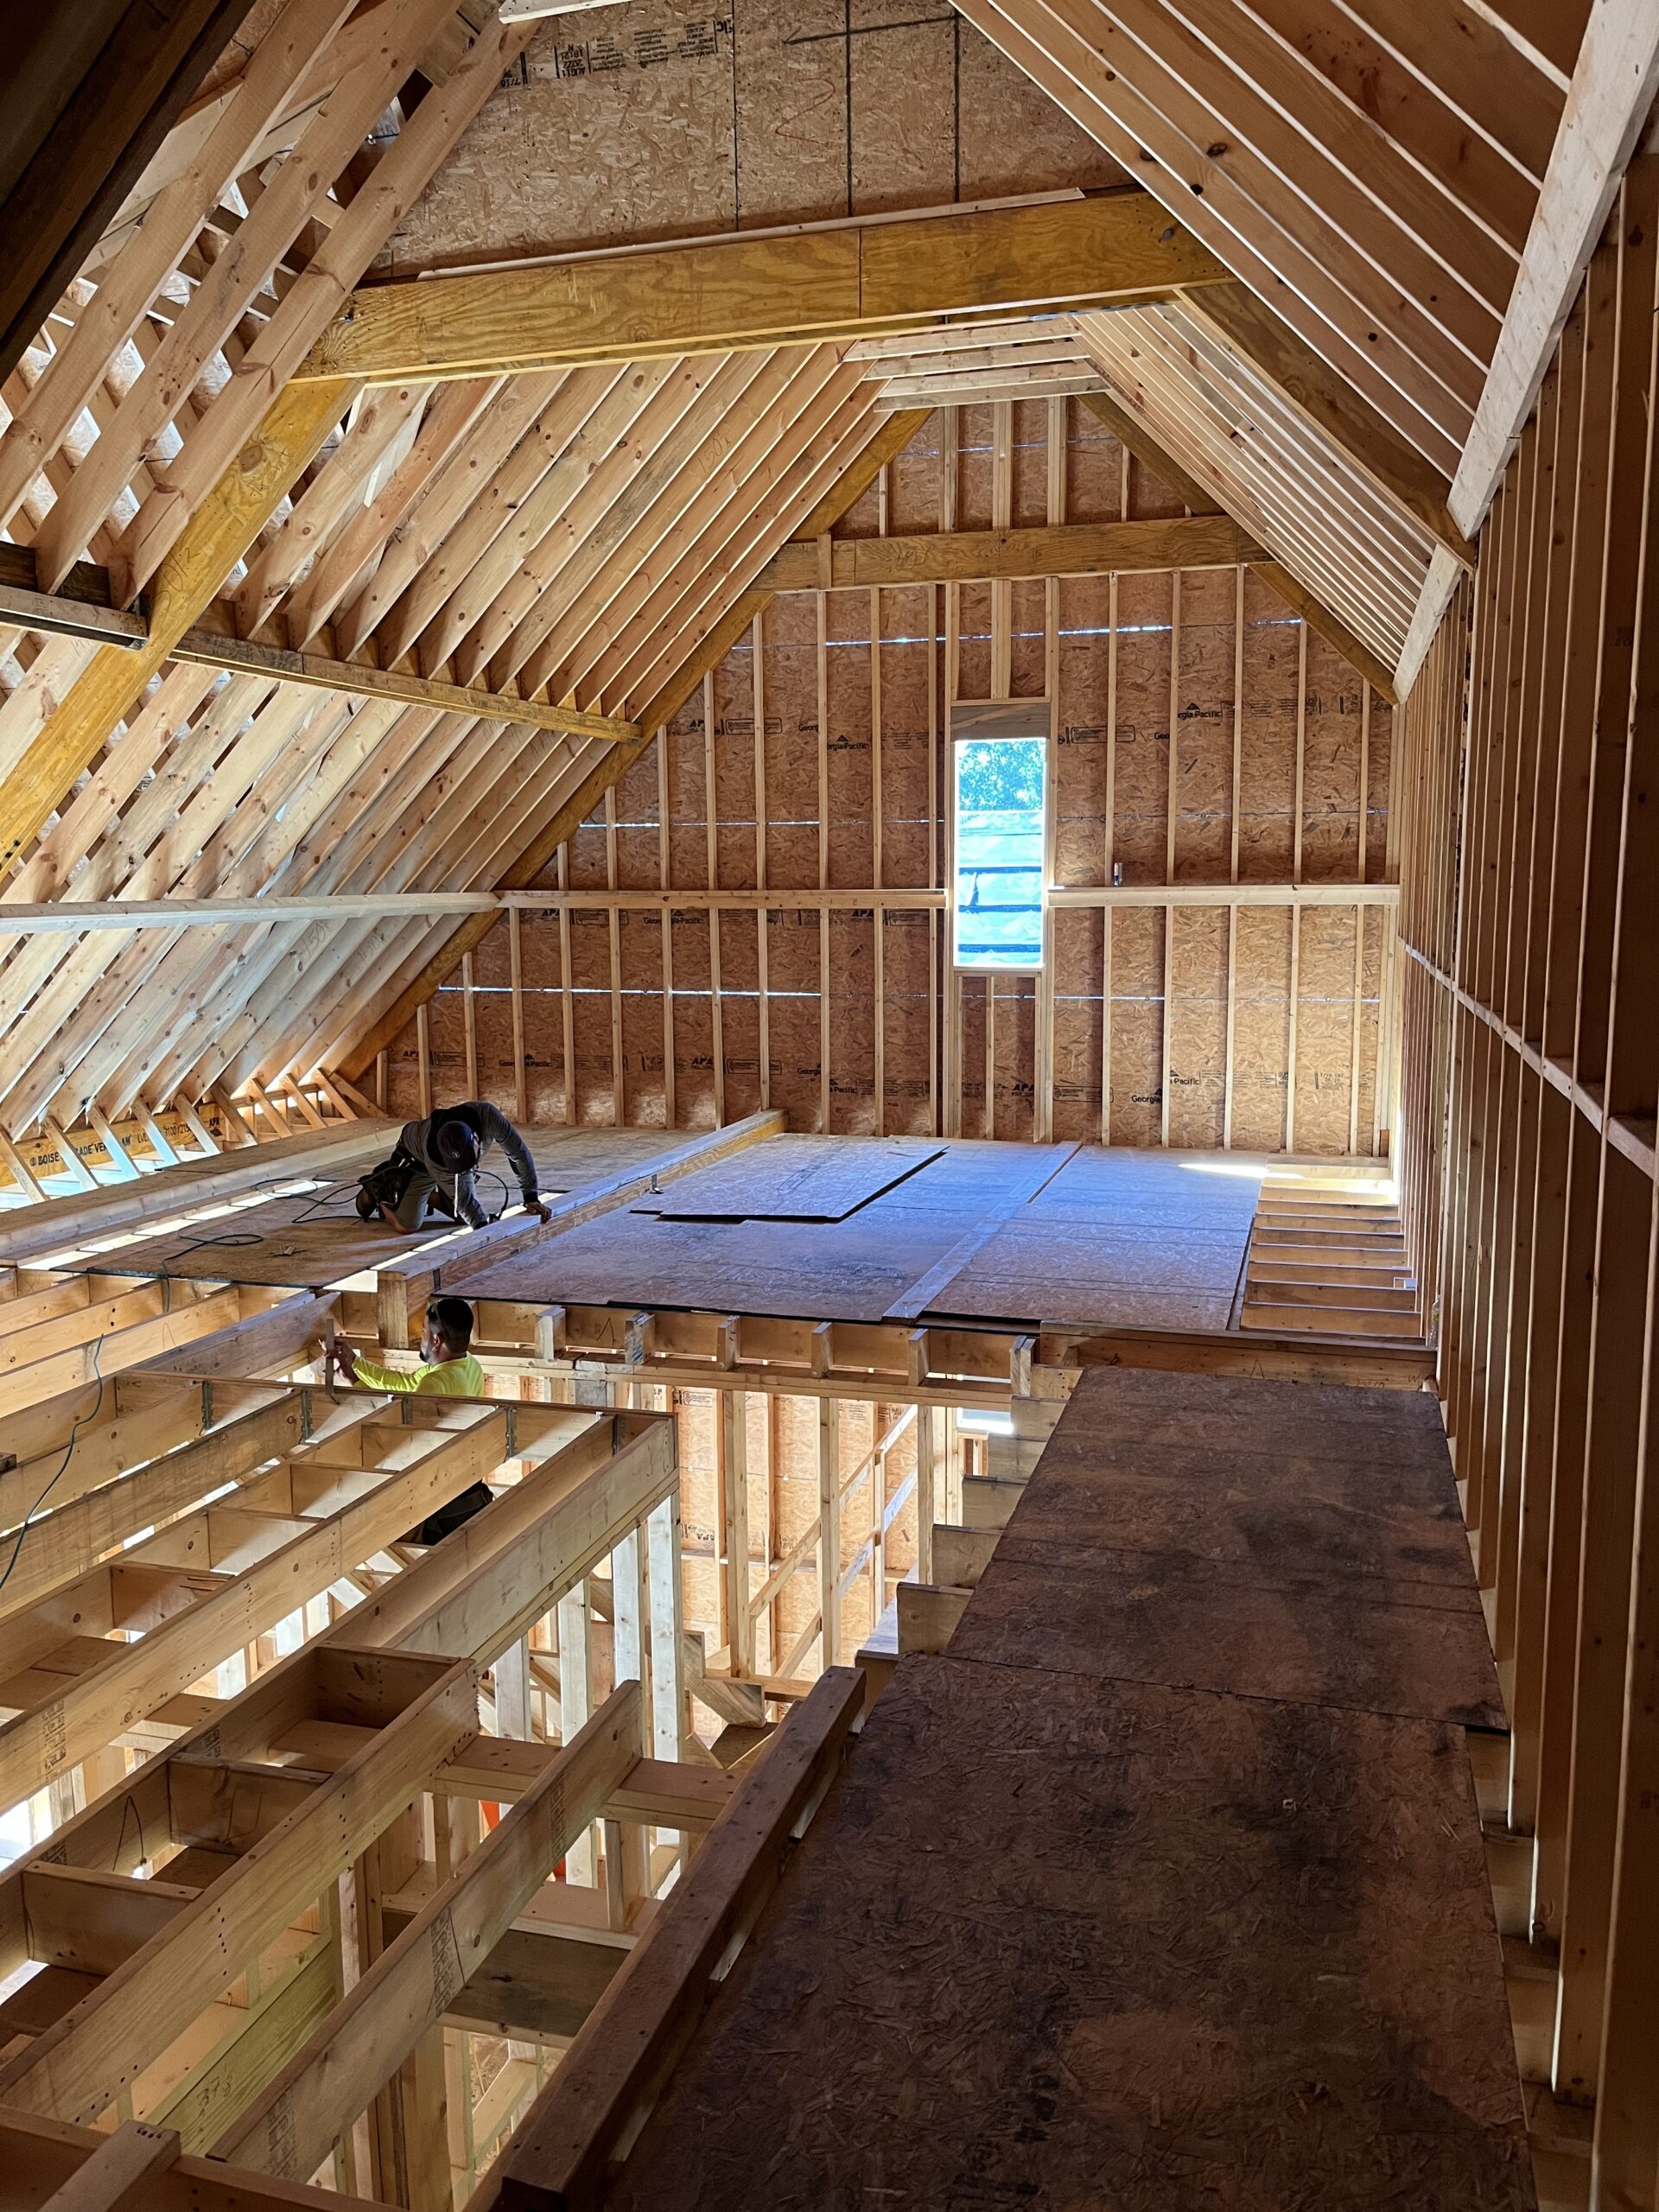
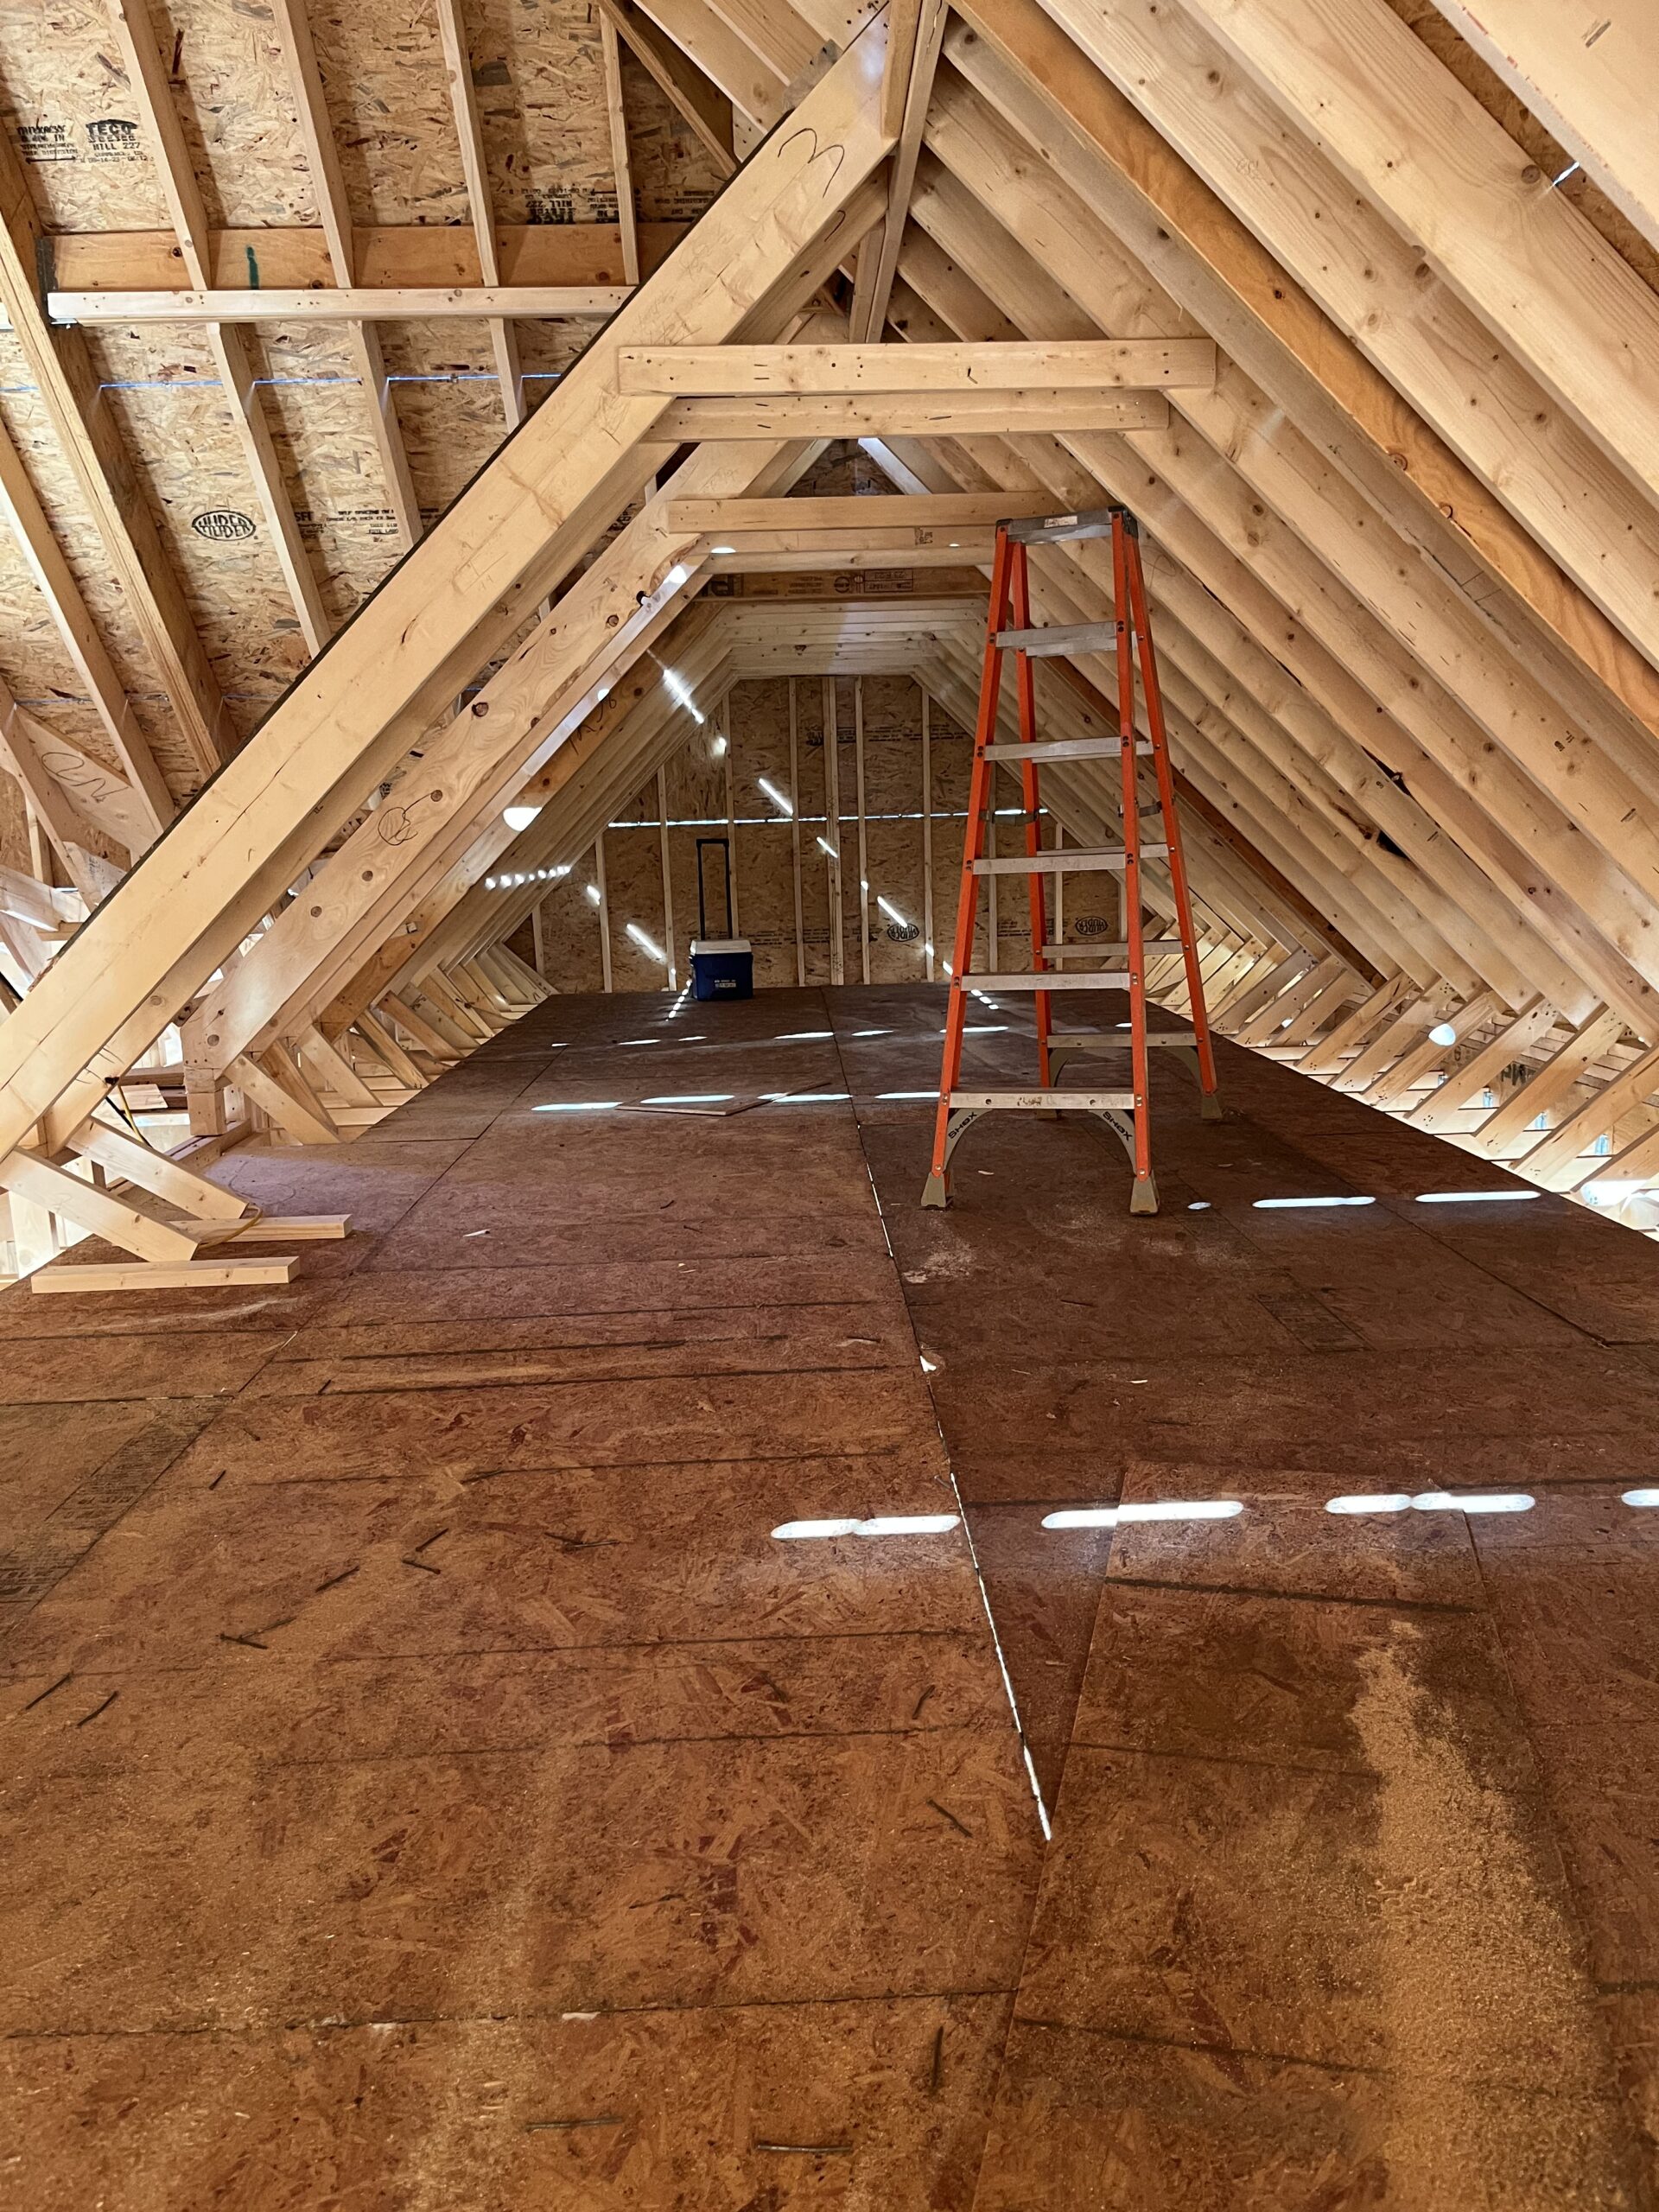
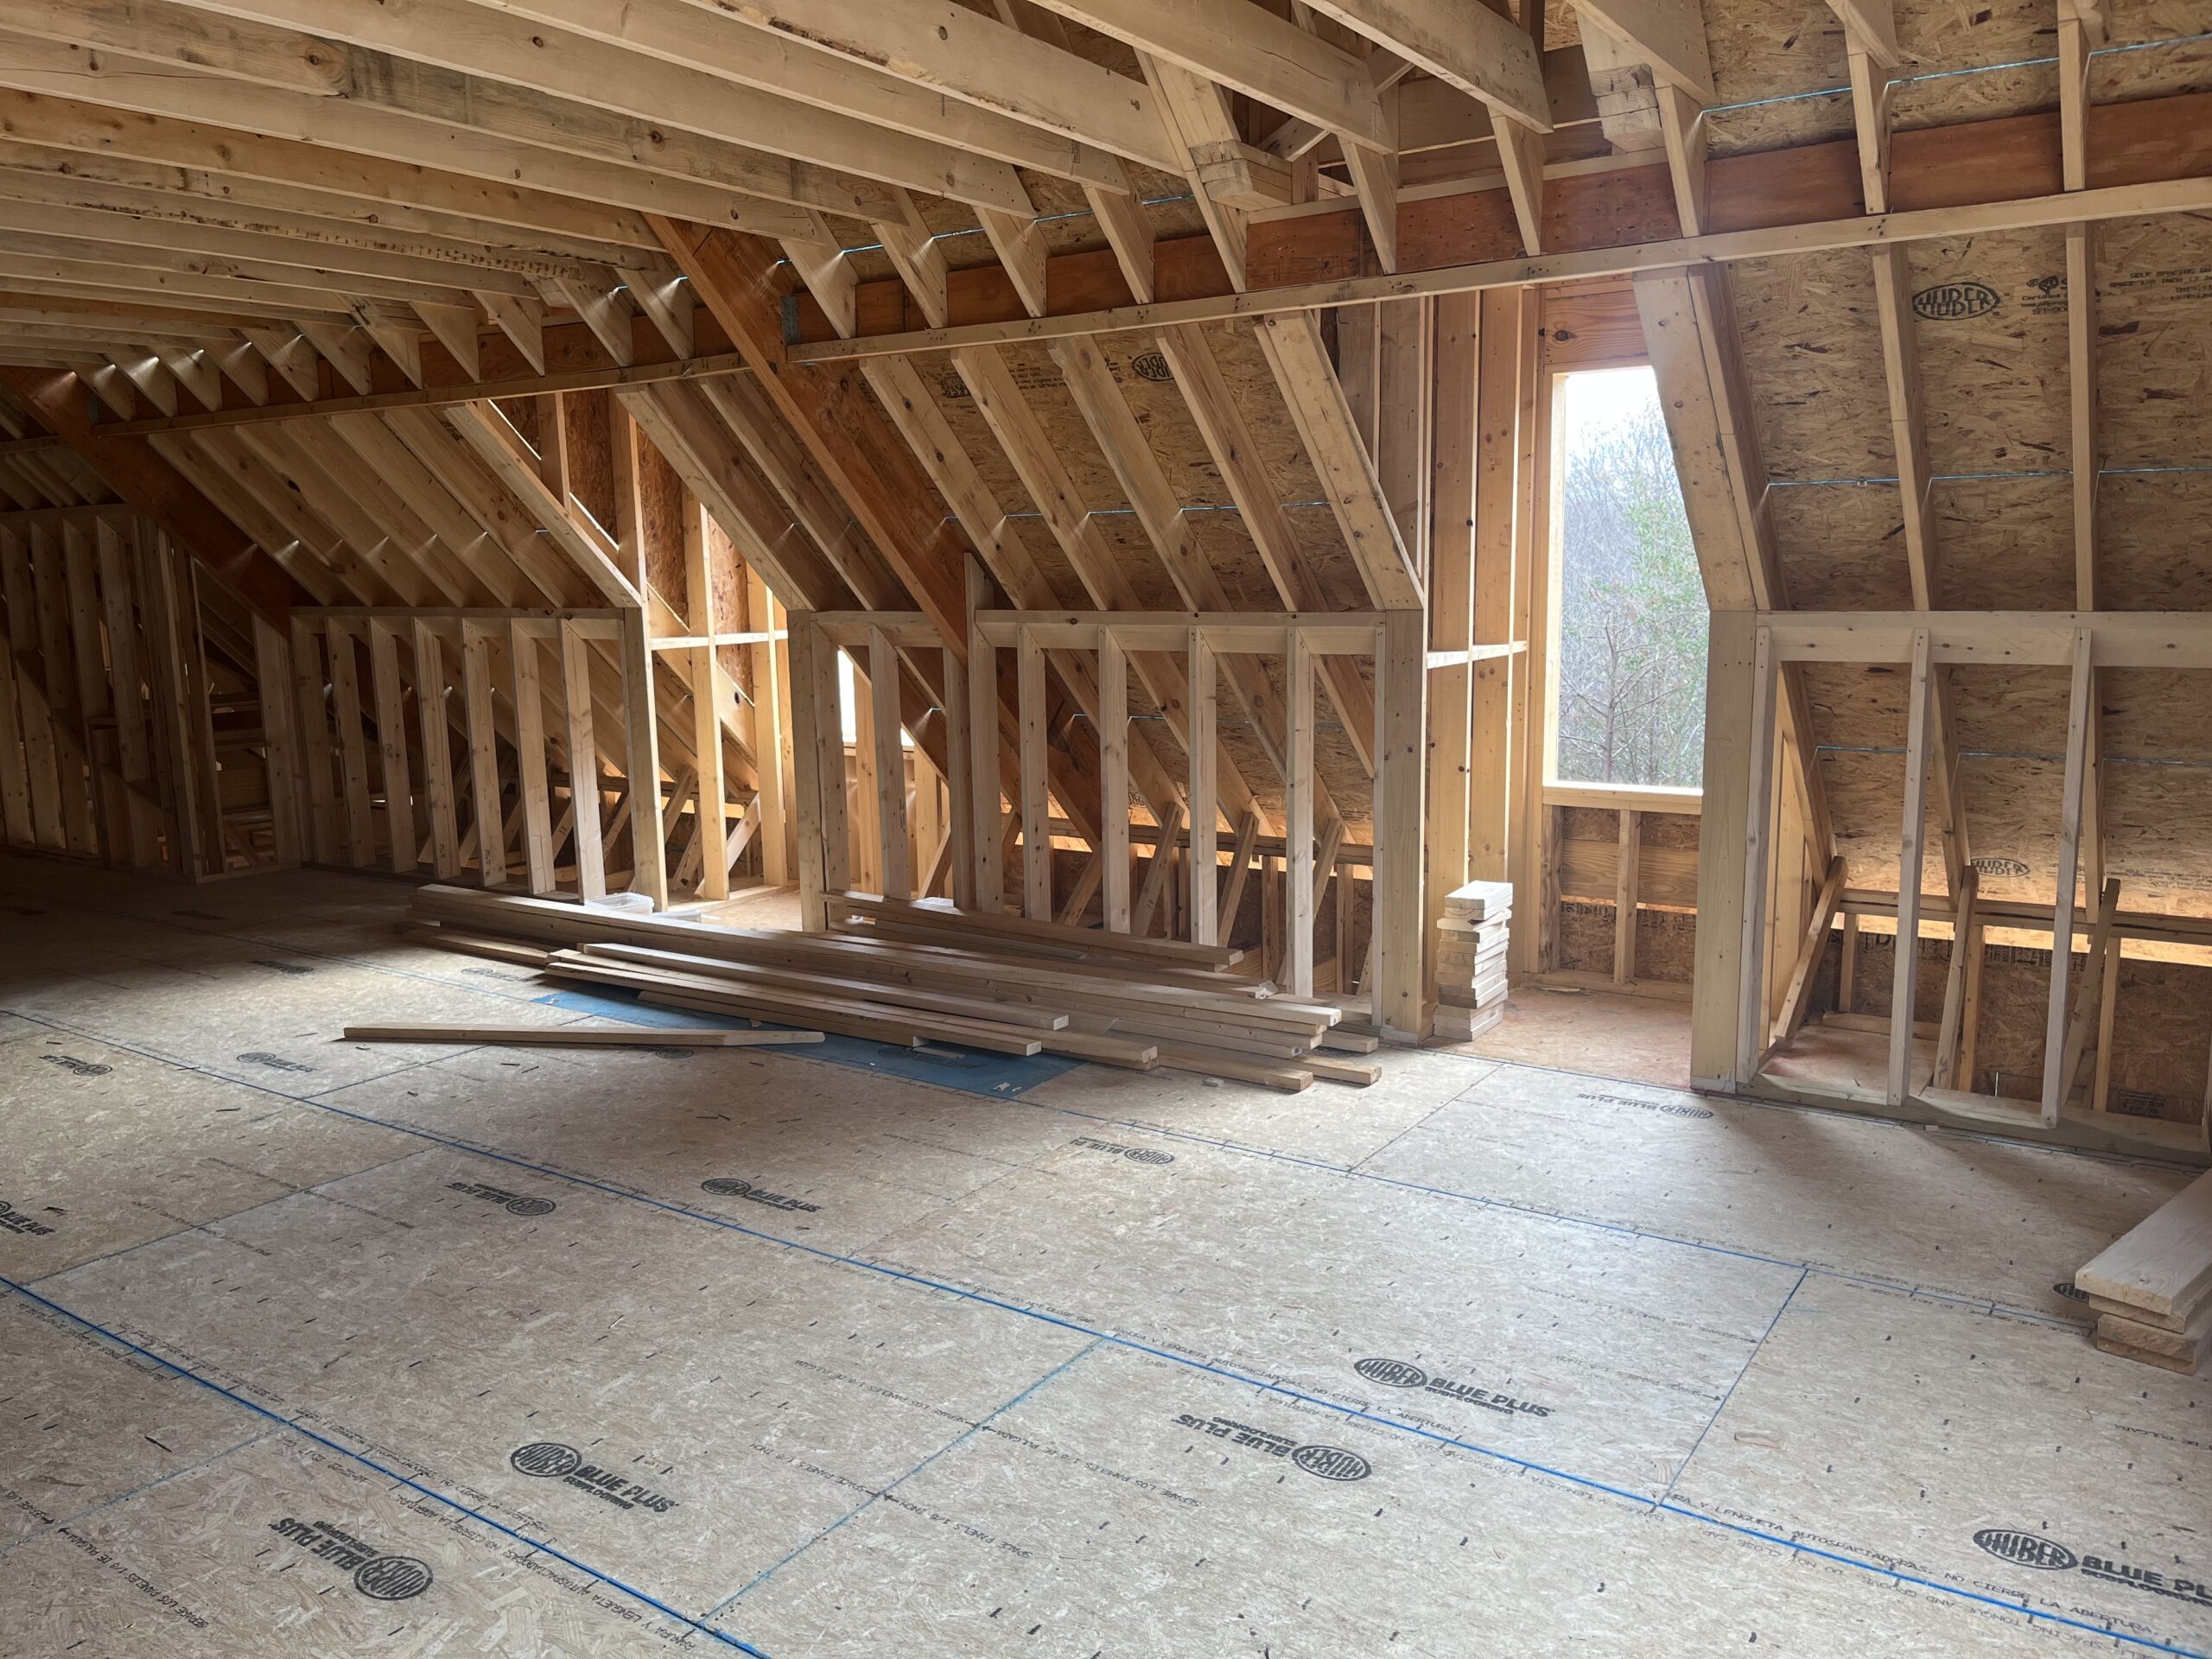
This is an example of a project that with the Cost Savings in Material and a Brace Free Open Attic designed by Roof Framing Solutions the Homeowners added a Truss Floor System and a full set of stairs to the attic to gain an additional 825 square feet of Future Finish and 430 square feet for Storage for a total gain of 1,255 square feet of attic space.

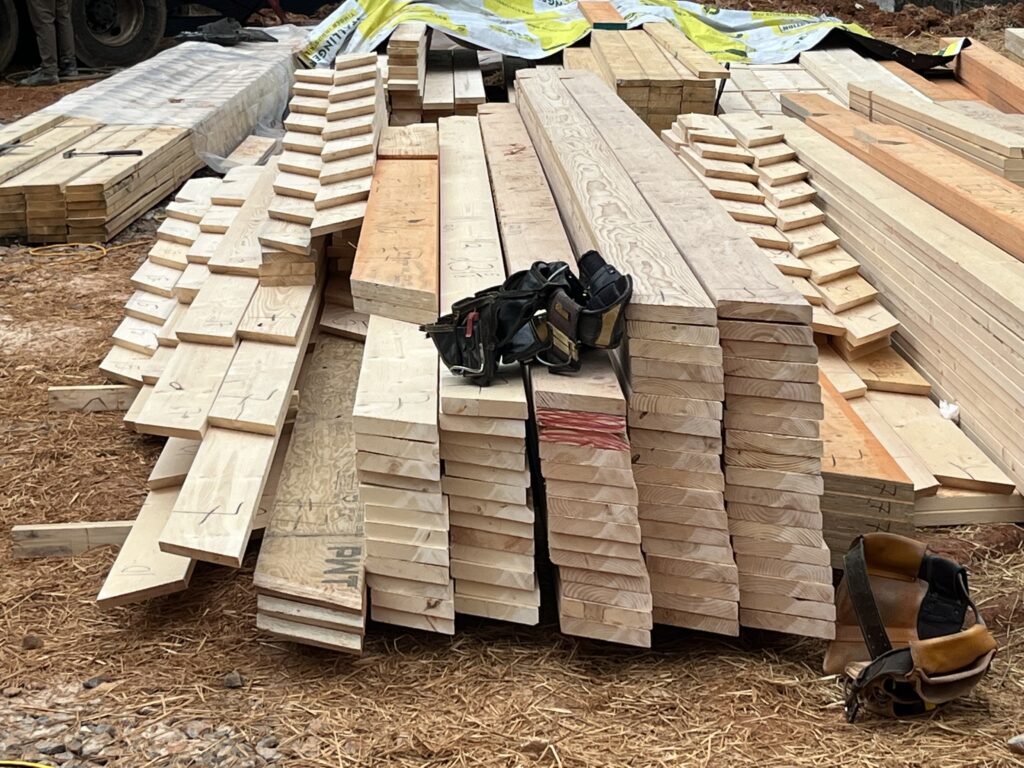
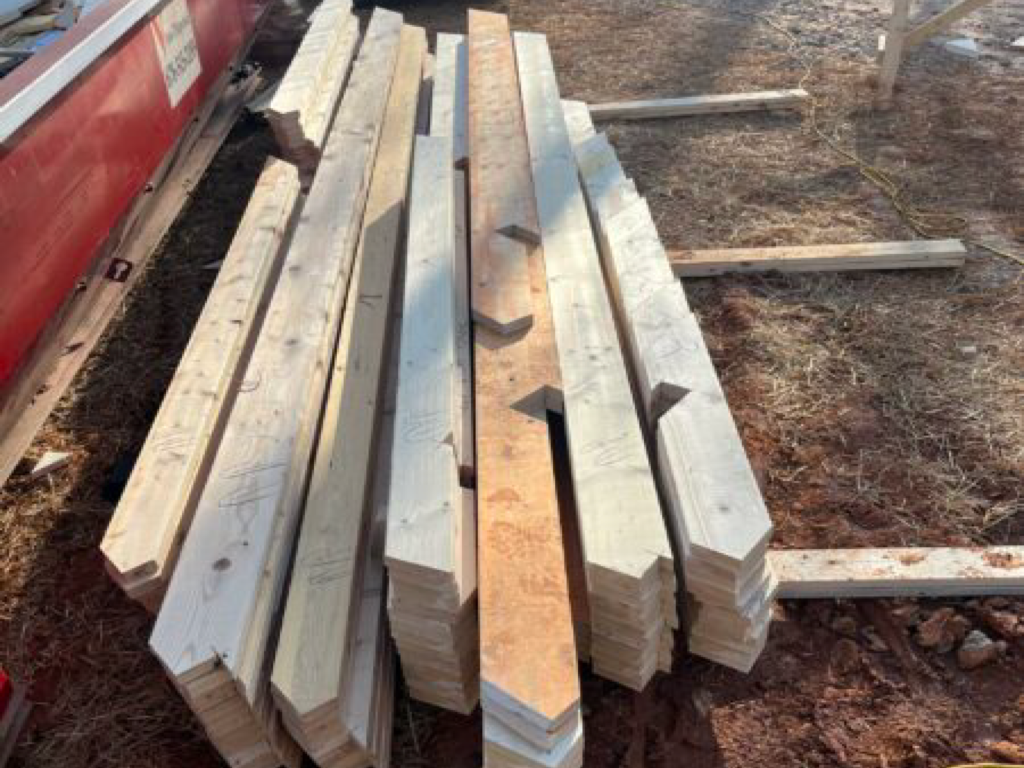
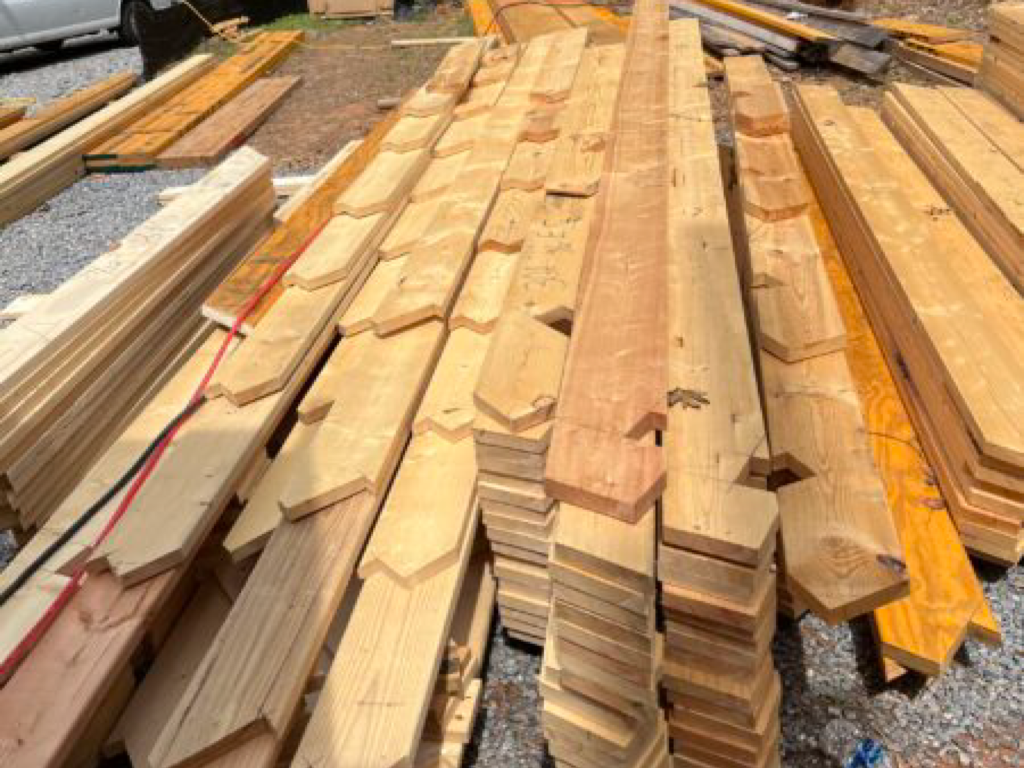
Getting a complete Roof Framing Material List and then framing the Roof is the most complicated, time-consuming, and costly part of framing a house. The last thing a Homeowner wants to see after the Roof is built is huge piles of waste or stacks of expensive over-ordered material covering the lot. Unfortunately, most material lists are done by someone with little to no roof knowledge or building experience, or by the Framer on-site, at the last minute, multiple times. This is called a “Shotgun Takeoff “. Having smarter cost control and material management during roof construction requires an accurate, complete Roof Framing Material List and Layout, with a Roof System Rafter Cut List and Layout.
Here are some examples of “Shotgun takeoffs“ and how they can get out of control with waste and overordering. As you look through these pictures of all the material waste and MONEY covering the lot, ask yourself…

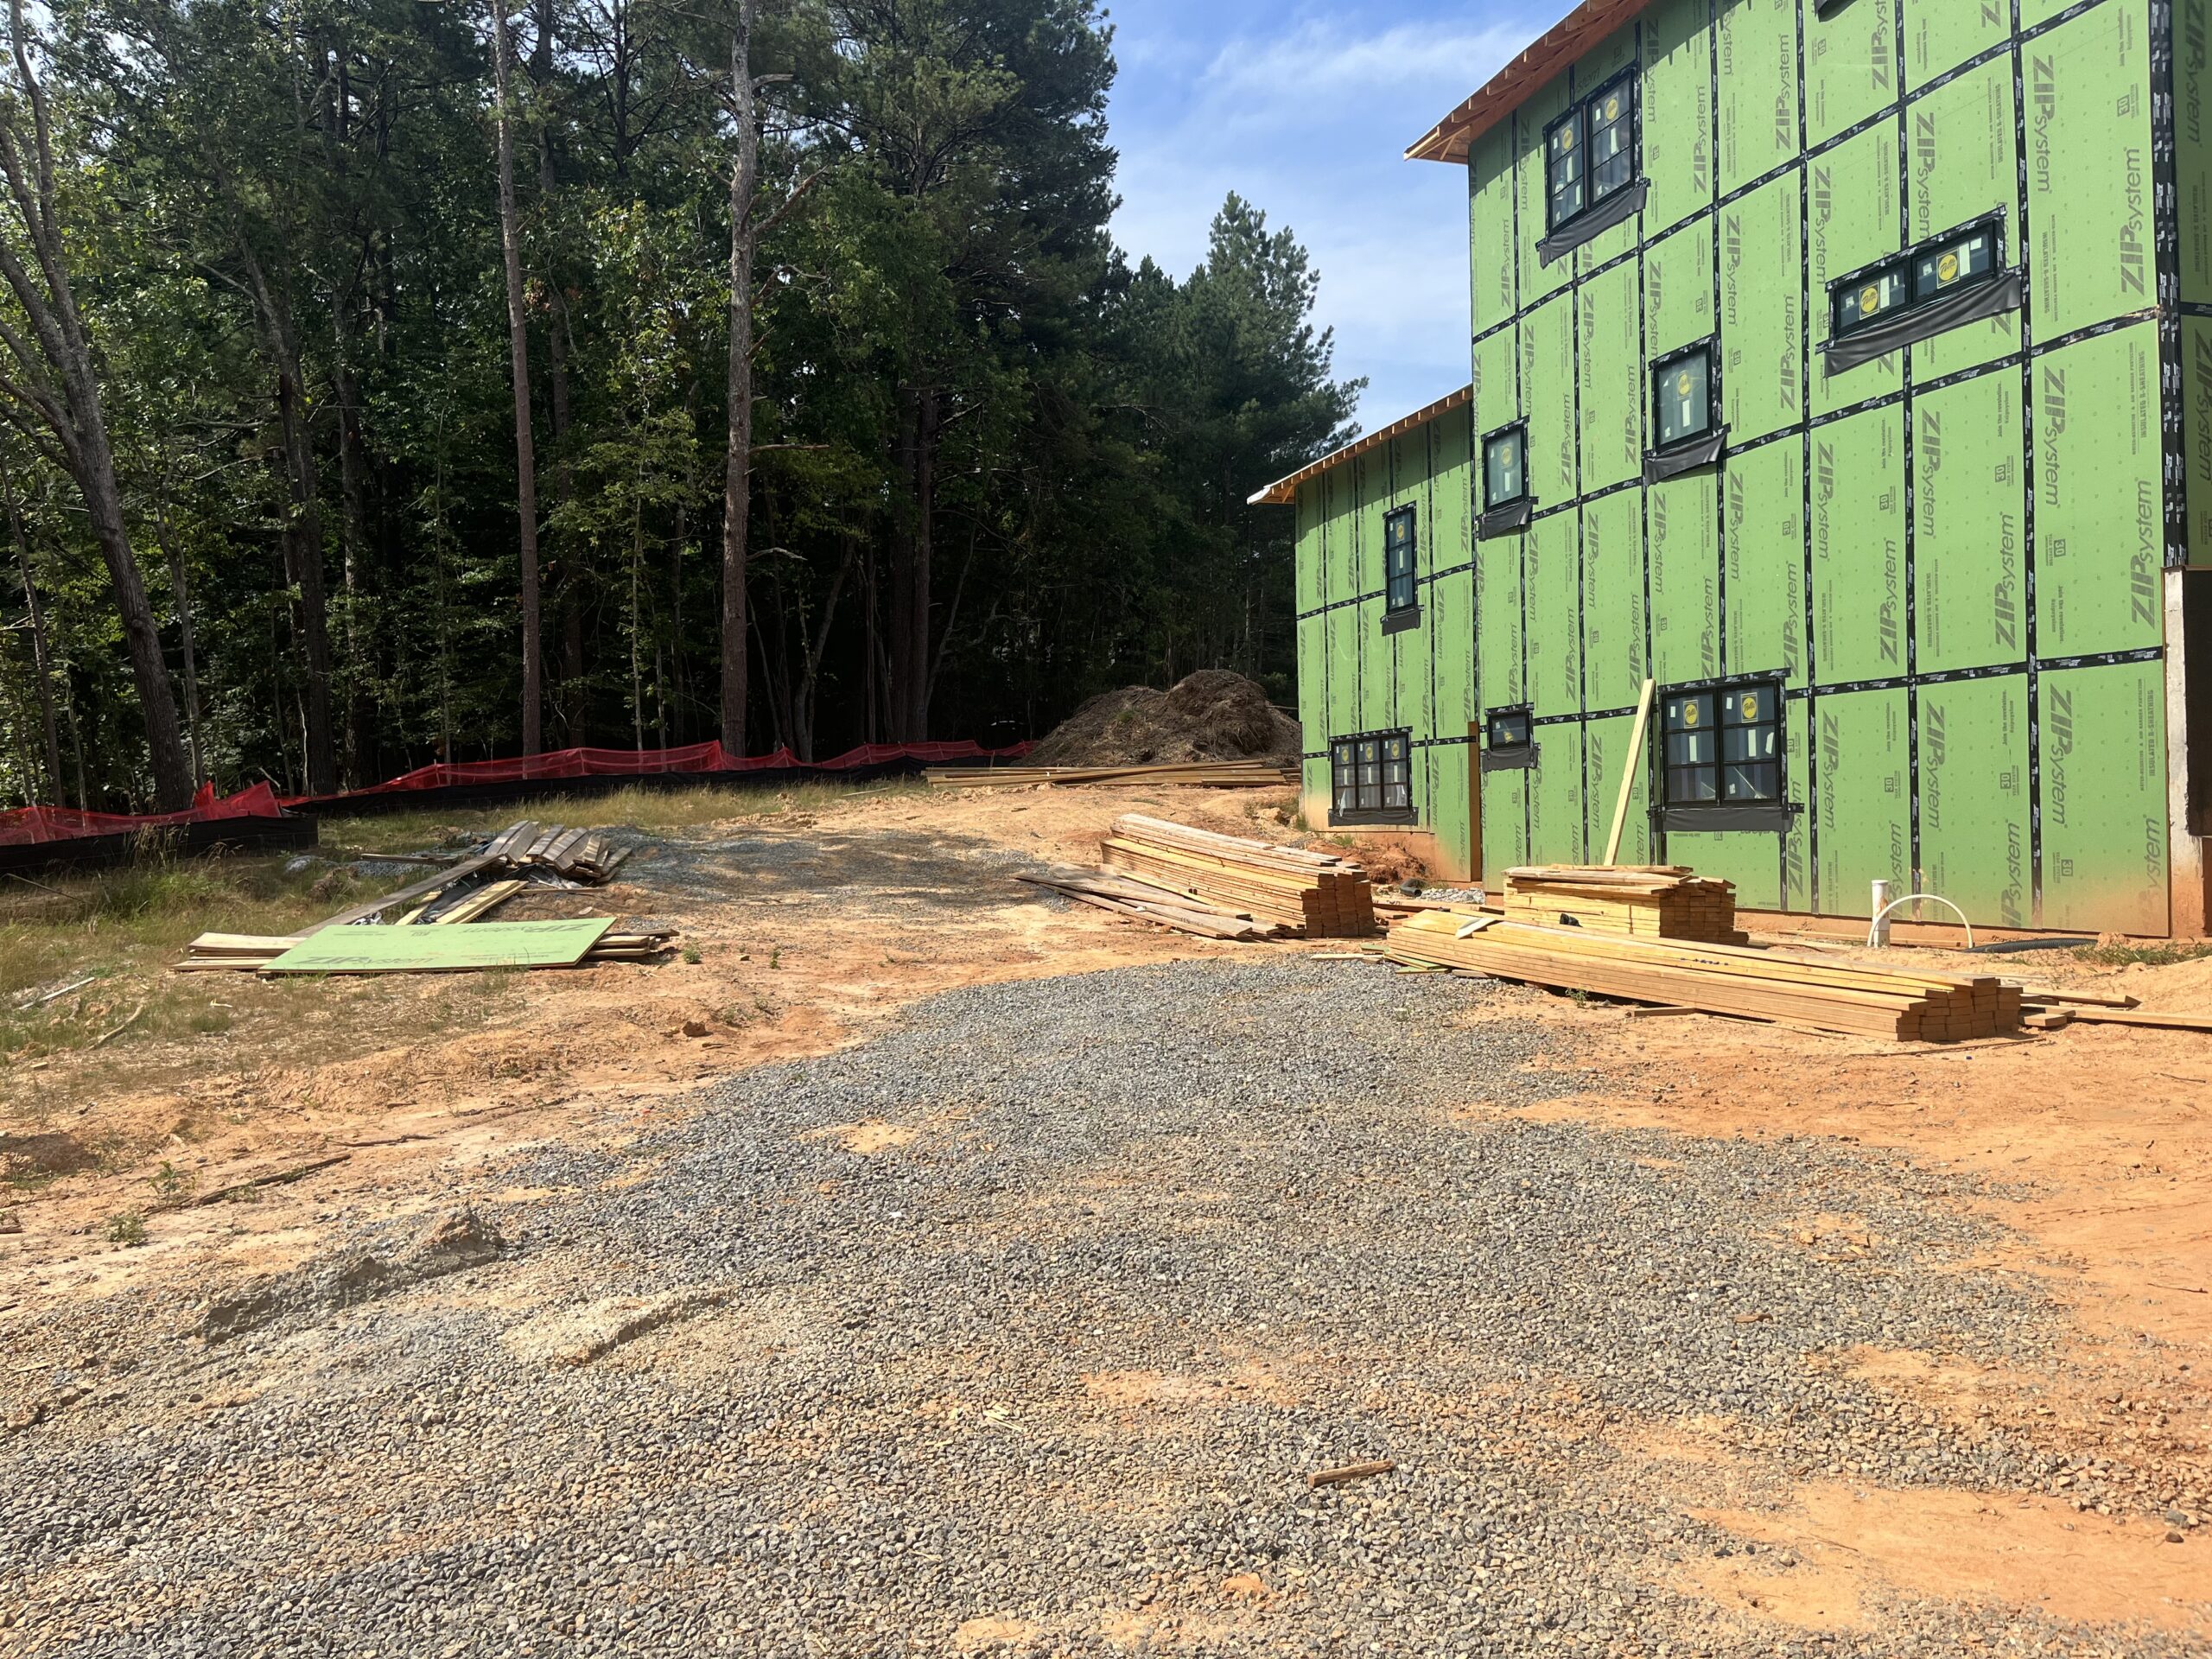
With a Structurally Designed Roof System from Roof Framing Solutions there is Smarter Cost Control and Material Management with Roof Construction. There are no huge waste piles or stacks of lumber consuming valuable jobsite space waiting to be picked up, used by others or stolen
This is an example of a 4,250 square foot ranch-style house with a Brace Free Open Attic Designed by Roof Framing Solutions. With Smarter Control and Material Management the Homeowners re-directed the savings back into the house and were able to add the following:


Without a Common or Standard Method of Roof Framing taught or practiced within the industry and the lack of Roof Cutters with the knowledge or experience there are as many ways to cut a Roof as there are Framing Crews. This can lead to many costly time-consuming problems such as:
Here are some examples of houses brought to a stop waiting for the Roof Truss package to be delivered and another with the package dumped and scattered all over the jobsite causing damage to several Trusses. The Framing crews had to pull off and start other projects because of the delays. The next phase of Contractors and deliveries had to be cancelled and rescheduled also. When using the Roof Framing Solutions Method there is no loss of production waiting for Trusses, scheduling cranes or repairing the broken Trusses. With the Roof Framing Solutions, the entire Roof System is Structurally Designed, creating a Roof Material List and Layout with a Roof System Rafter Cut List and Layout all done in the pre-construction phase eliminating any loss of production during construction.
Using a Prefab Roof Truss System can cause many costly time-consuming problems such as:

This is an example of a Designated Mechanical Closet in the Finished area of a Brace Free Open Attic Roof System Designed by Roof Framing Solutions. Having this closet allows for easy Installation and Smarter, Straighter Ductwork behind the new Finished walls to protect them from damage or crushing. With the HVAC unit laid out in an organized easily accessible way and the ductwork hanging from the rafters with ductstraps, this area will also be used for Conditioned Storage with access to other areas for unconditioned storage. Note the full-size entry door for easy access for maintenance.
Here is an example of an HVAC unit in a Brace Free Open Attic Roof System Designed by Roof Framing Solutions. With no need for the outdated Roof Bracing methods used currently the attic is clear and open for easy installation and clear access for maintenance. Using Spray Foam Insulation, the ductwork can hang from the rafters with ductstraps to ensure that it is straight and has minimal bends or sags which can restrict airflow and efficiency. It is also easier to check for leaks and protect them from being damaged or crushed in the future storage area. Also note how much space is available for storage.
The Roof Framing Solutions Roof System Rafter Layout Plan provided to the Framer is a detailed Layout, written in the Framers Language, of where all the Pre-cut Rafters and Roof Sections are located. The numbering system on the Rafter Layout Plan matches the Rafter Cut List so there is no confusion as to what Rafters goes where. Following the Rafter Layout Plan all the Rafters and Structural components are laid out including:
With the Roof Framing Solutions Roof System Rafter Layout Plan the entire Pre-cut Roof System can be moved into the correct location without any confusion and be ready to be assembled
The Rafter Cut List provided to the Framer are cut sheets with specific detailed information, written in the Framer’s Language, needed to lay out, cut, and number each rafter for the entire Roof System, including the following:
With the Roof Framing Solutions Rafter Cut List the entire Roof System can be pre-cut, organized and stacked, ready to be assembled while the house is being framed, eliminating the loss of production with today’s slow, outdated stick framing methods or the problems with Prefab Roof Truss Systems.
The Material Layout Plan is a complete detailed Layout for a Brace Free Open Attic Roof System showing the Framer all the information needed to cut and set up the roof. With the Material Layout Plan there is no confusion as to what has been ordered and where it goes. There is no more guesswork on setting up the roof with detailed information such as the following:
After reviewing all the Architectural and Structural plans provided a complete Roof System Layout is developed with any recommendations needed for a Structurally Superior, Cost Effective, Brace Free Open Attic Roof System. Then a detailed material list is created listing all the material by Size, Length and Quantity to build the entire Roof System. This material list can be used for pre-construction material pricing and getting a firm cost for budgeting. Having Smarter Cost Control and Material Management for Roof construction will eliminate:
When planning your home’s layout or renovation, don’t overlook the importance of dedicated storage space. Whether you choose conditioned (climate-controlled) or unconditioned (non-climate-controlled) storage, both can serve vital roles in organizing your home, protecting your belongings, and improving overall functionality.
Conditioned Storage: This space is insulated, temperature-controlled, and som1. Understand the Difference
etimes humidity-regulated. Ideal for storing sensitive items like electronics, documents, clothing, photographs, or holiday décor that could be damaged by heat, cold, or moisture.
Unconditioned Storage: Typically located in areas like garages, attics, sheds, or unfinished basements. These spaces are suitable for storing durable items such as tools, lawn equipment, seasonal gear, and plastic storage bins.
2. Plan Based on What You Store
Start by identifying what items you need to store now—and in the future. Then decide what kind of environment they require:
Use conditioned spaces for valuables, heirlooms, and items susceptible to mold or warping.
Use unconditioned spaces for less sensitive items that can withstand fluctuations in temperature and humidity.
Whether you’re planning to expand your living area now or laying the groundwork for a future upgrade, creating new or future finished space is a strategic way to add value, comfort, and functionality to your home. From basements and attics to additions and over-garage rooms, smart planning today can lead to stunning results tomorrow.
1. Plan with Purpose
Before construction begins, identify the intended use of the space. Will it be a home office, guest suite, recreation room, or rental unit? Defining the purpose helps guide design, layout, and mechanical needs such as plumbing, electrical, and HVAC.
2. Design with Flexibility in Mind
Even if you’re not ready to finish the space right away, plan for future adaptability. Frame walls, run utilities, and install subflooring with future use in mind. Adding rough-ins for bathrooms or kitchens now can save time and money later.
3. Consider Structural Requirements
Check load-bearing walls, floor joists, and foundation strength—especially for additions or over-garage builds. Ensuring the structure is sound and up to code now will prevent costly fixes down the line.
4. Utilities and Infrastructure
Install wiring, outlets, and plumbing lines during the early construction phase—even if you don’t need them yet. Future-proofing your space with smart HVAC planning and sufficient electrical capacity makes finishing the area easier later.
5. Insulate and Weatherproof Early
Even if you’re not finishing the space right away, insulation and weatherproofing are essential. This protects your investment and helps maintain energy efficiency in the rest of the home.
When planning your home’s layout or renovation, don’t overlook the importance of dedicated storage space. Whether you choose conditioned (climate-controlled) or unconditioned (non-climate-controlled) storage, both can serve vital roles in organizing your home, protecting your belongings, and improving overall functionality.
1. Understand the Difference
Conditioned Storage: This space is insulated, temperature-controlled, and sometimes humidity-regulated. Ideal for storing sensitive items like electronics, documents, clothing, photographs, or holiday décor that could be damaged by heat, cold, or moisture.
2. Plan Based on What You Store
Start by identifying what items you need to store now—and in the future. Then decide what kind of environment they require:
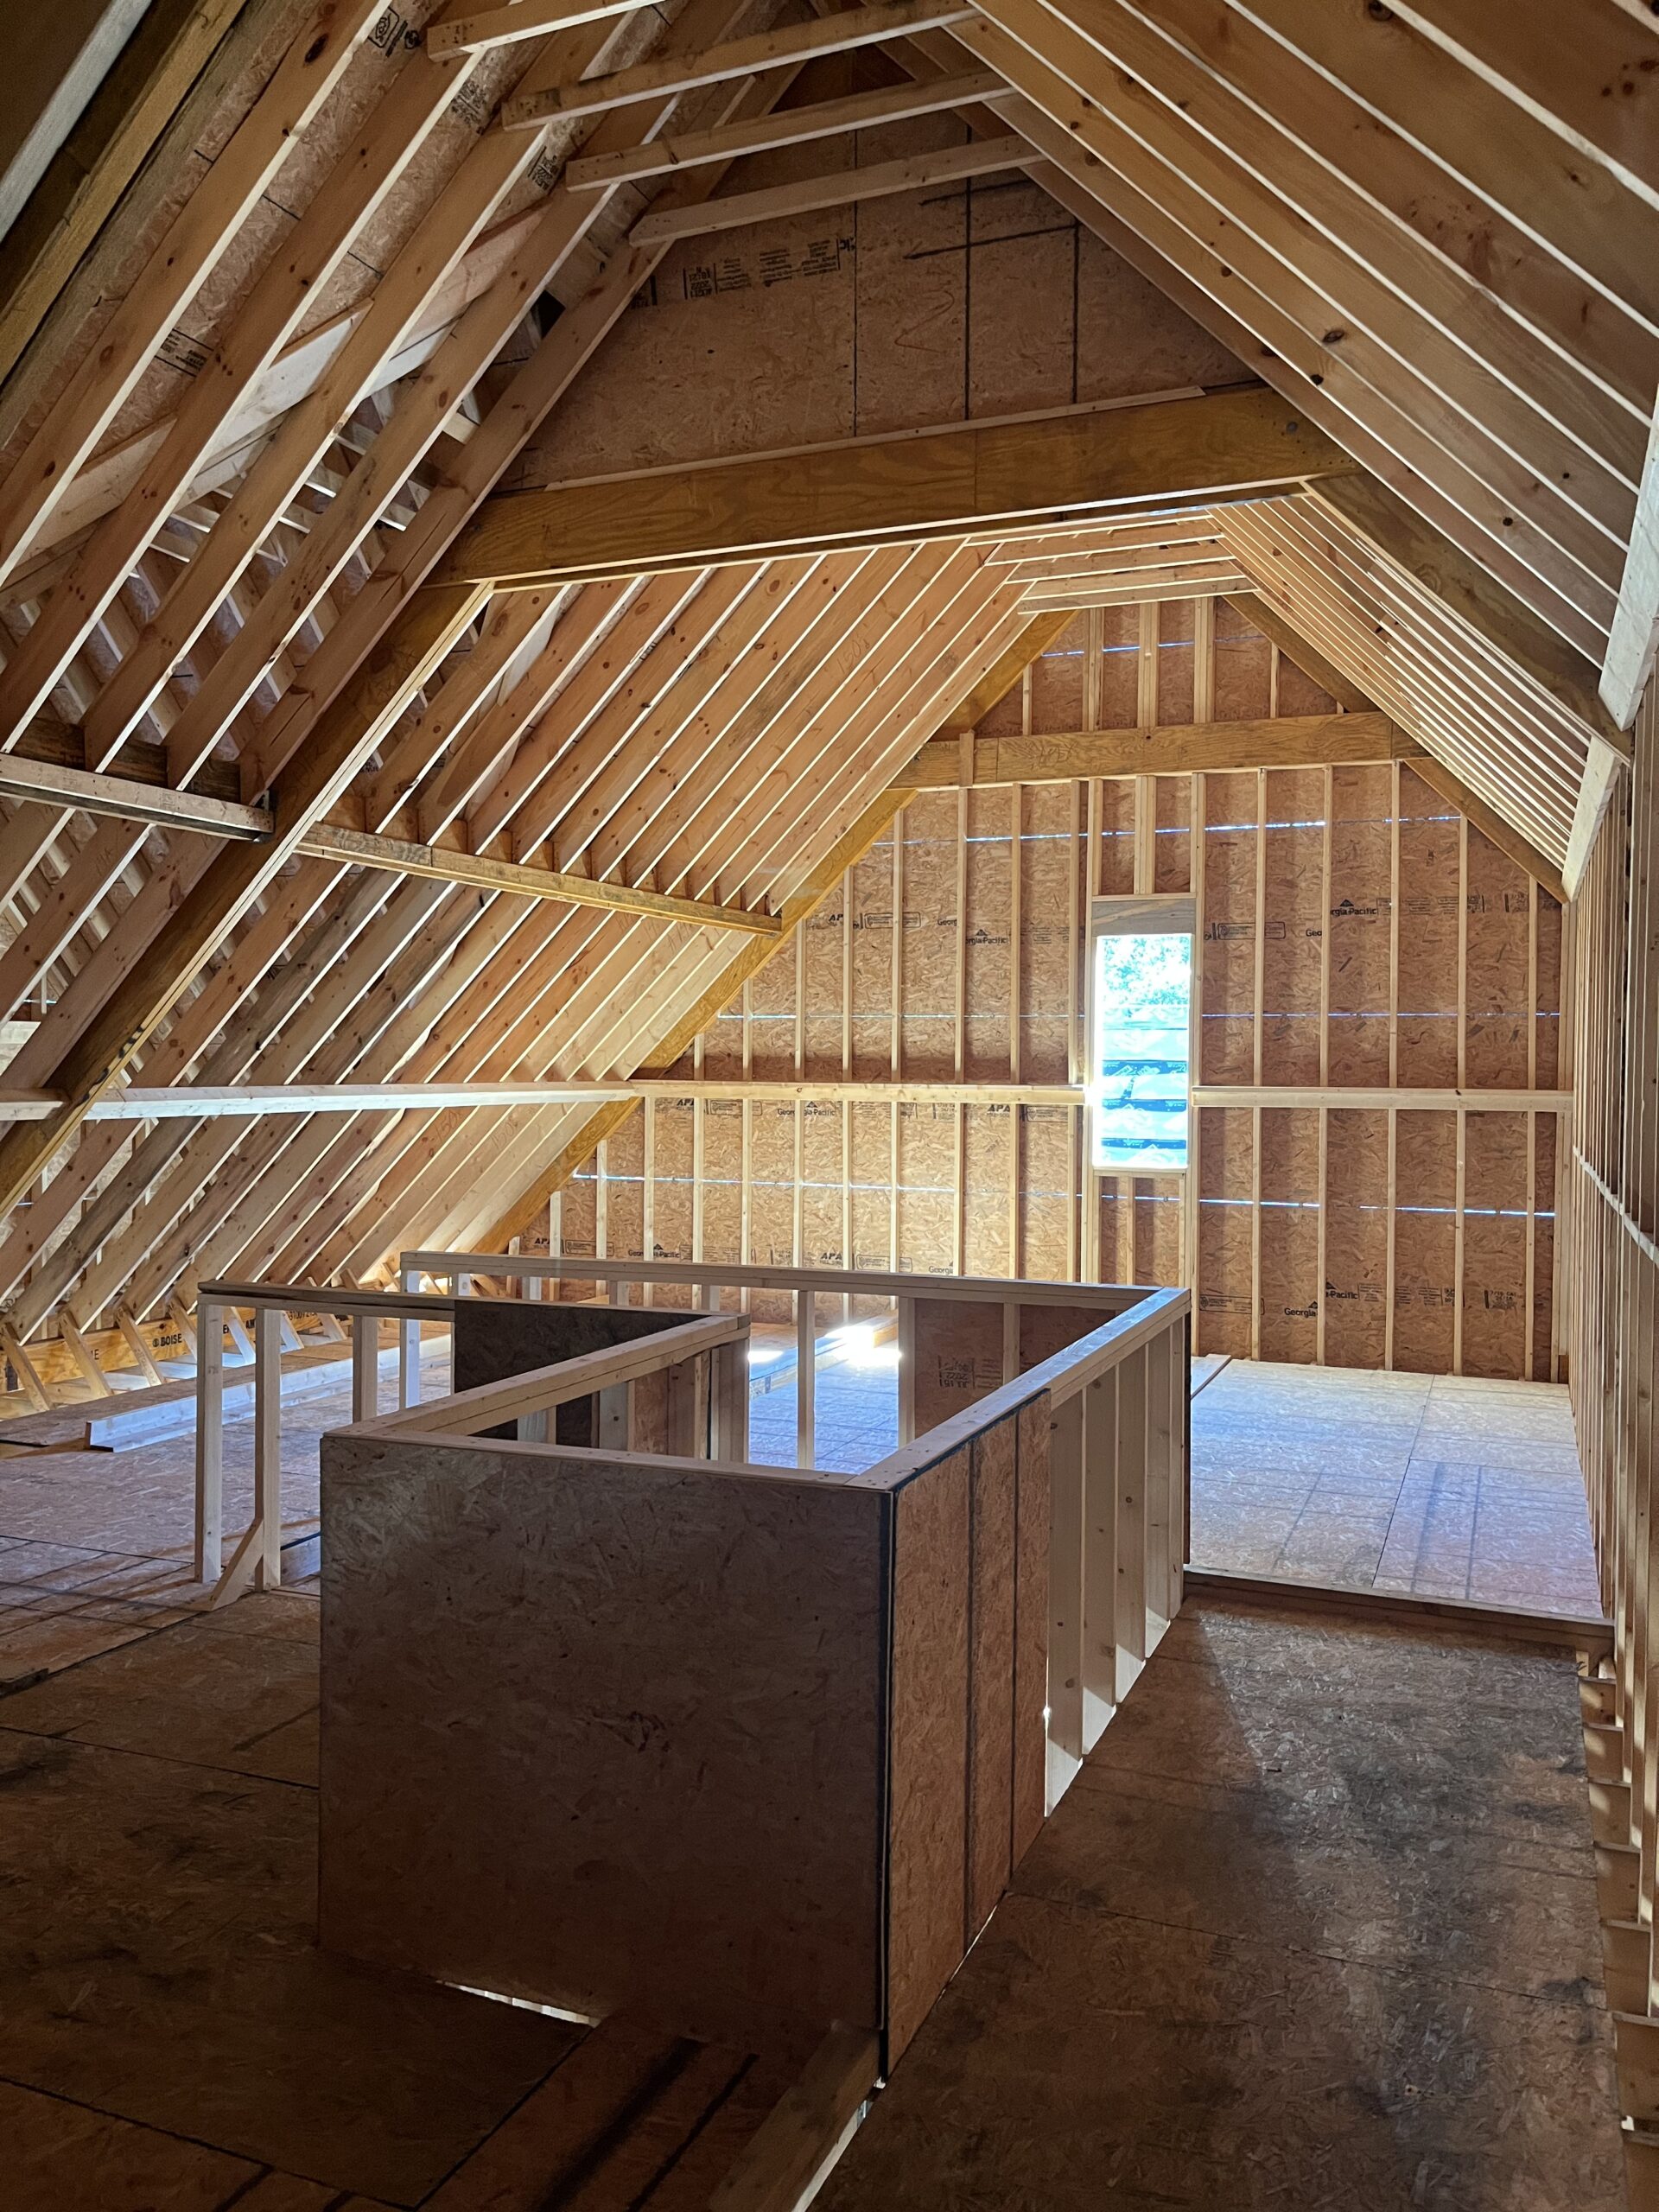
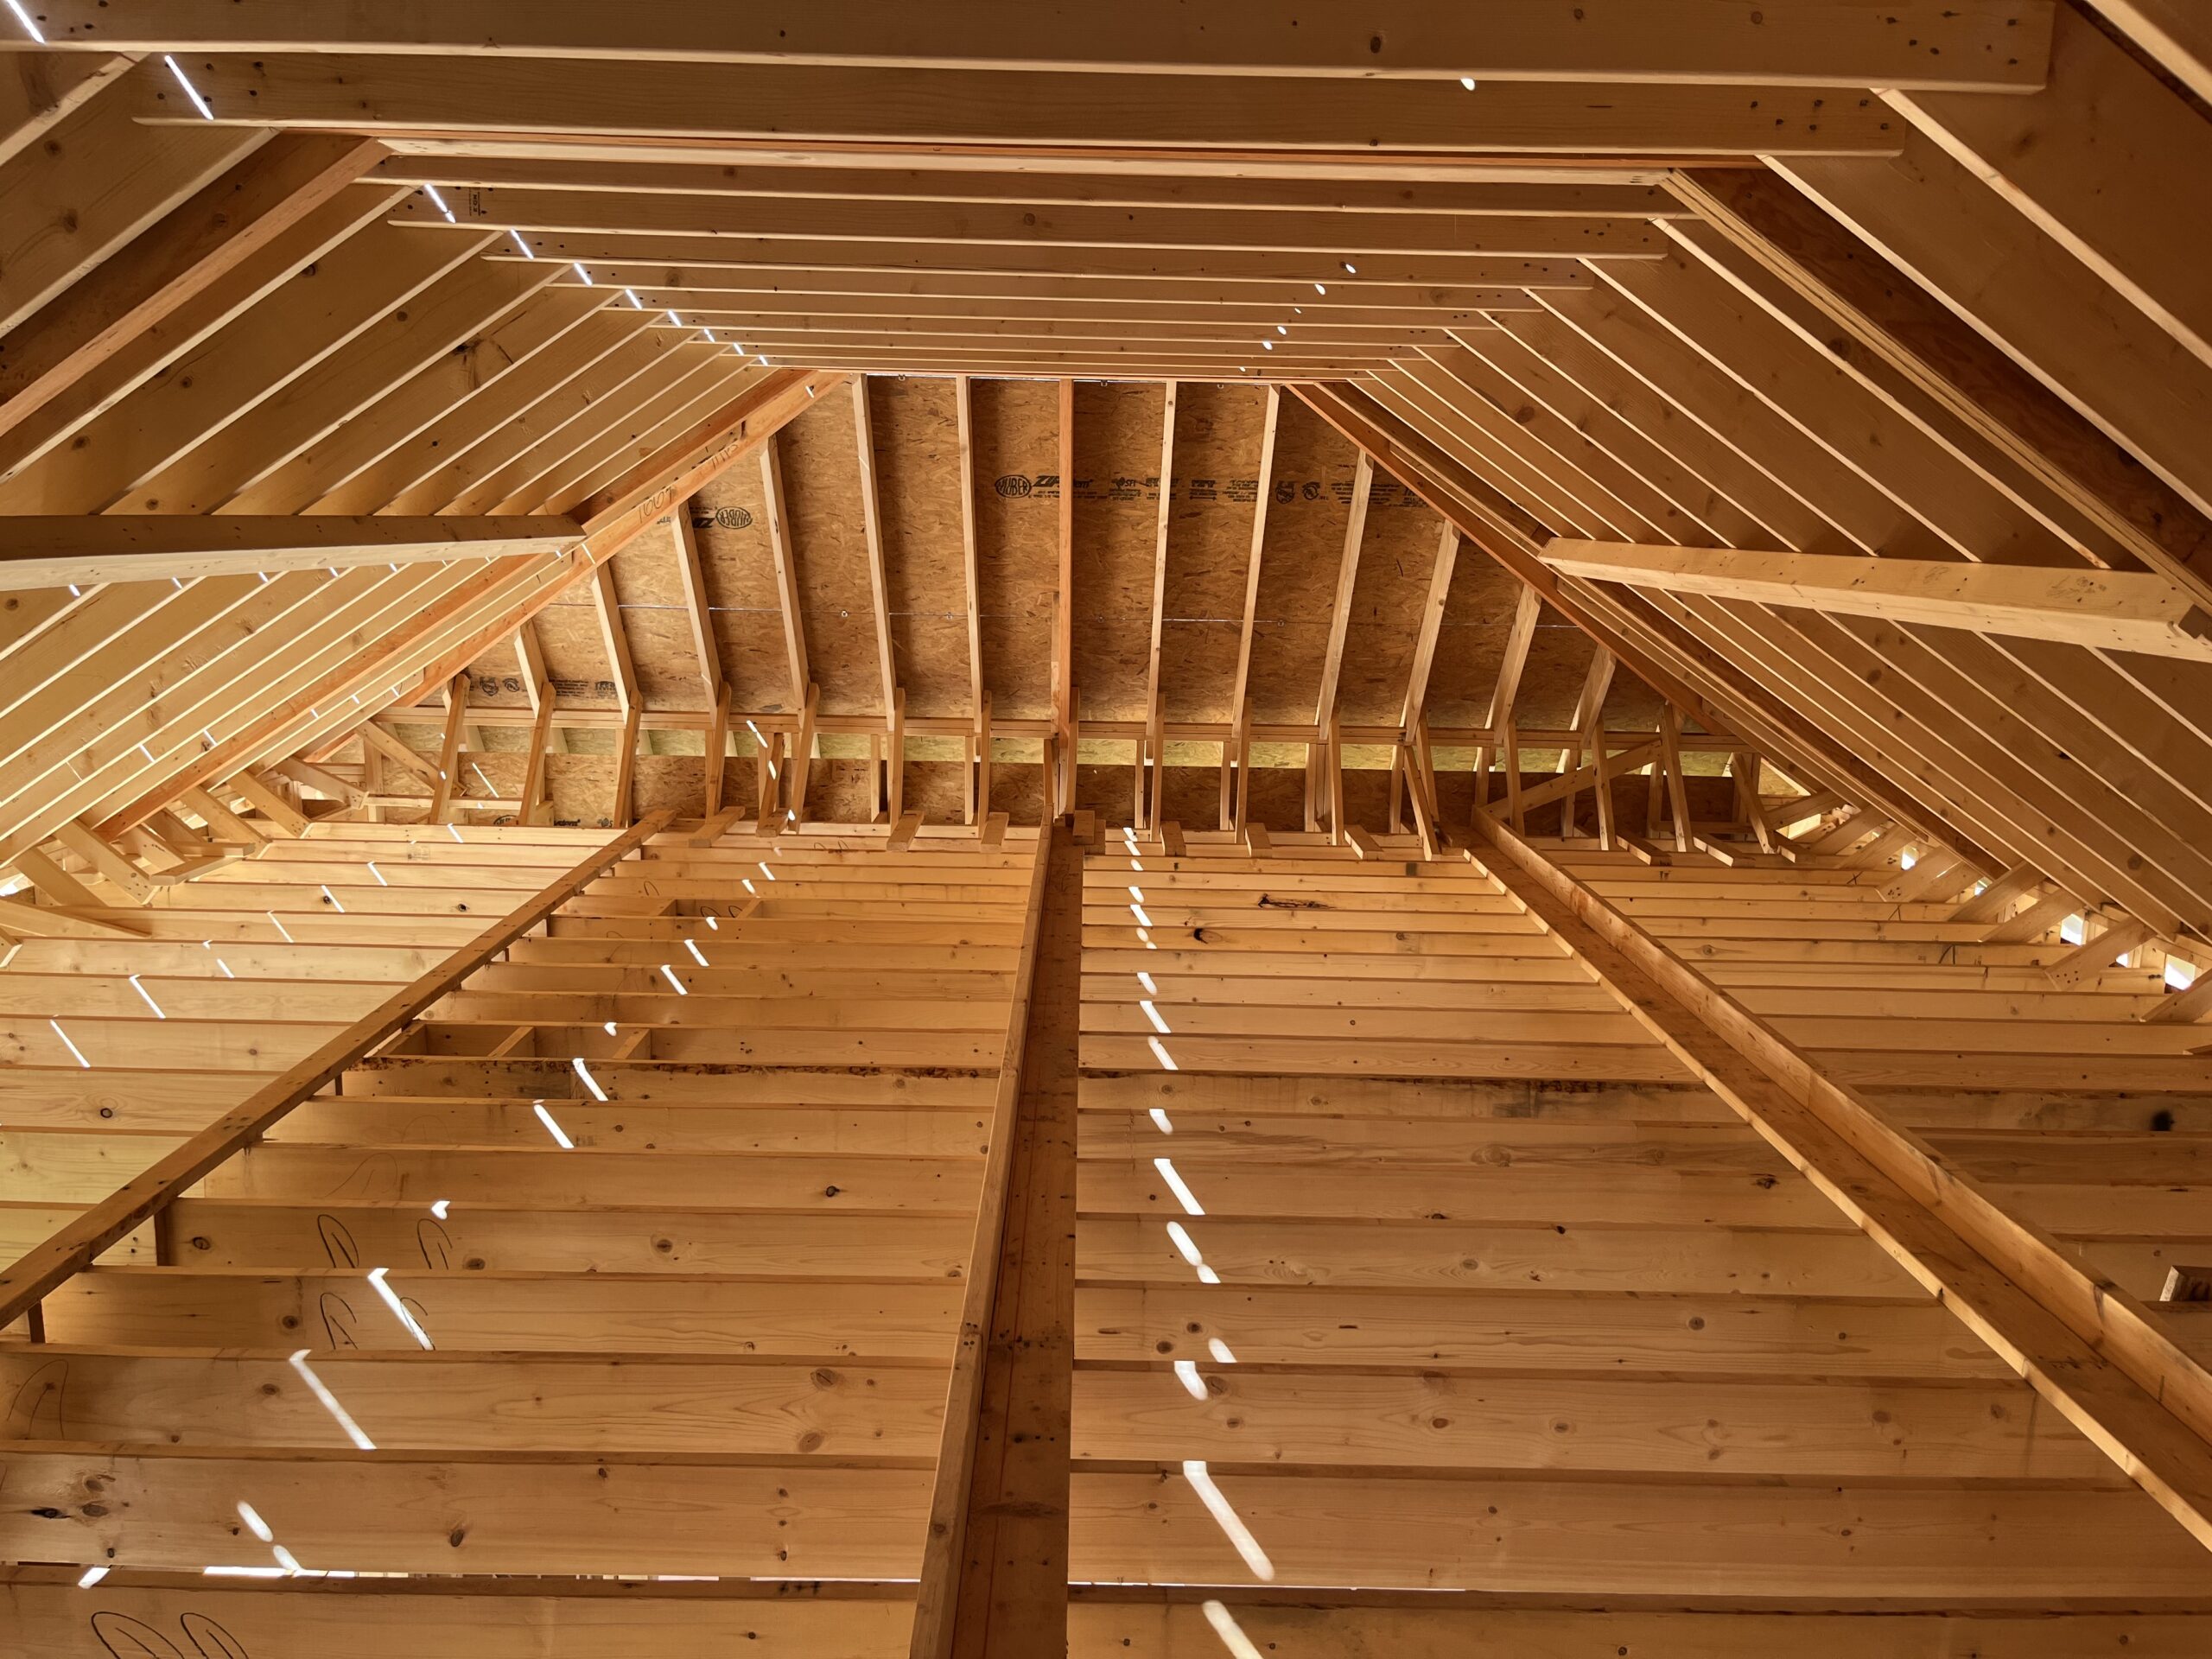
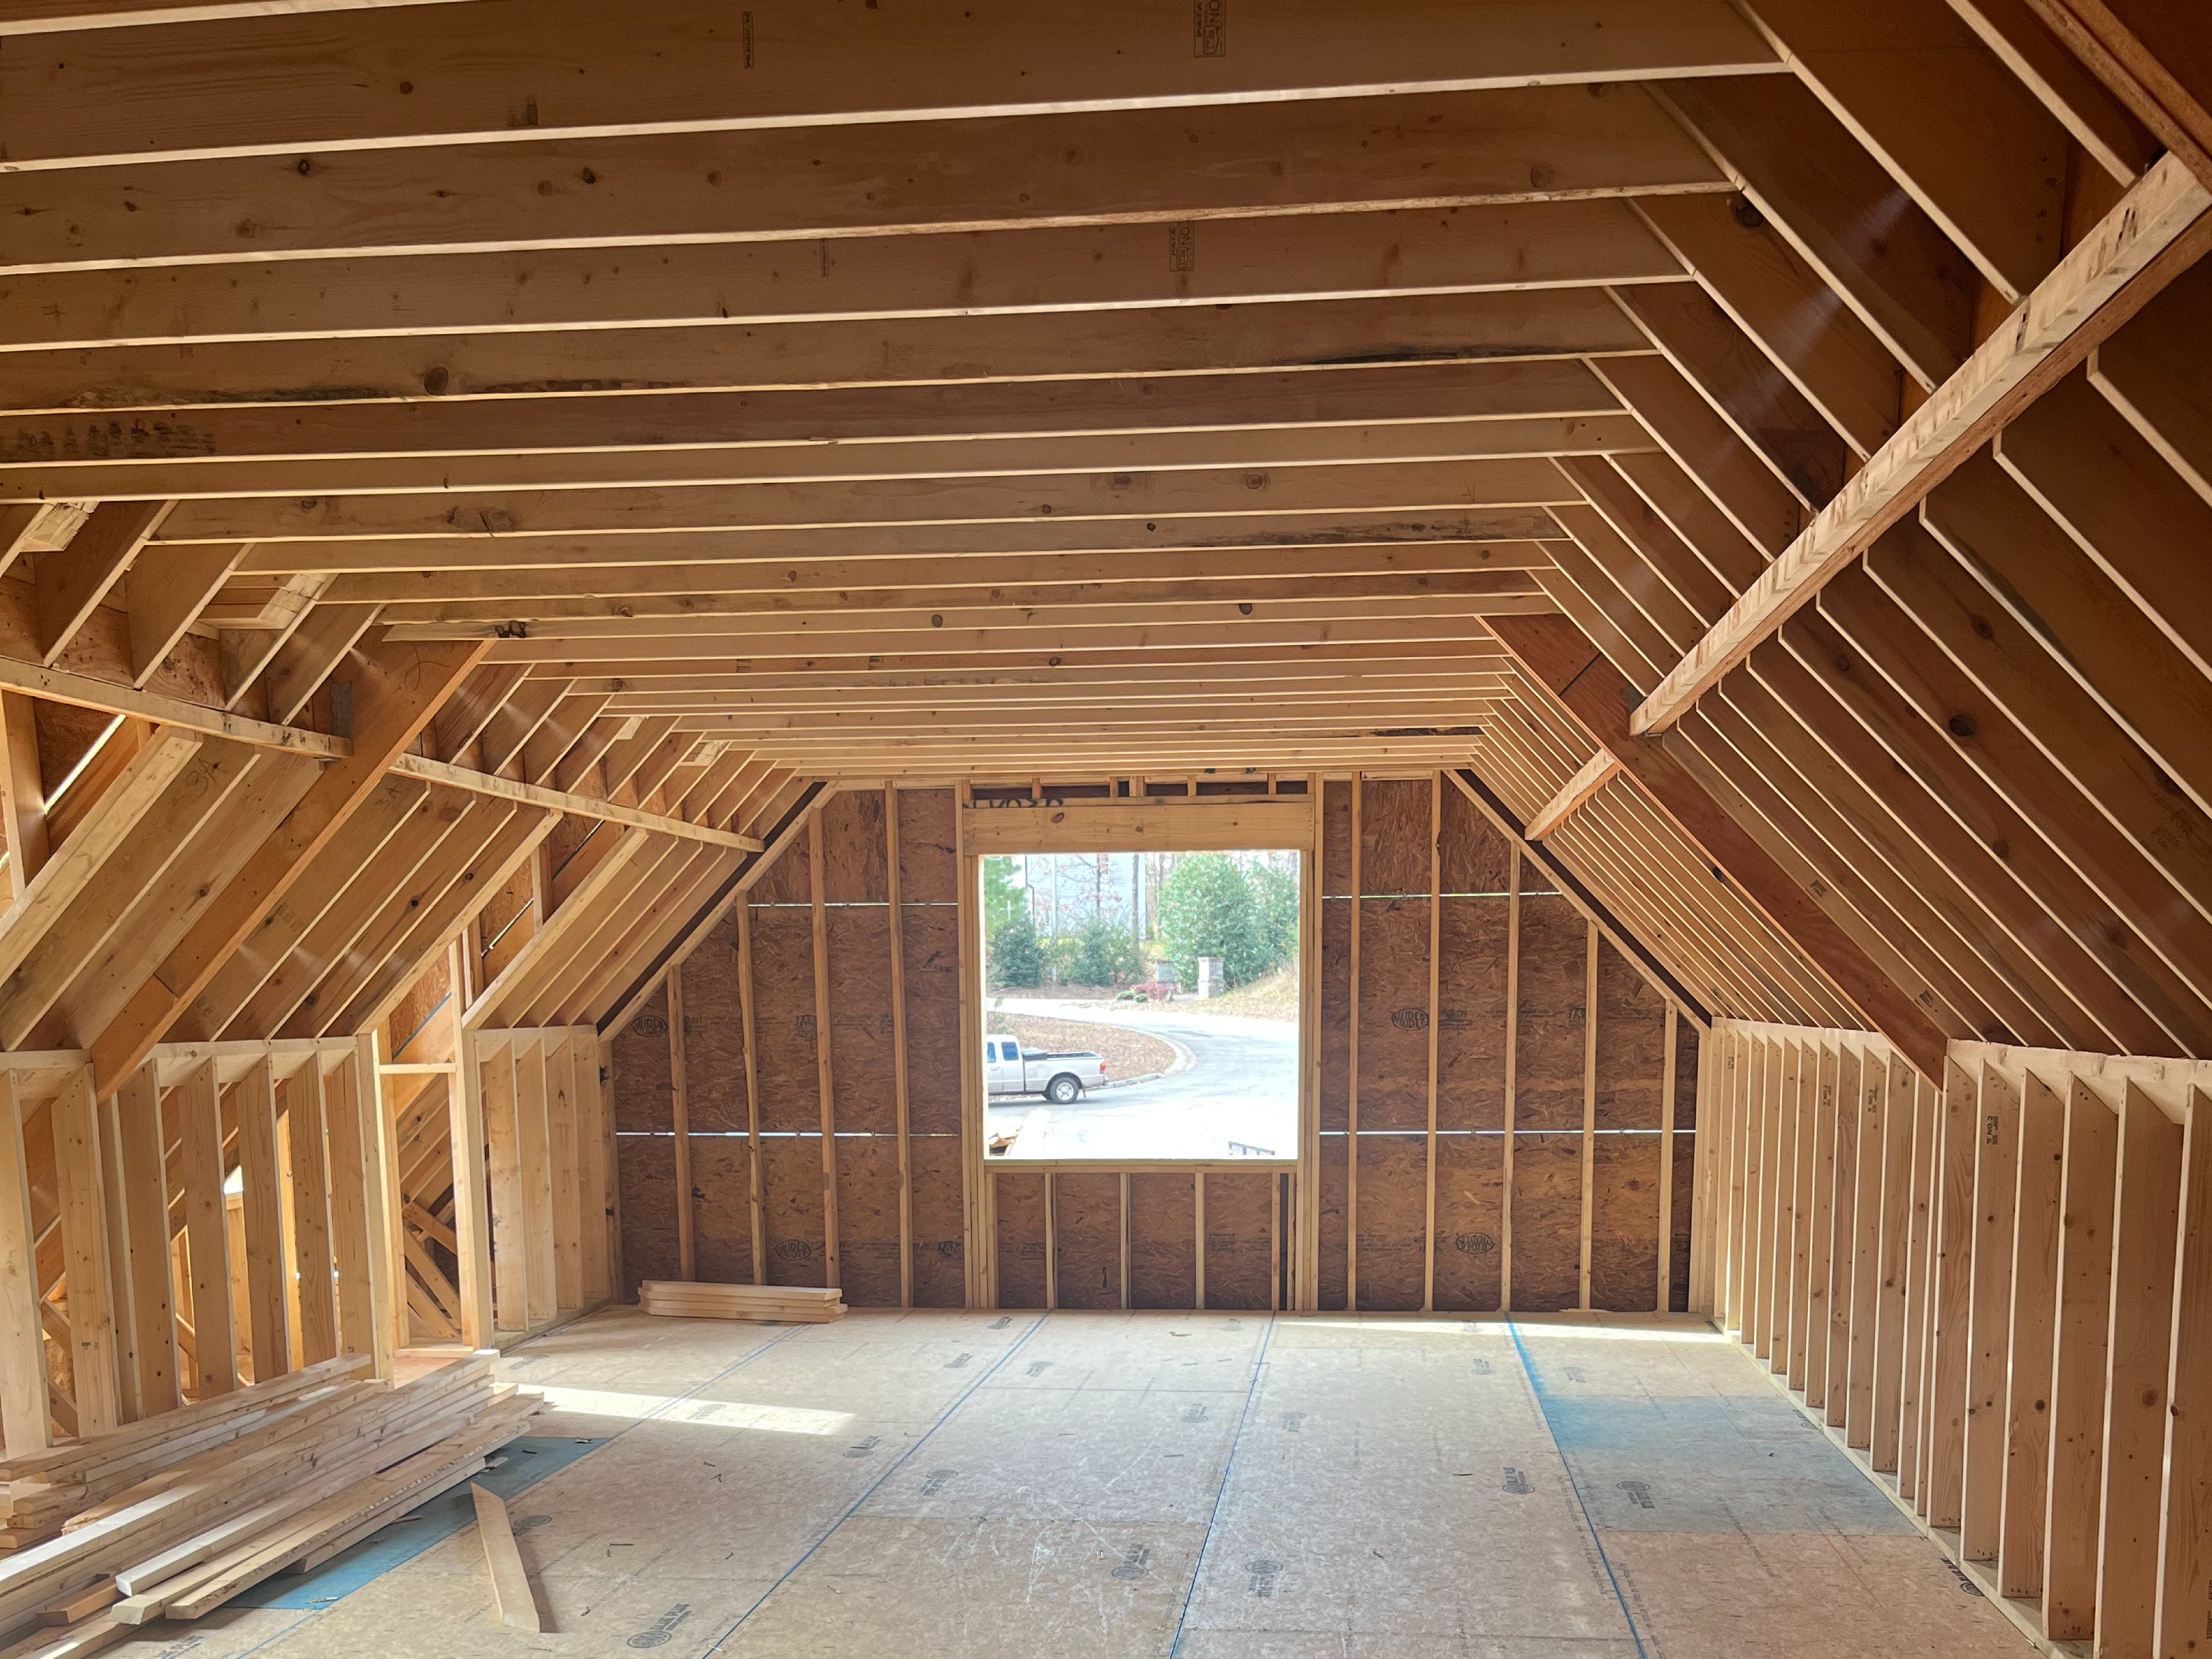
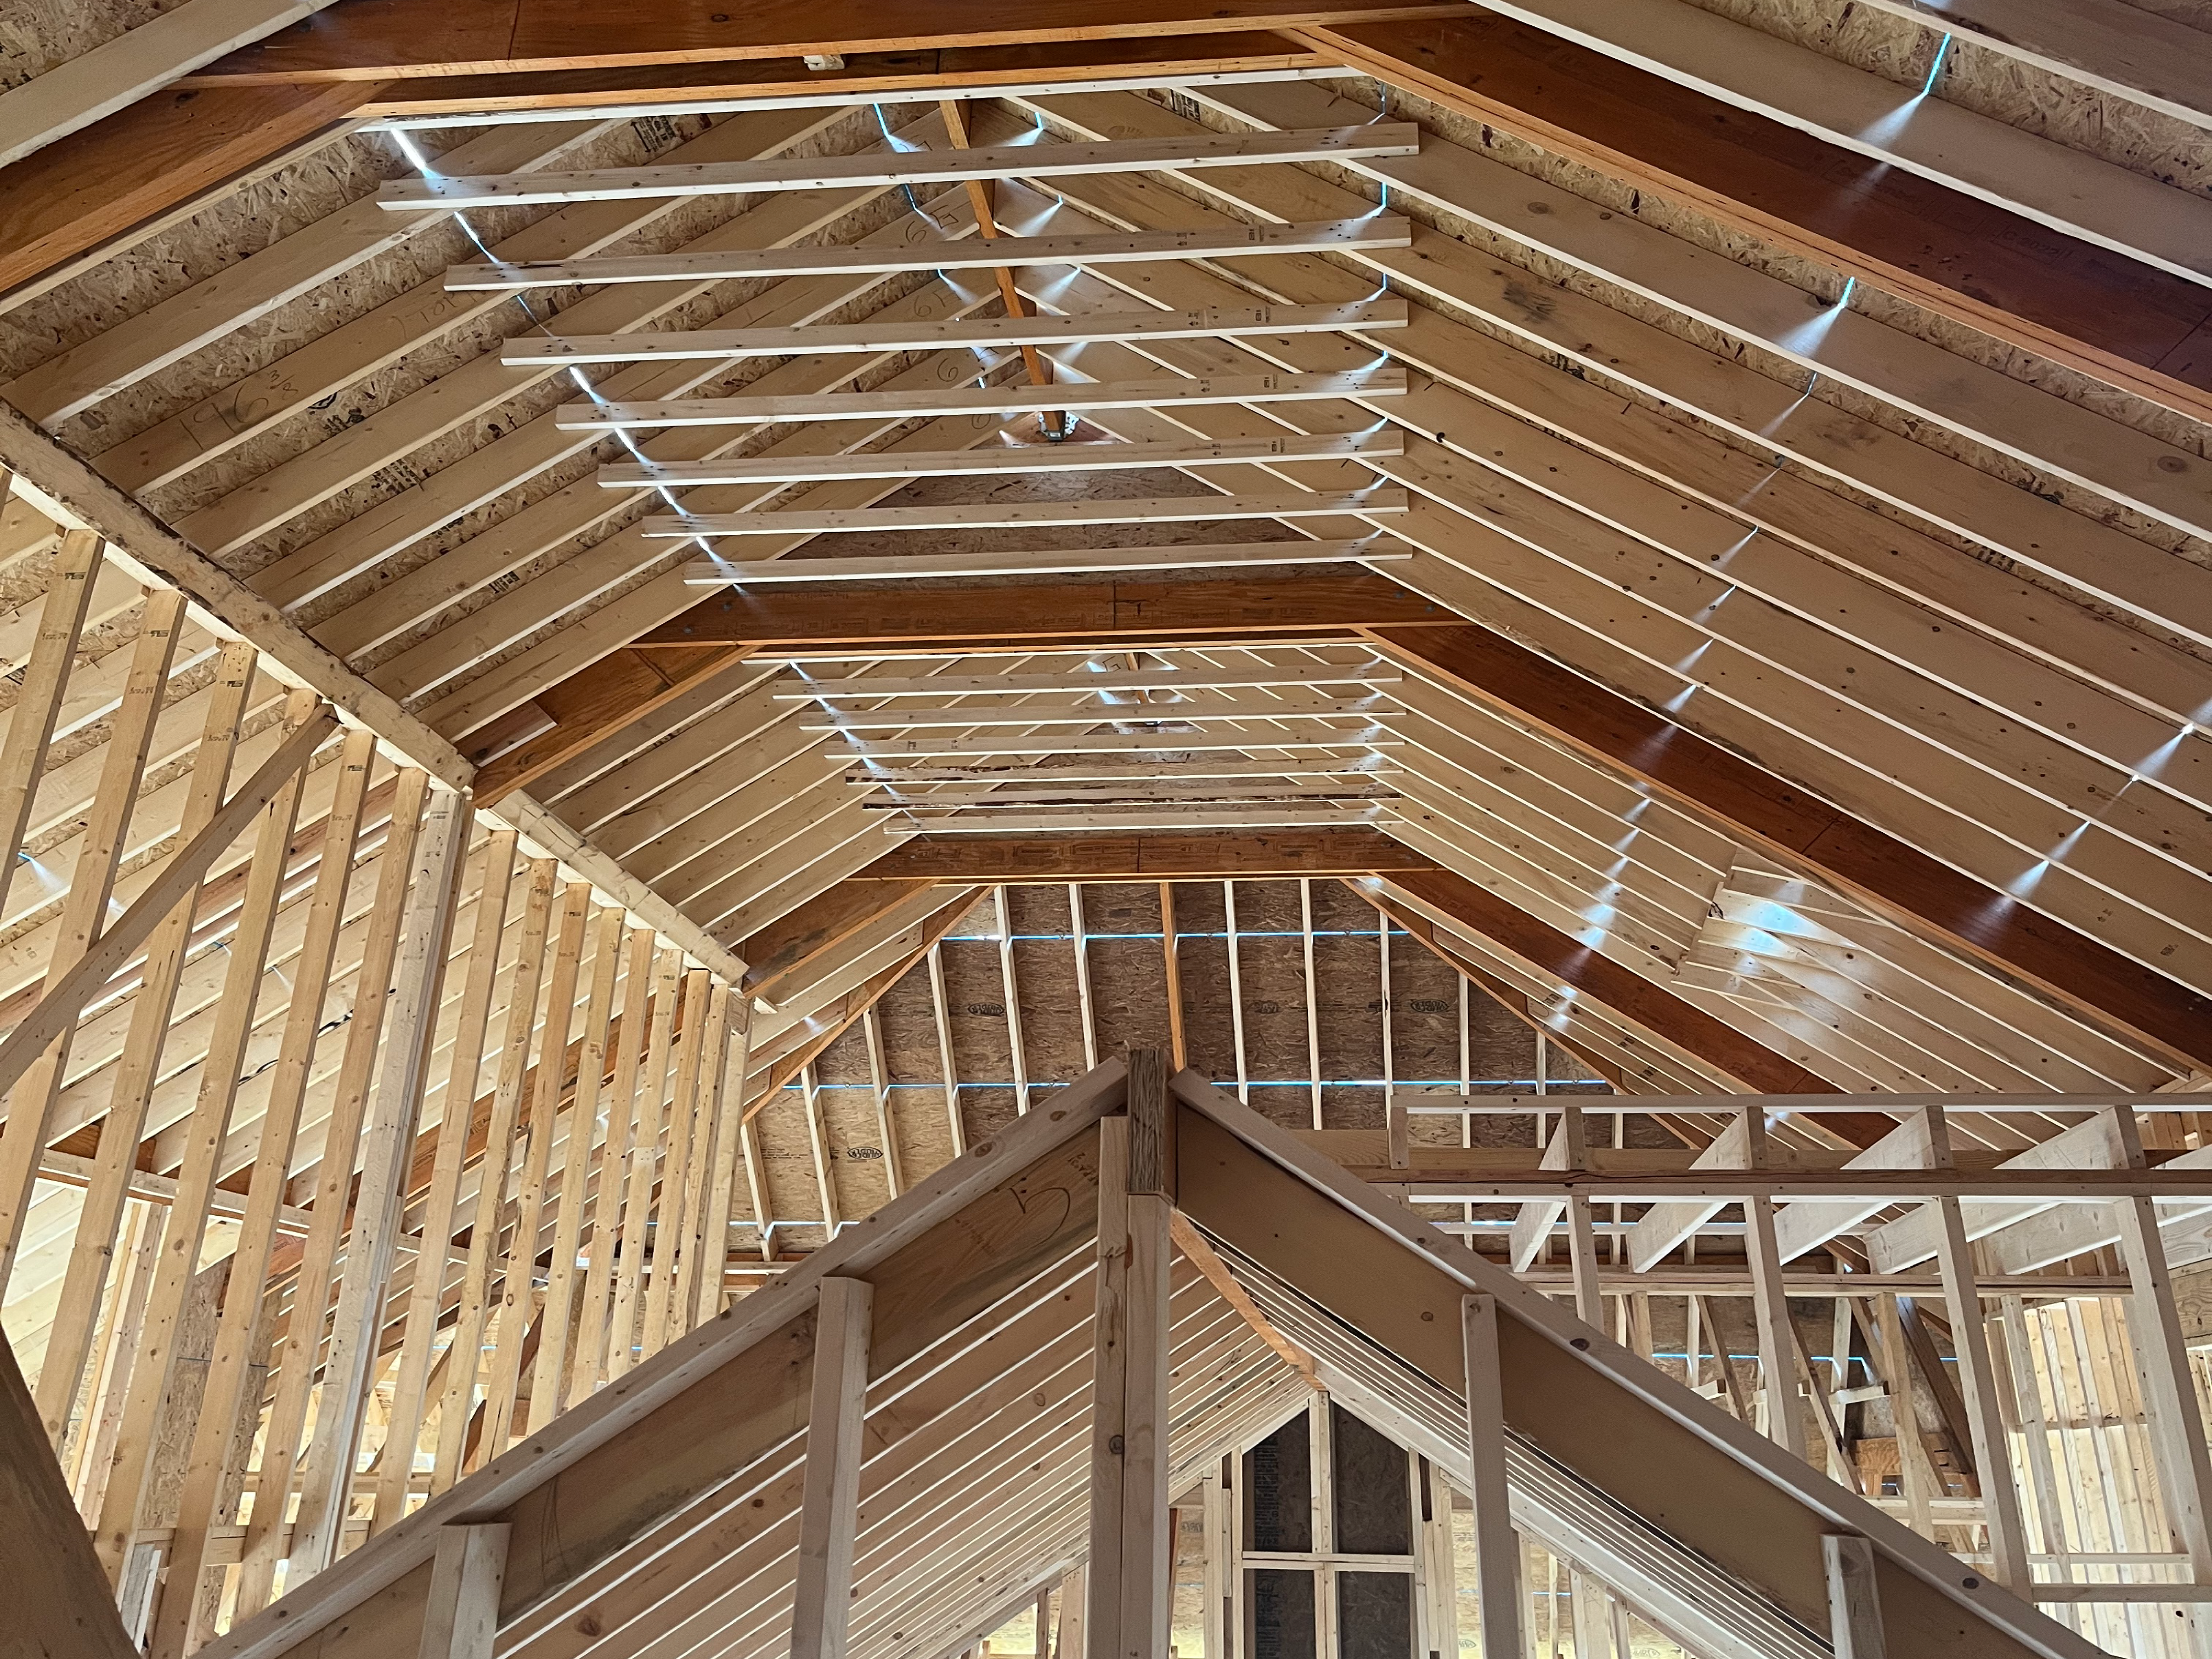
The Brace Free Open Attic Roof System is an innovative structural design that eliminates the need for internal bracing, providing a clean, unobstructed attic space. This approach is especially valuable for homeowners or builders looking to maximize usable square footage without compromising on strength or stability. By removing cross-bracing, the attic becomes more accessible and flexible for future modifications such as loft conversions, storage, or HVAC system installations. The system is engineered with precision to ensure load distribution is maintained, even in high wind or snow-load areas.
Another key advantage is the improved air circulation it offers, which contributes to a healthier roofing environment and reduces the risk of mold or moisture damage. It also enhances energy efficiency by allowing insulation and ventilation systems to perform more effectively. The minimalist framing also means quicker installation times and lower labor costs compared to traditional trussed systems. Architects and designers appreciate the open-span aesthetics, which offer creative freedom in interior planning. The system is compatible with a range of roofing materials and styles, making it a versatile option for various project types. Overall, the Brace Free Open Attic Roof System combines durability, functionality, and modern design to deliver a smart roofing solution for today’s construction needs.